yastero

The work behind the tools

What's new in Yastero

Better ways to measure, draw and plan a home project. Follow the changes, see the screenshots and find out what each update helps you do.

80 illustrated milestones · October 20, 2026–October 26, 2026

v0.1.0-alpha.80Planner

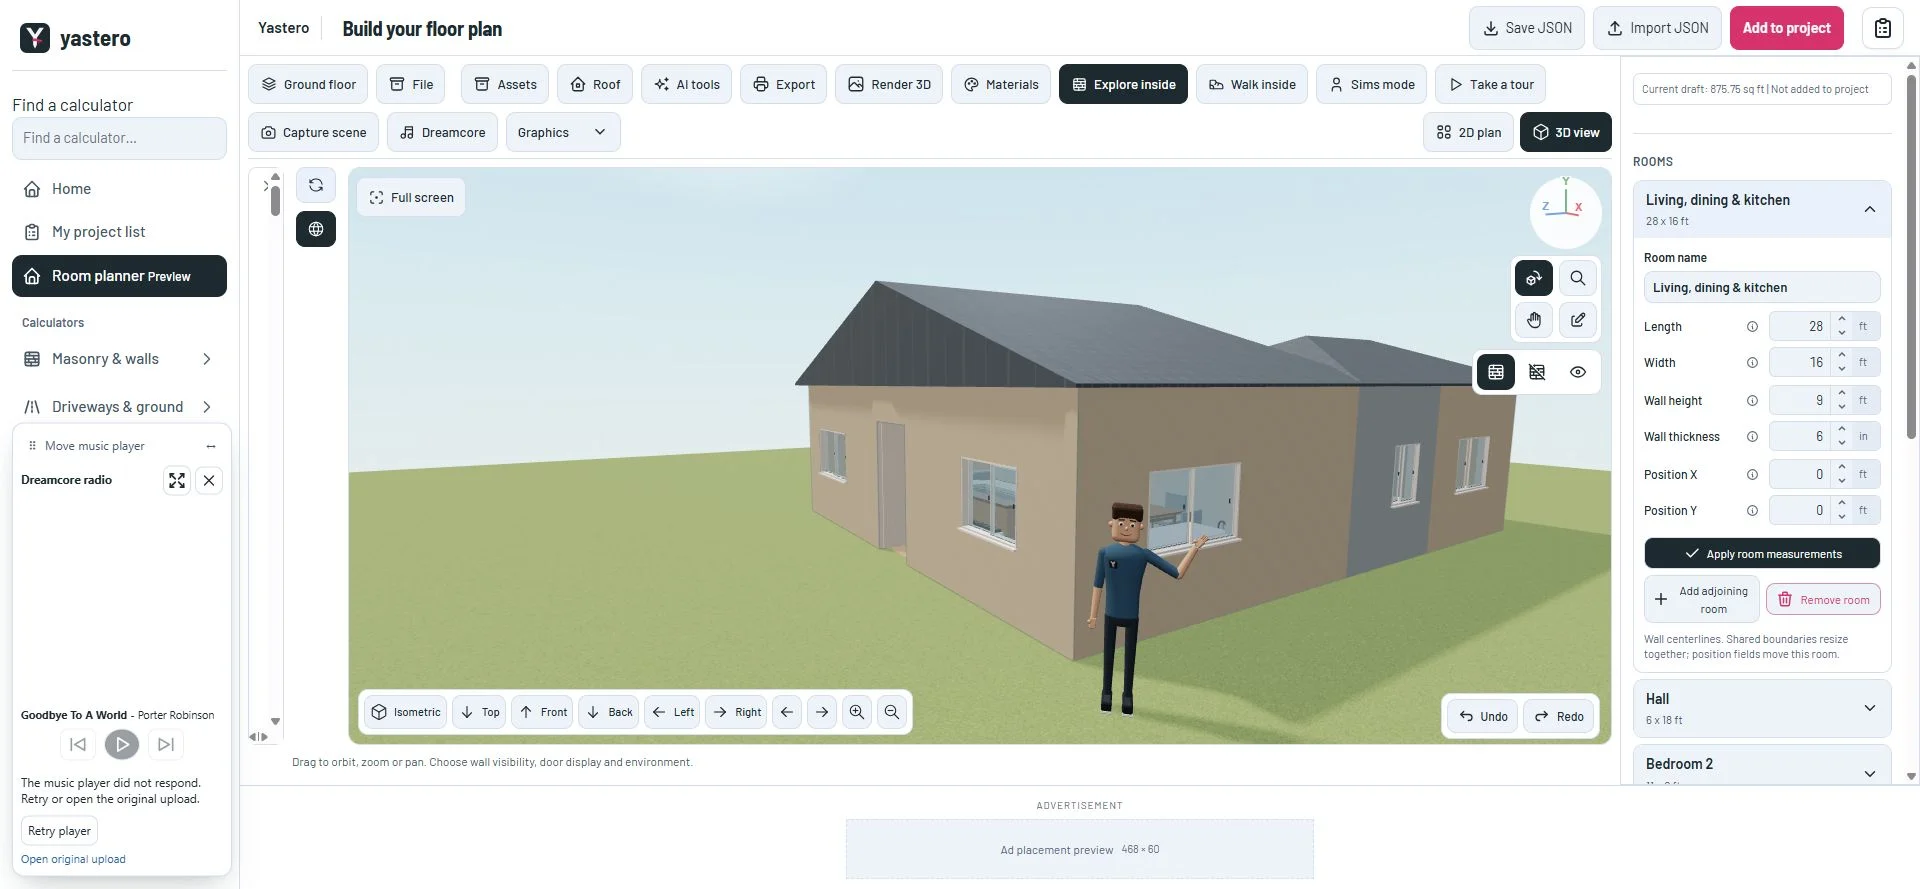
Fold camera controls away while you work

Hide the camera bar behind a small Views tab, then reopen the same controls without changing your camera.

  • Use Hide camera views to fold Isometric, Reset, elevations, rotation and zoom into a small Views tab.
  • Reopen with a click or Enter. Your camera and active Isometric state stay intact.
  • The desktop preference survives a reload. Phone controls remain available in the existing View drawer.
Classic model with the camera controls folded into a small Views tab at the lower leftView larger
Leave the model clear while keeping camera controls one click away.Development screenshot ·
Read the update
v0.1.0-alpha.79Planner

Explore homes and keep 3D tools within reach

Browse real home models with floor layouts, work from a direct 3D tool rail, and see when Isometric is active.

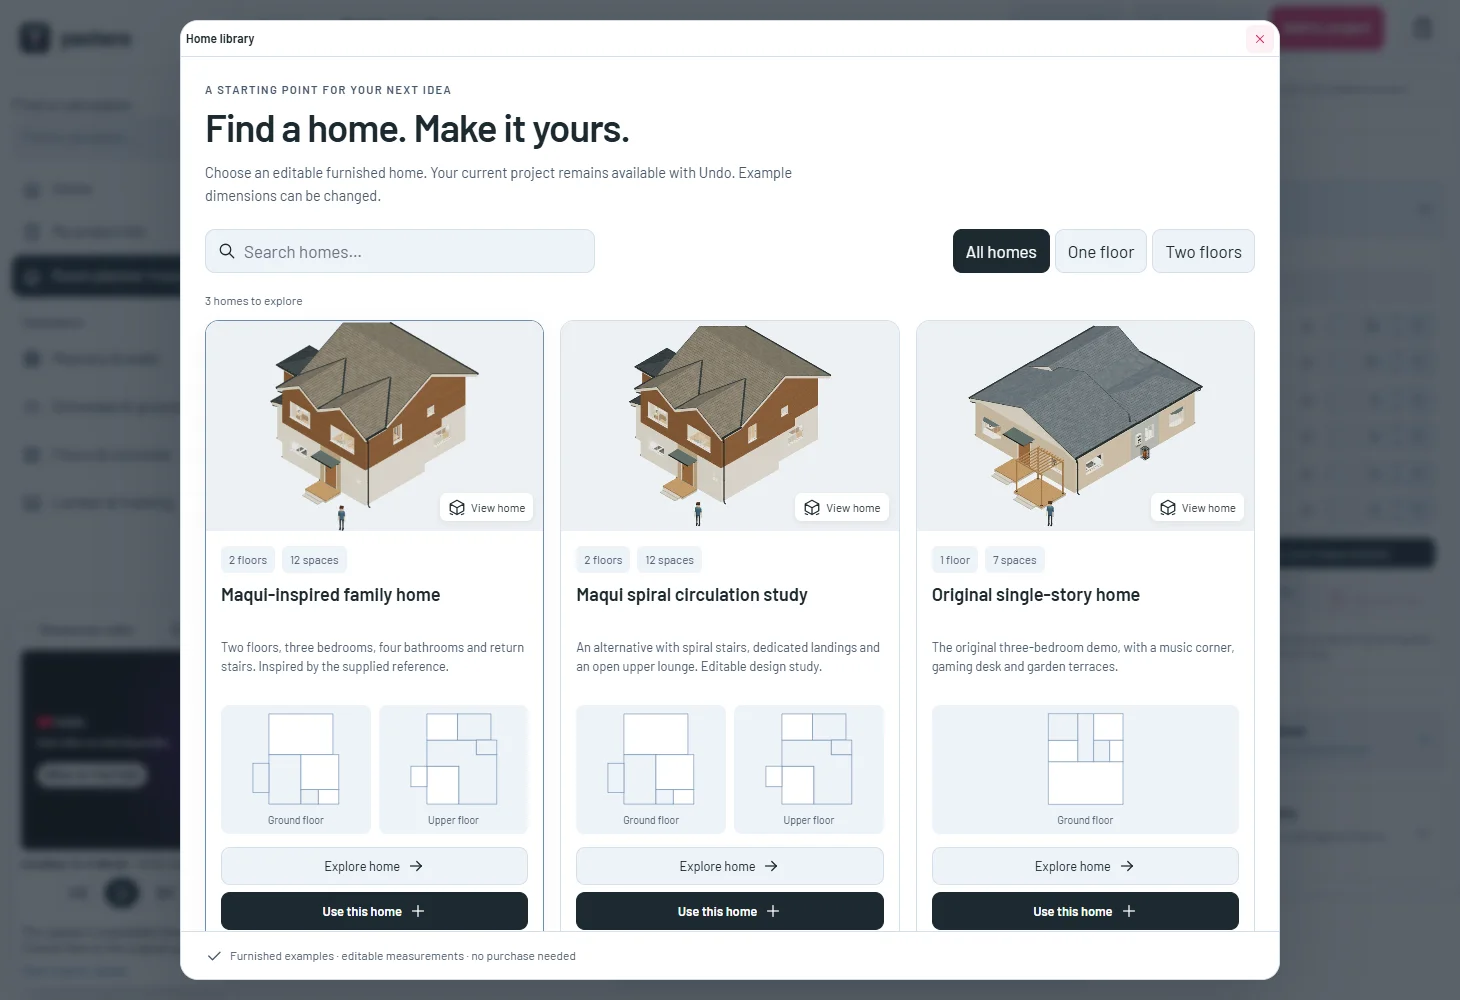
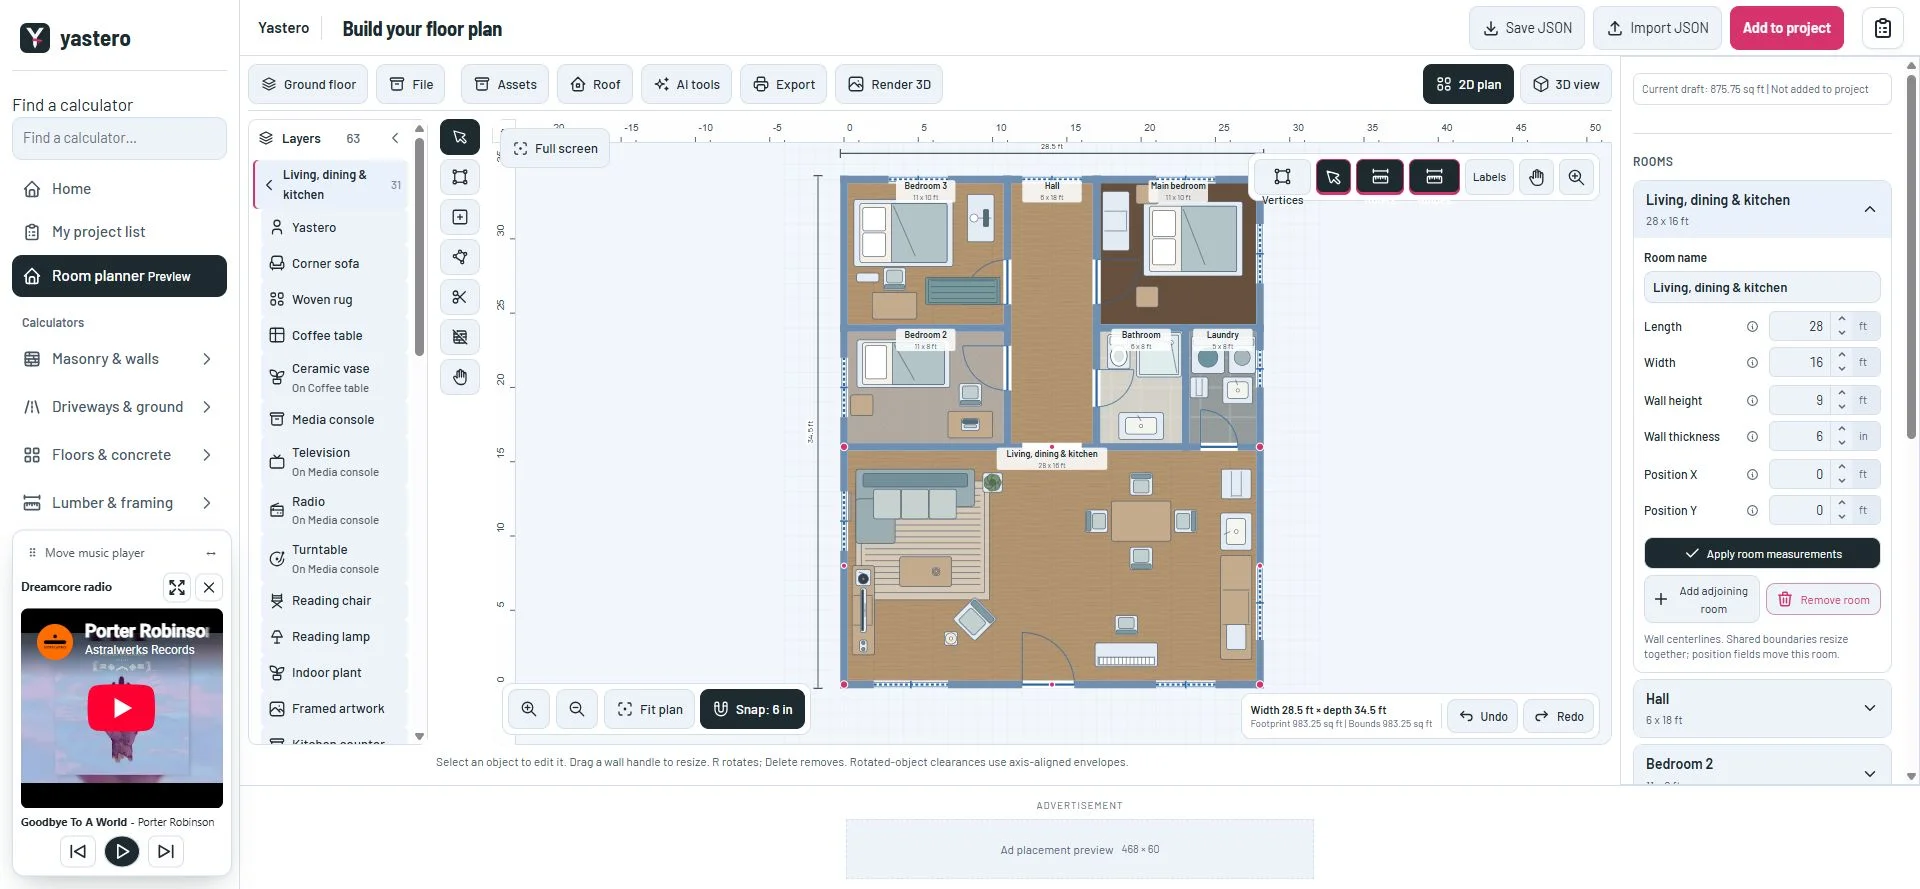
  • Explore three editable furnished homes in a spacious library, with actual 3D captures, floor layouts and room lists. Choose Use this home when ready.
  • The classic editor’s work rail brings selection, move, rotate, scale, materials, assets and character modes beside the scene.
  • Isometric now has a visible active state. Zoom keeps it; rotating away or resetting to perspective clears it.
Home library with three actual 3D home captures, floor layouts, search and floor filtersView larger
Explore a furnished home and its room layout before using it.Development screenshot ·
Read the update
v0.1.0-alpha.78Planner

Move rooms and keep space to work

Apply room coordinates in the real-wall inspector, minimize roof tools on a phone, and move smoothly between camera views.

  • Apply Position X/Y with room dimensions in one step. The neighboring room stays where it is, and Undo restores the complete layout.
  • Minimize roof settings to see the model, then resume the same step and values.
  • The initial building review stays compact. Full screen keeps the inspector and tools available.
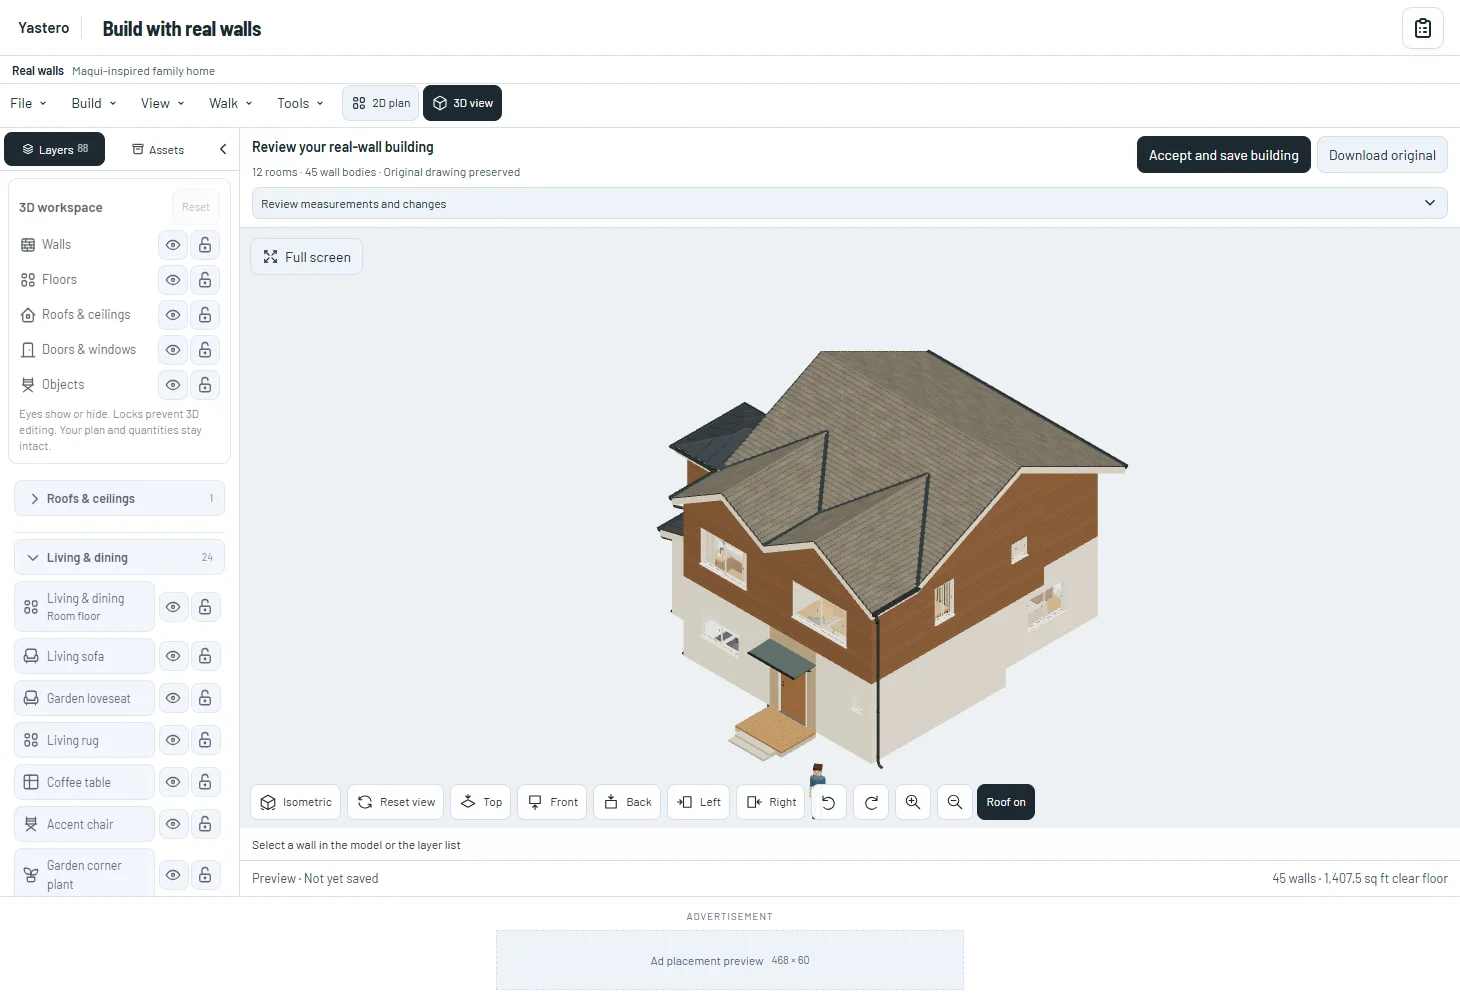
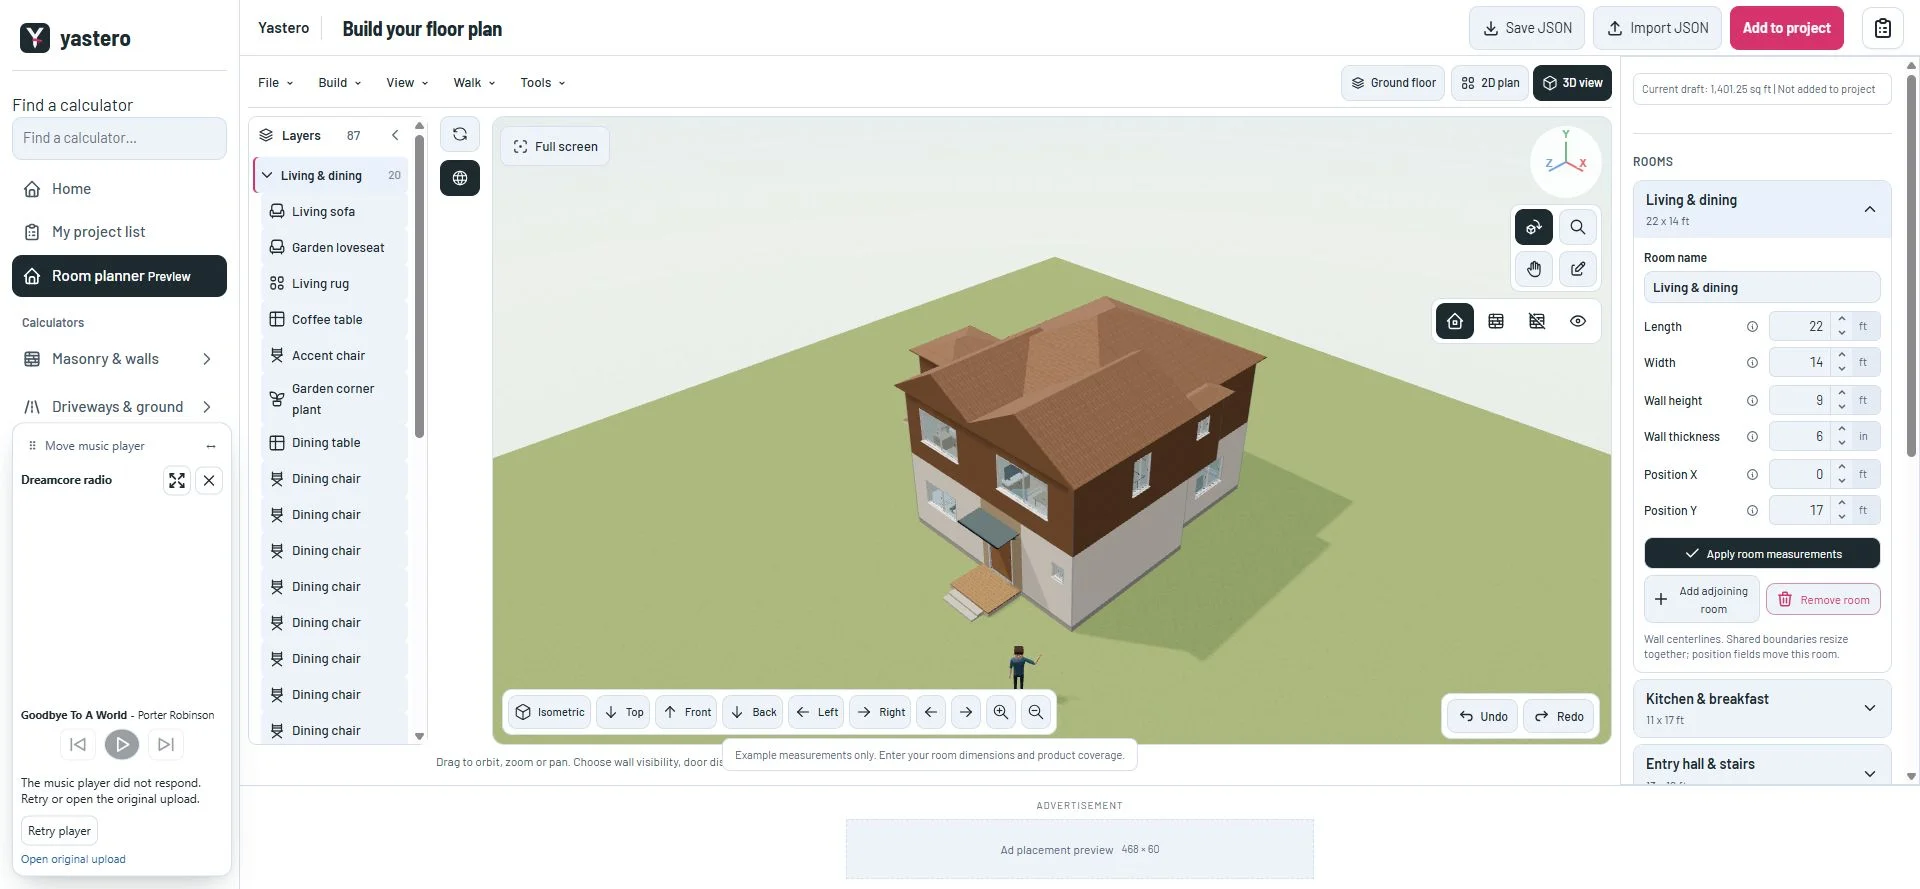
Two-floor furnished house in a spacious native canvas with its migration measurements collapsedView larger
Review the house first; expand the measurements when needed.Development screenshot ·
Read the update
v0.1.0-alpha.77Planner

Resize connected rooms while keeping the opposite wall fixed

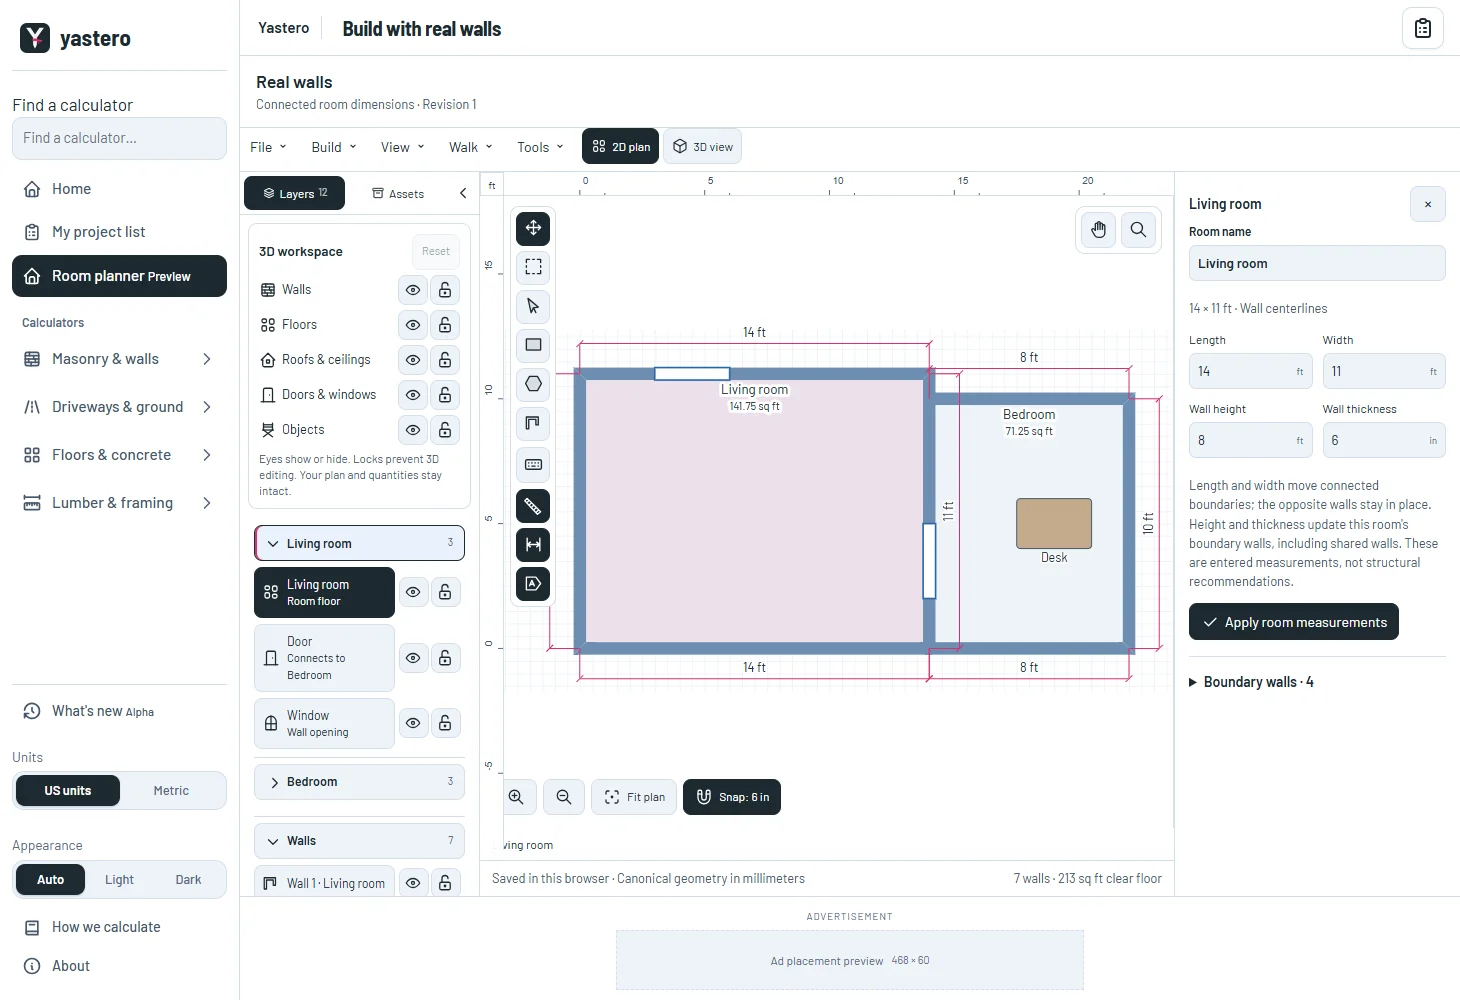
Apply a room’s length and width in the real-wall inspector, with shared boundaries, exact millimeter inputs and one-step Undo.

  • Edit Length and Width in the same compact room form. Apply both dimensions together.
  • Shared walls retain their physical identity as the neighboring room adjusts. Undo restores the whole previous layout.
  • A change that collapses a neighboring room, traps furniture or removes an opening’s supporting span leaves the saved plan intact.
Native plan after resizing a living room to 14 by 11 feet beside a bedroom with its opposite wall fixedView larger
The living room grows and the adjoining bedroom adjusts at their shared wall.Development screenshot ·
Read the update
v0.1.0-alpha.76Planner

See exactly which element you are working on

Whole-object frames and clear layer states help identify roofs, furniture, doors and windows in the real-wall model.

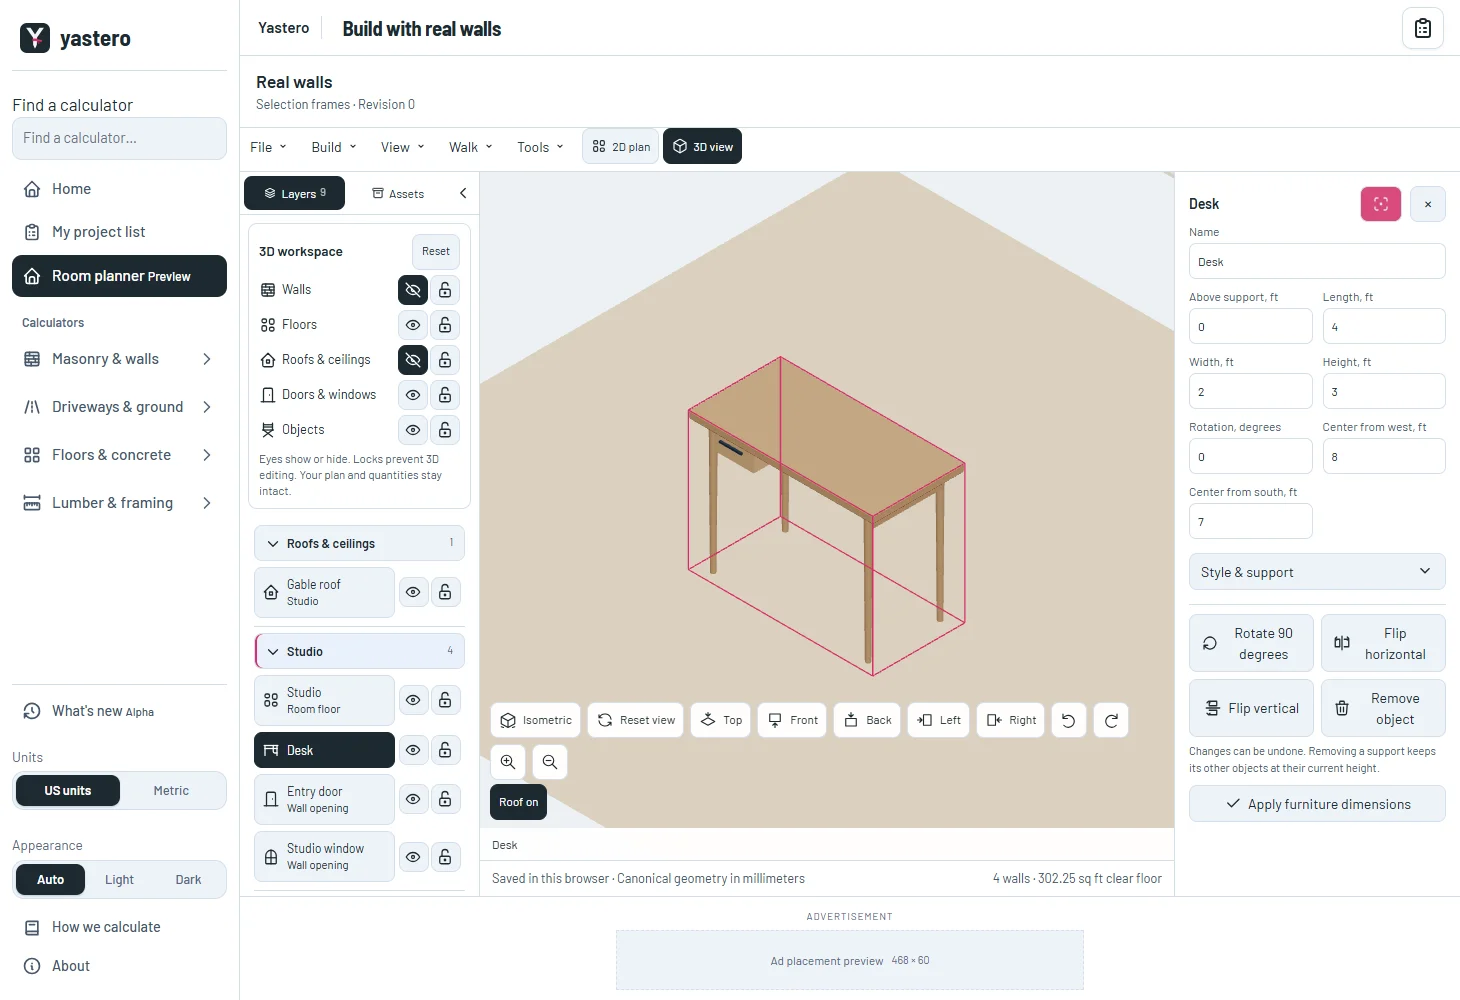
  • Hover over a model element to see its name and complete frame. Click to select it and find its active layer.
  • Furniture frames include every visible part, including legs and repeated pieces. Hidden elements leave no frame behind.
  • Focus keeps your chosen camera angle. On a phone, it returns to the centered canvas while retaining pending measurements.
Selected desk in the native model with a complete frame, active layer and properties inspectorView larger
Follow the selected element from the model to Layers and its inspector.Development screenshot ·
Read the update
v0.1.0-alpha.75Planner

Bring an object or opening into view

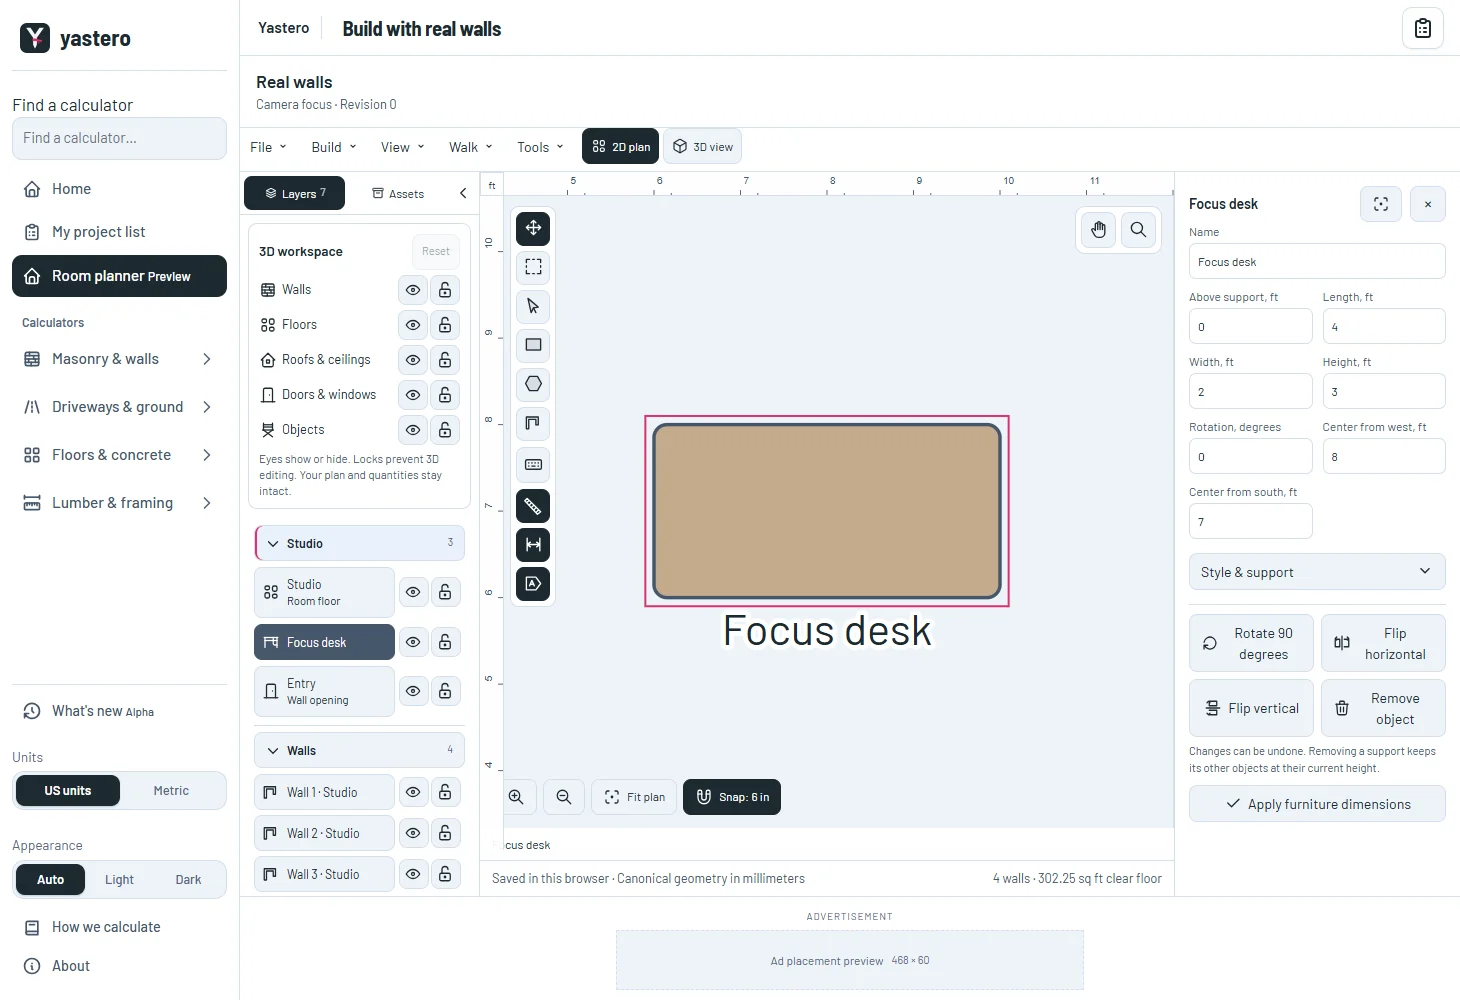
Focus the real-wall plan or 3D camera on an object or opening from its layer row, a keyboard shortcut or the inspector.

  • Double-click an object or opening in Layers to bring it into view.
  • Press Alt+Enter on a focused layer row to move the camera while retaining the current selection.
  • On a phone, Focus selected element returns to the canvas and keeps any pending measurements.
Native millimeter plan framed closely around a selected desk with its inspector still visibleView larger
Bring the selected object into view without changing its dimensions.Development screenshot ·
Read the update
v0.1.0-alpha.74Planner

Find your objects and shared openings by room

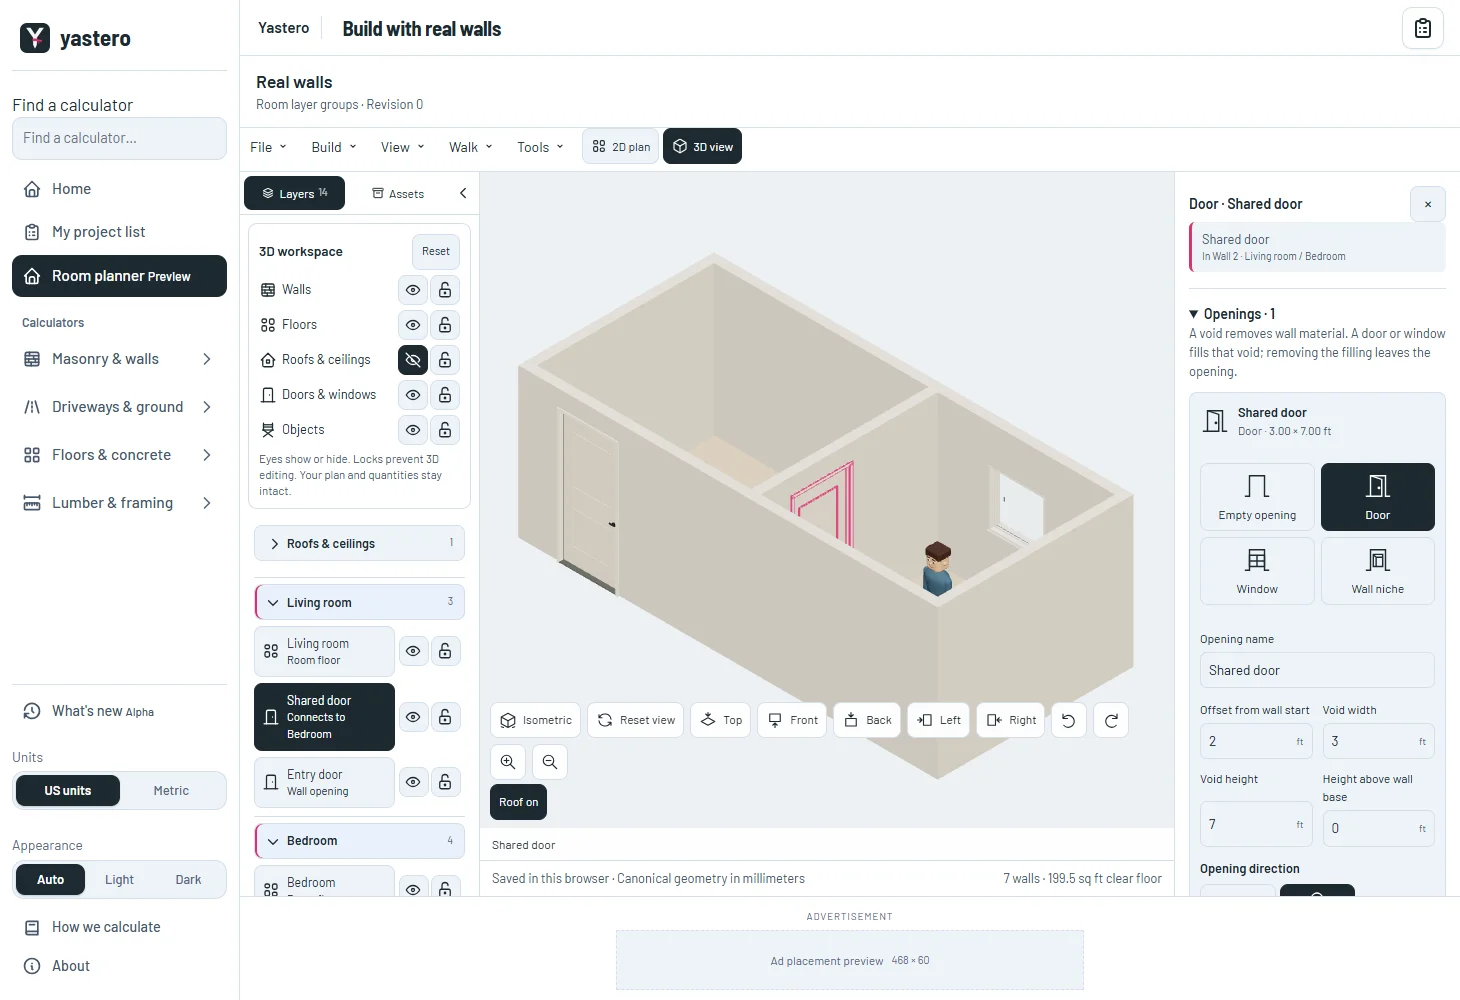
The real-wall layer list now groups floors, objects and openings by room. Shared openings appear in both rooms while remaining one physical object.

  • Expand a room to find its floor, objects and openings. Roofs and physical walls remain easy to reach.
  • Both rows of a shared door select the same object and keep their eyes and locks synchronized.
  • On a phone, expanding a room keeps the library open; choosing an element opens its inspector.
Native room groups with the same shared door selected in both rooms and outlined in the modelView larger
Find the same physical opening from either room.Development screenshot ·
Read the update
v0.1.0-alpha.73Planner

Select a room and edit its boundary measurements

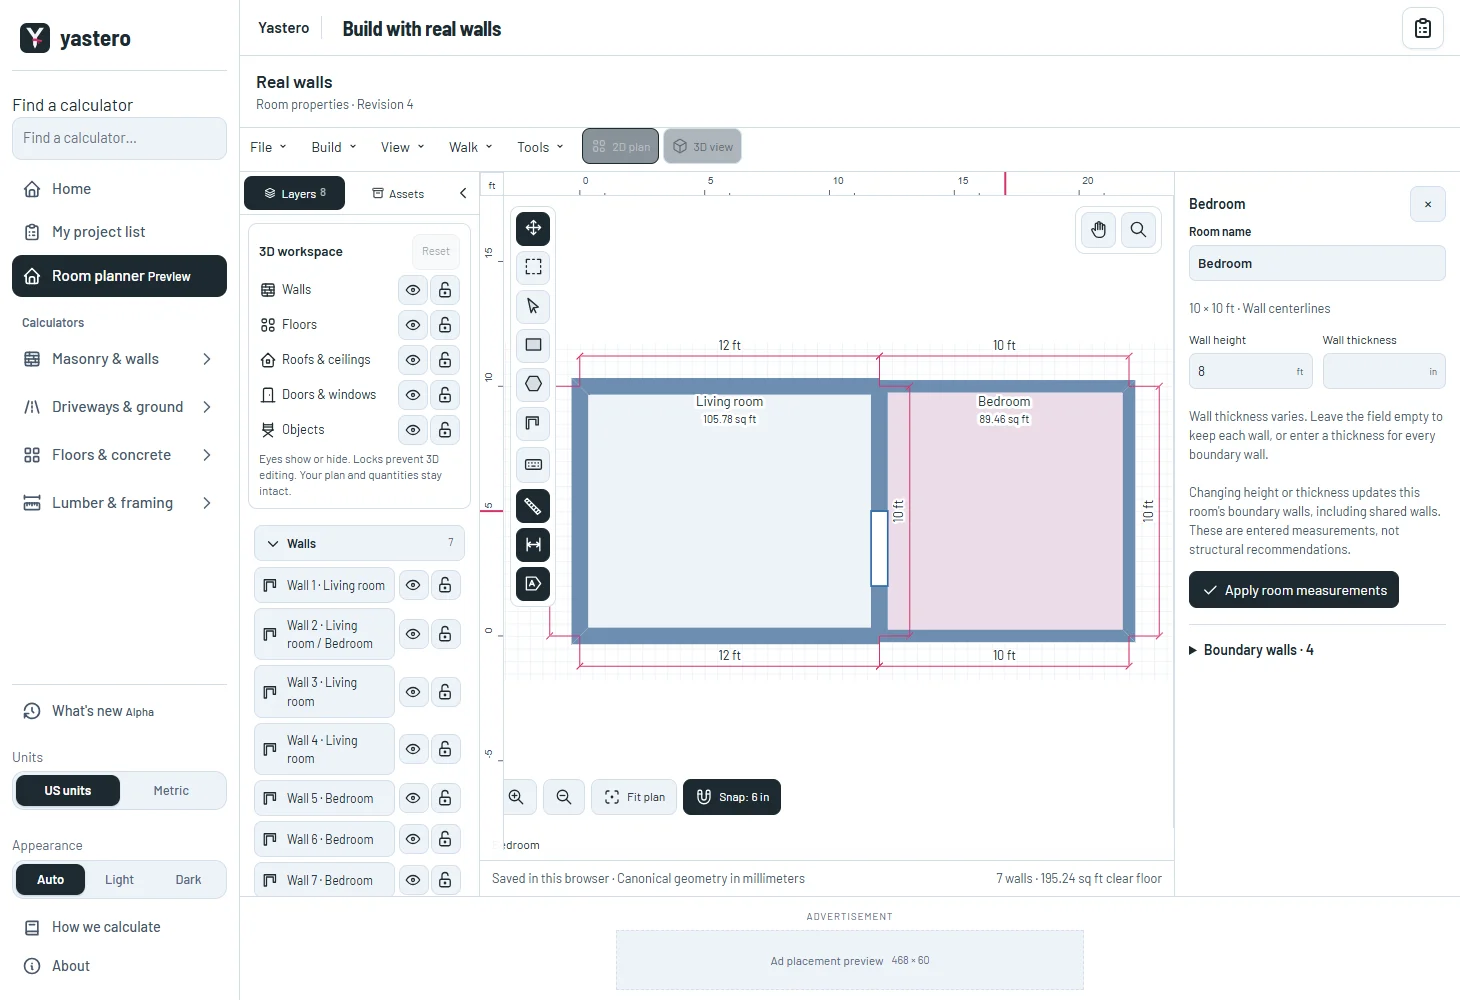
Click a floor in the real-wall plan or model to inspect its room, change its name and apply wall height or thickness in one undoable action.

  • Select the floor with a click, a 3D pick or Enter on a focused room.
  • Change the room name, wall height or wall thickness and apply them together.
  • A locked shared wall rejects the entire edit while keeping your pending inputs.
Selected native room with a compact name and boundary measurements inspectorView larger
Select a room directly from its floor.Development screenshot ·
Read the update
v0.1.0-alpha.72Planner

Draw L-shaped rooms one corner at a time

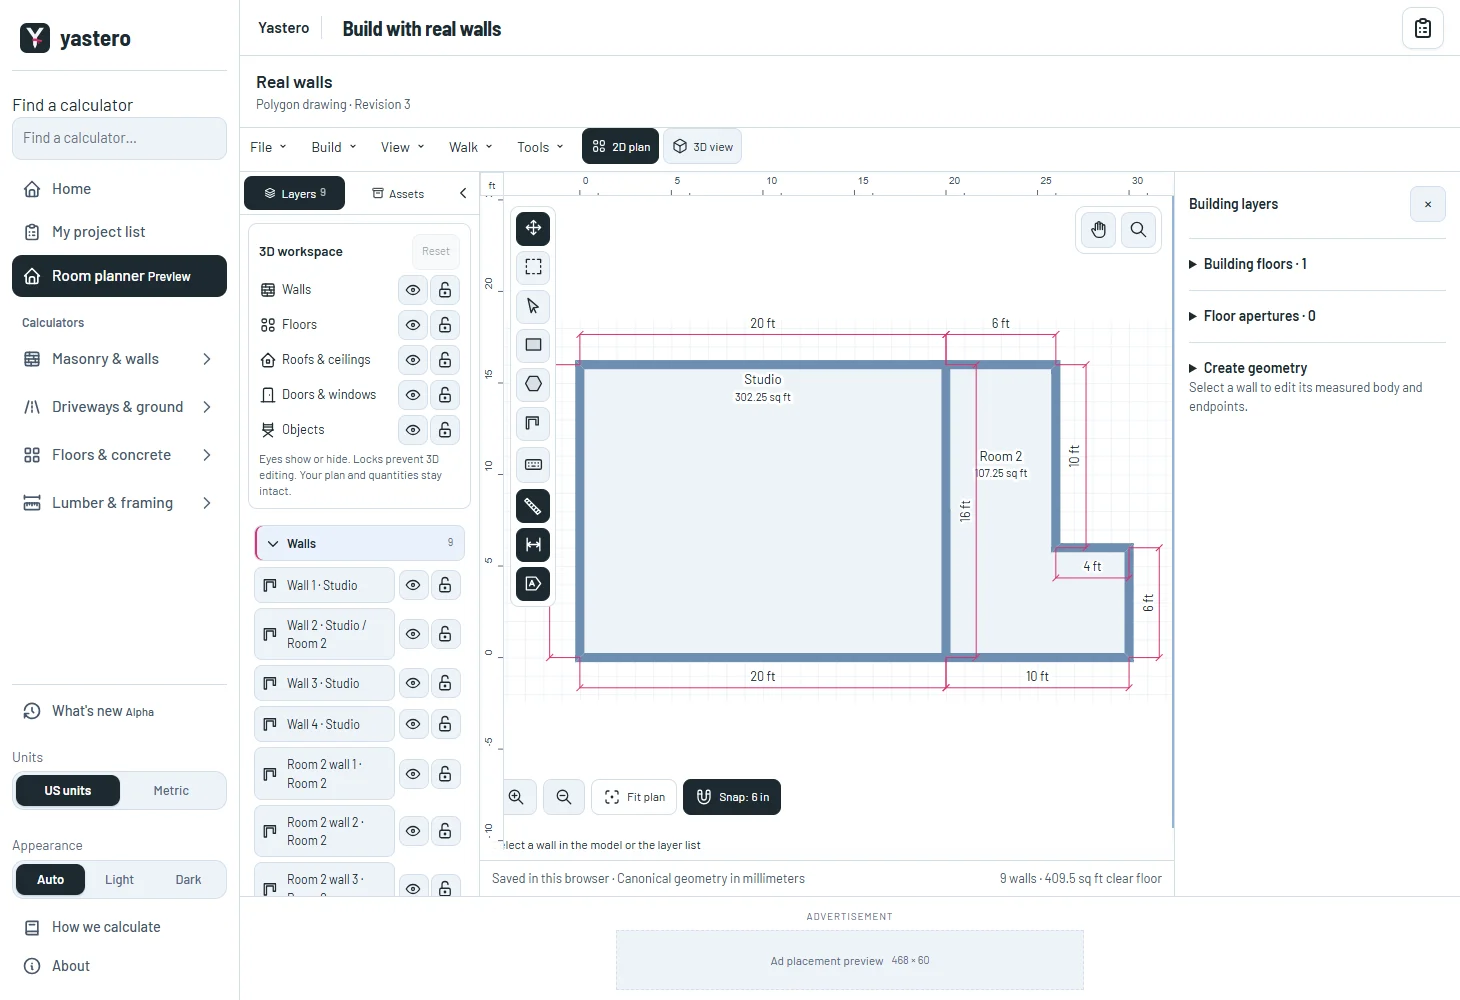
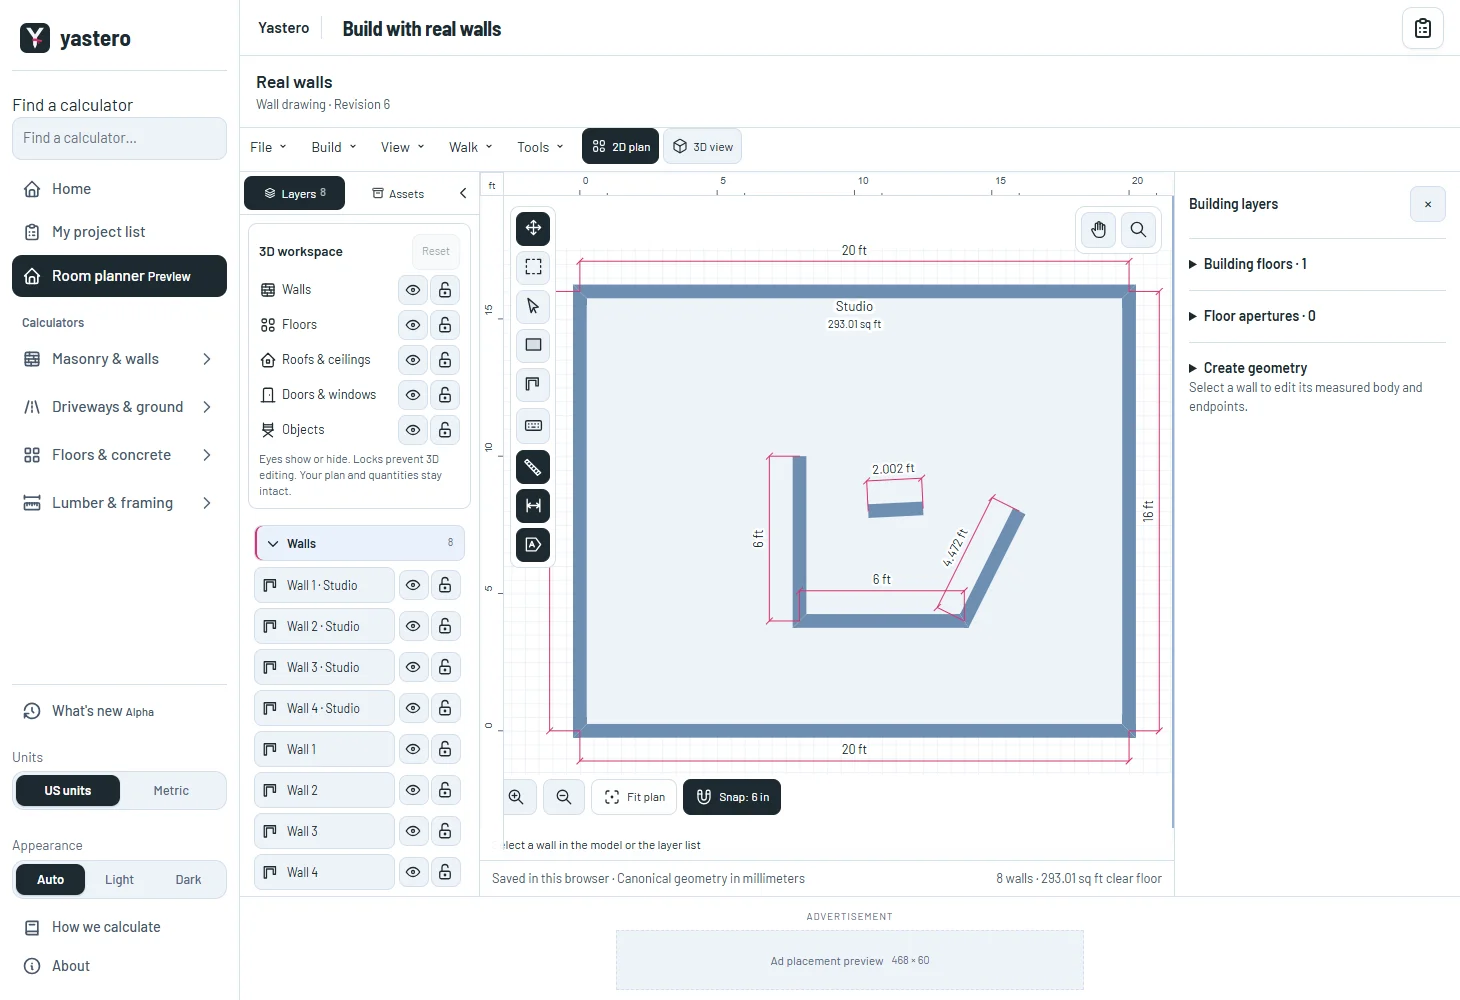
Trace a room with more than four corners in the real-wall plan, revise the sketch and close it as one measured, undoable change.

  • Choose Draw polygon or press Shift+U, then click horizontal and vertical sides.
  • Undo the last corner, cancel the sketch or close with Enter, the first corner or Close room.
  • Adjacent rooms reuse their shared physical wall. One Undo restores the building before the new room.
Measured L-shaped native room sharing a physical wall with the original studioView larger
Add a room with more than four corners while retaining the shared wall.Development screenshot ·
Read the update
v0.1.0-alpha.71Planner

Draw measured wall segments with P

Place consecutive wall segments at any angle in the real-wall plan, with exact endpoint connections, a live preview and a clear finish action.

  • Choose Draw wall or press P, then click the start and each next endpoint.
  • Preview without saving, use arrow keys and Enter, or hold Space to pan temporarily.
  • Finish with Escape or Finish drawing; Undo removes one saved segment.
Physical room with several independent straight and angled wall segmentsView larger
Add wall segments without silently changing the room definition.Development screenshot ·
Read the update
v0.1.0-alpha.70Planner

Draw connected rooms in the real-wall plan

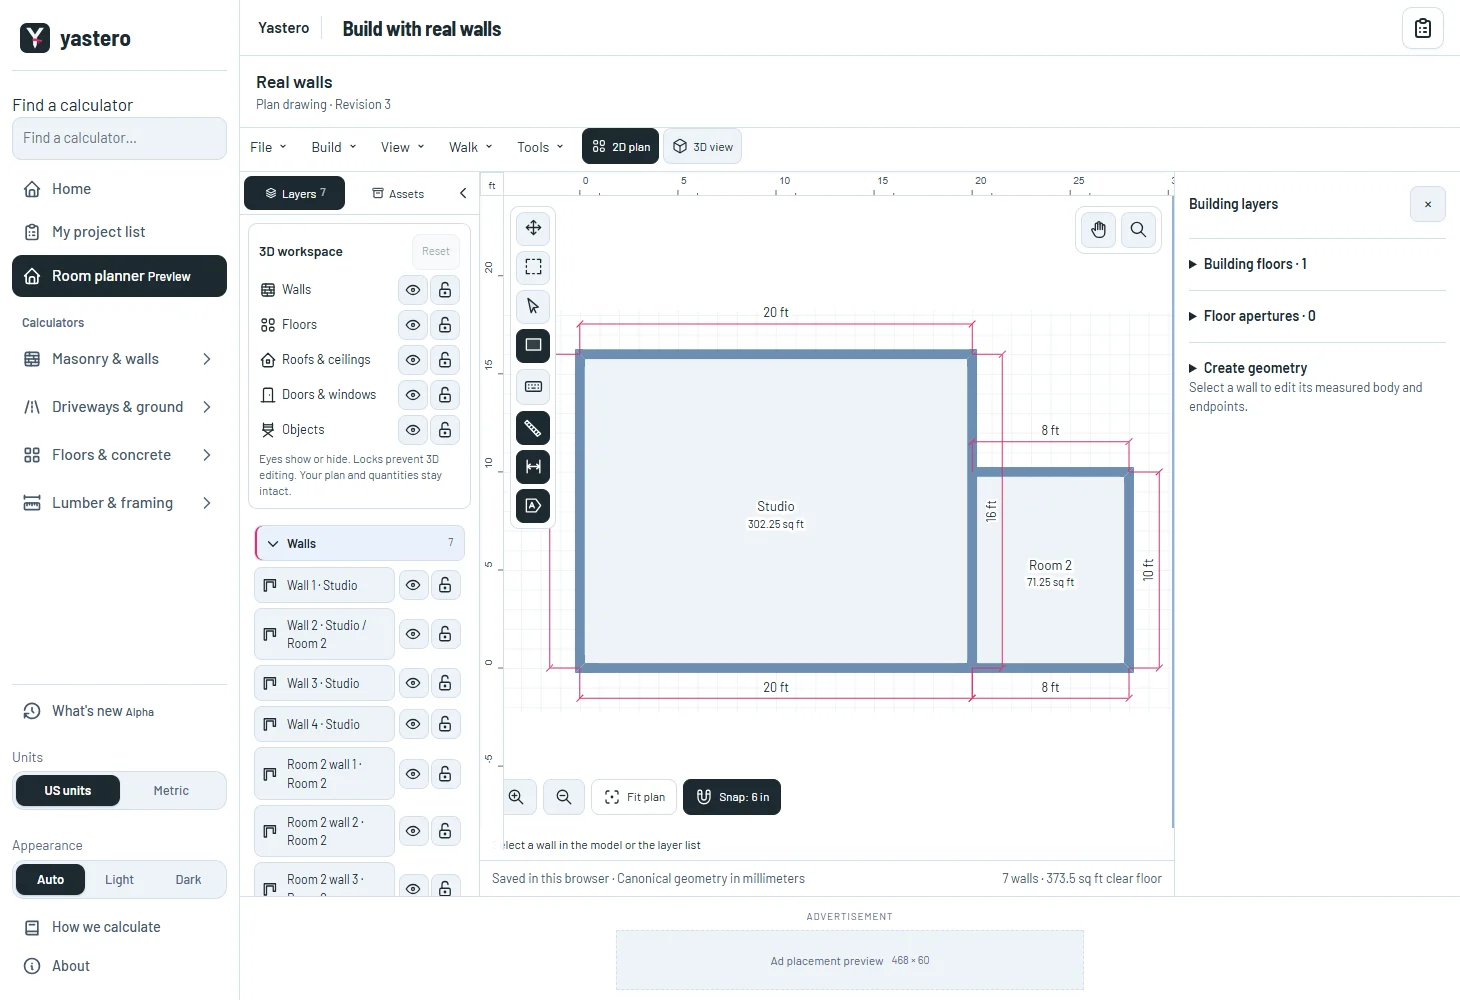
Choose the shared rectangle tool, preview a new room beside the building and save its measured walls in one action.

  • Press U or choose Draw rectangle, then drag between opposite corners.
  • Adjacent rooms reuse the physical wall they share. Undo restores the complete previous building.
  • Use the same tool drawer and a finger on a phone.
Two measured native rooms sharing one persistent physical wallView larger
Draw beside the building and retain the shared wall identity.Development screenshot ·
Read the update
v0.1.0-alpha.69Planner

Select and move real-wall corners on the plan

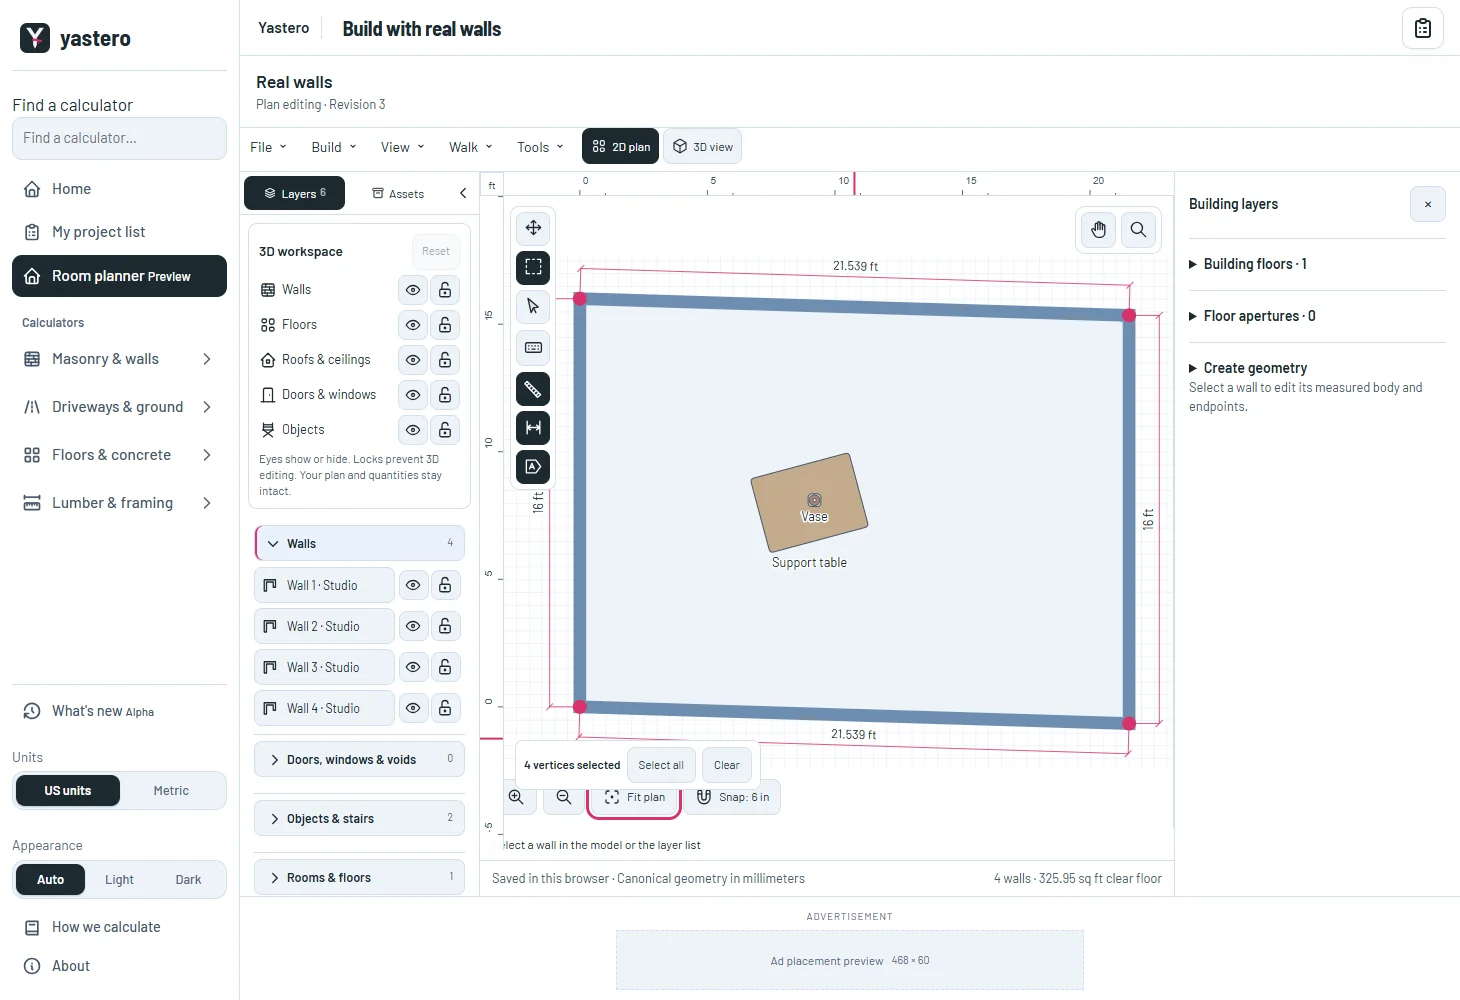
Use the familiar corner and box-selection tools to reshape physical walls, preview a move, and save it once when you release.

  • Choose Edit vertices with A, or drag a selection box with M. Shift adds or removes corners.
  • Move corners together with the pointer or arrow keys, and cancel a drag with Escape.
  • Move a wall or a furniture support without losing persistent identities or supported objects.
Native measured floor plan with four selected persistent corners and the shared tool railView larger
Select corners with the same tool icons and selection status as the classic planner.Development screenshot ·
Read the update
v0.1.0-alpha.68Planner

Move around the real-wall plan with familiar controls

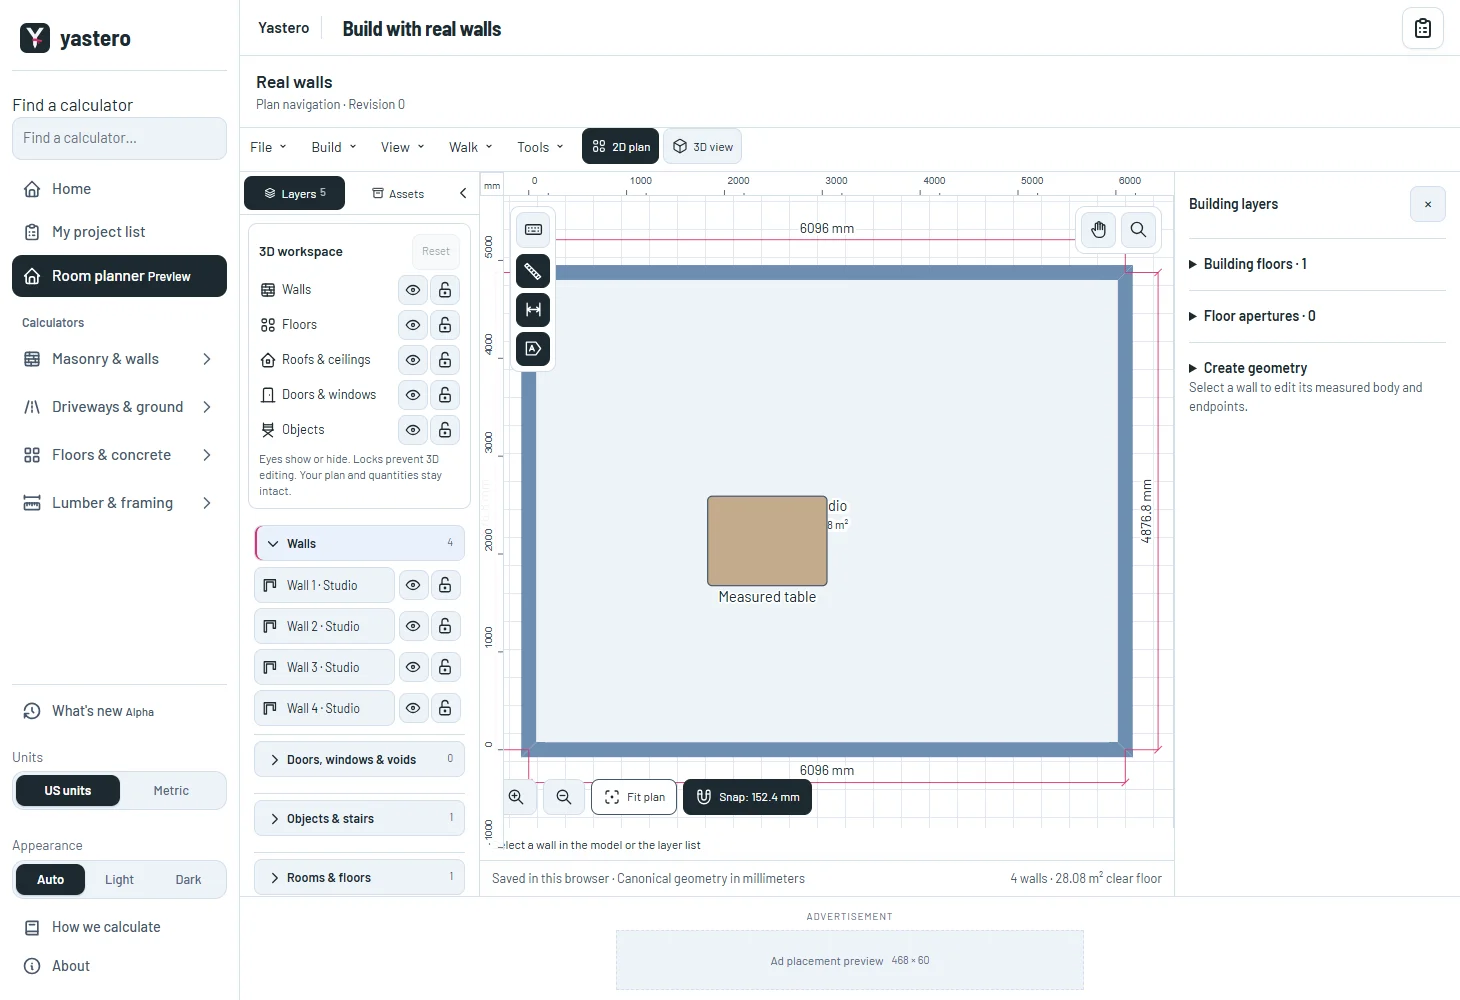
Pan, zoom and fit the physical floor plan, with shared rulers, dimension guides and keyboard help on desktop and phone.

  • Hold Space to move the view temporarily, or choose Hand with H.
  • Zoom with Z, the wheel or two fingers, then use Fit plan to return.
  • Show rulers in feet or millimeters and toggle dimension guides and labels.
Physical wall plan with millimeter rulers, dimension guides and shared navigation controlsView larger
Keep the measured plan visible beside Layers and the inspector.Development screenshot ·
Read the update
v0.1.0-alpha.67Planner

Place furniture and equipment in real-wall projects

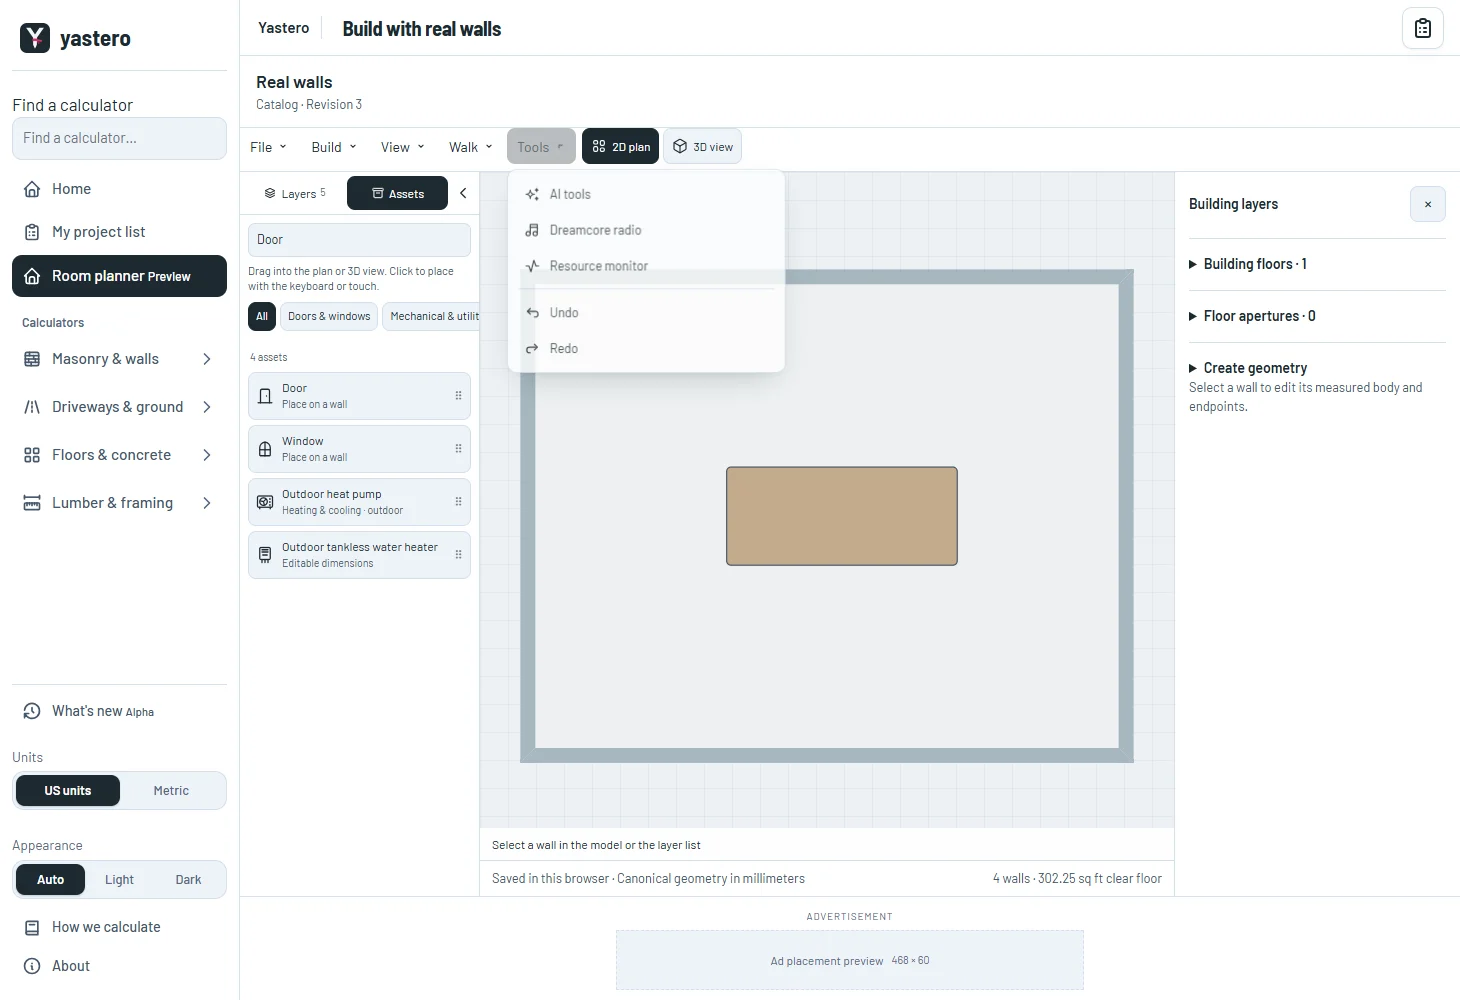
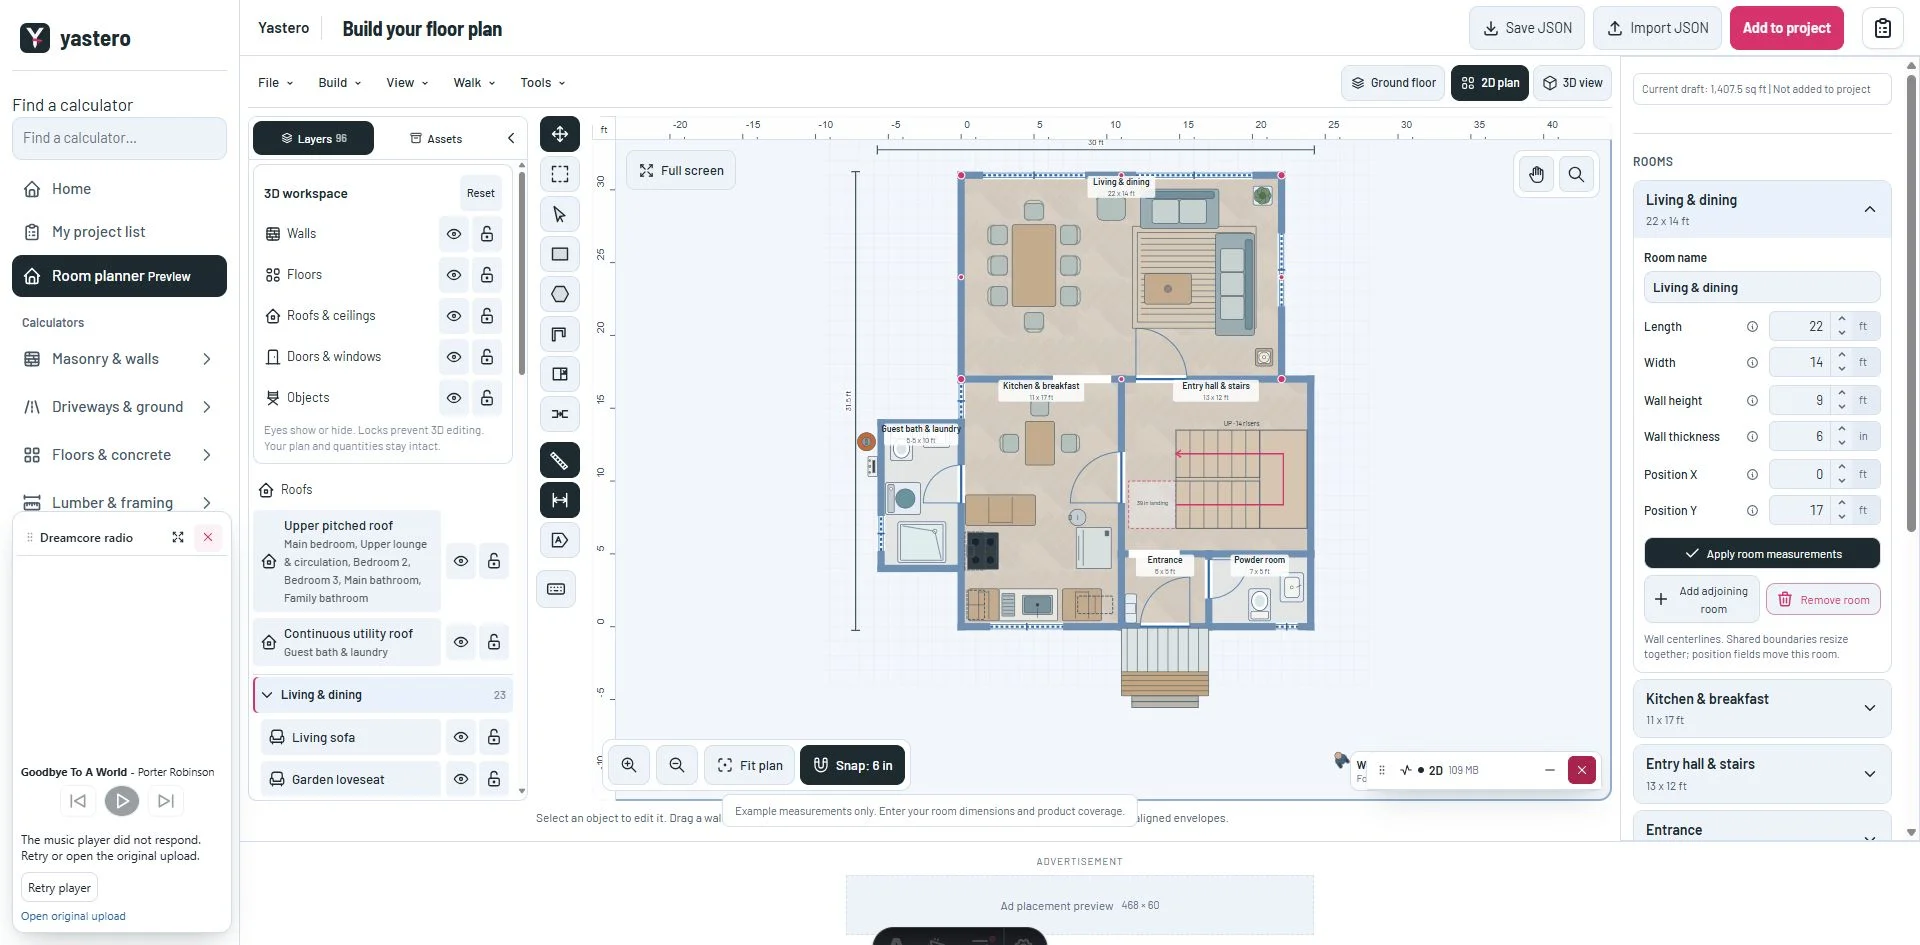
Explore the shared Layers and Assets sidebar, then drag or place furniture, equipment, doors and windows in the native 2D plan or 3D view.

  • Search or filter the familiar catalog, with a placement preview before saving.
  • Click or tap to place, use arrows and Enter from the canvas, or cancel with Escape.
  • Place a small object on a support, add exterior pieces outside the house, and use Undo after saving.
Native physical floor plan beside the shared left-hand Layers and Assets sidebarView larger
Find catalog assets beside the model, with room for the contextual inspector.Development screenshot ·
Read the update
v0.1.0-alpha.66Website

See more tools at a glance

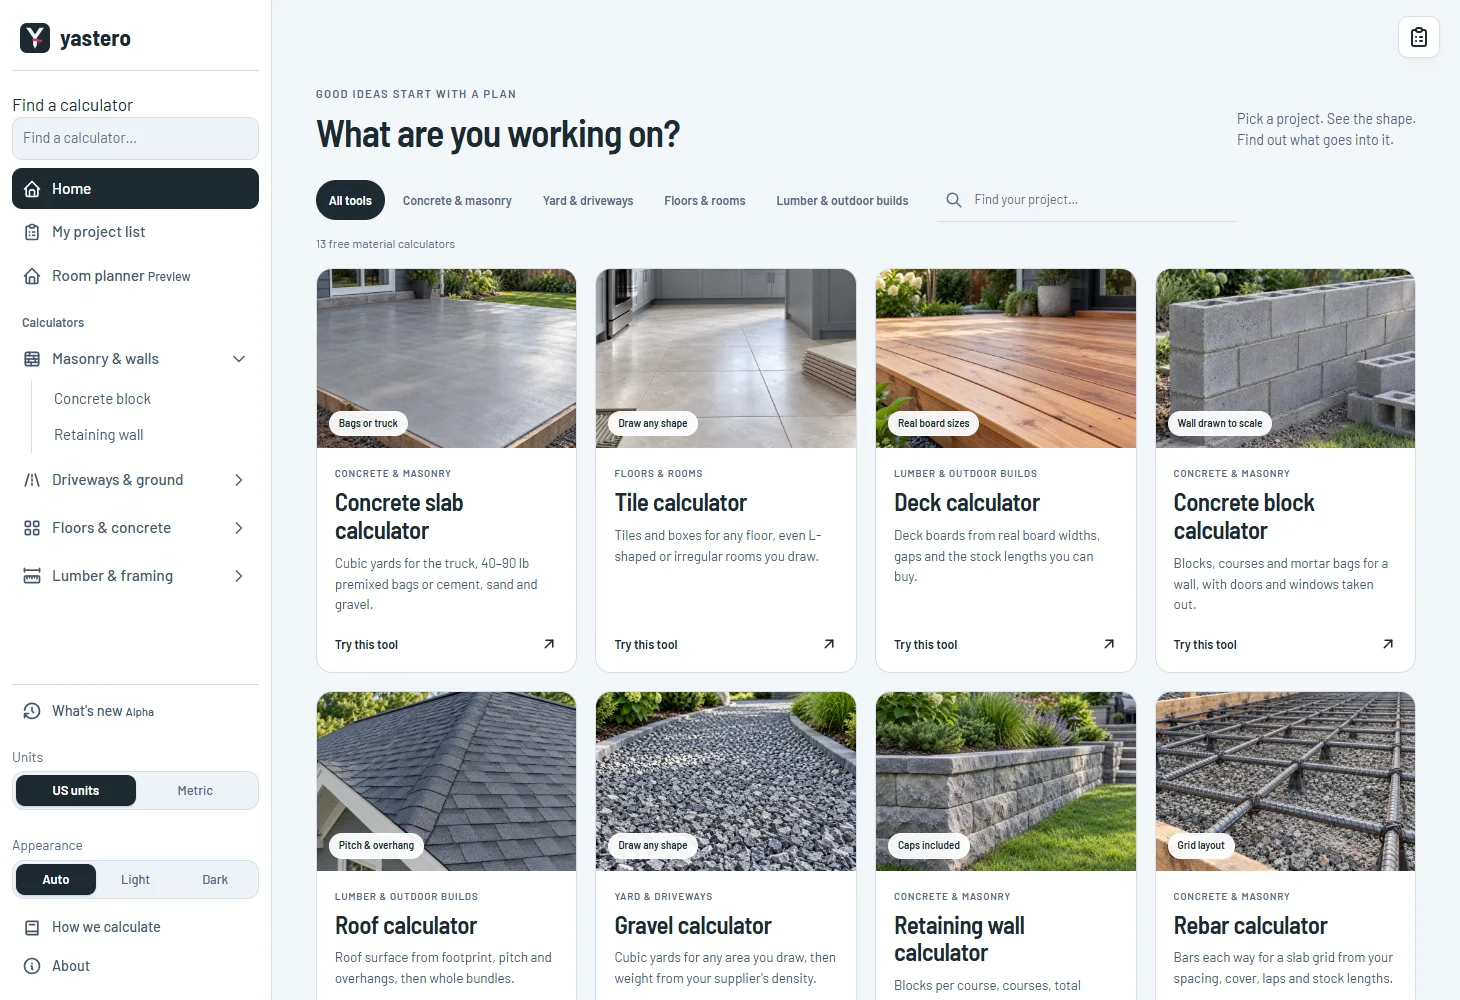
Explore the material calculators in a four-column desktop grid, with every tool on the page and filters to narrow your search.

  • See four tools across on desktop, followed by the rest below.
  • Use categories or search to find a project. Clear or reset to see every tool again.
  • The grid adapts to tablets and phones, and tool links remain available without JavaScript.
Material calculator catalog with four image cards per row on desktopView larger
See four tools across and continue down the catalog.Development screenshot ·
Read the update
v0.1.0-alpha.65Planner

Measure, preview and edit objects with real walls

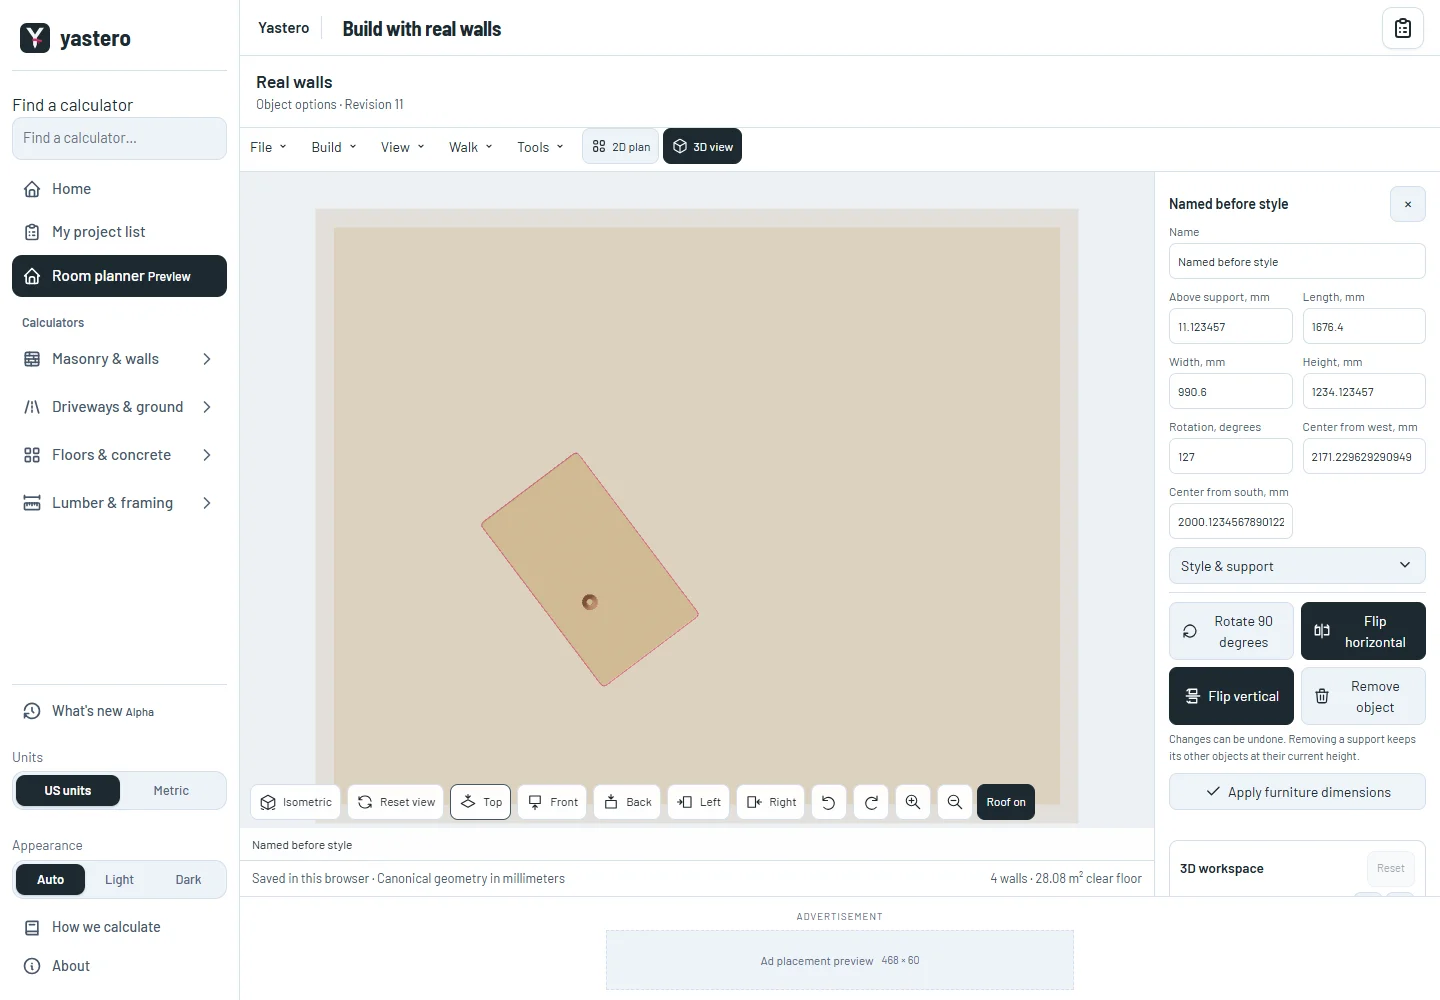
Select an object from Layers, edit its name, size and placement, and preview changes before saving. The shared property form now works with native millimeters.

  • Edit names, dimensions, height above support, position and rotation in a compact two-column inspector.
  • Change table styles, rotate or mirror while keeping measurements already typed in the form.
  • Discard a preview or use Undo after saving. Removing a support keeps its other objects at their current height.
Selected table in a real-wall project with its native millimeter property inspectorView larger
Inspect measured objects alongside the model.Development screenshot ·
Read the update
v0.1.0-alpha.64Planner

Choose doors and windows over real wall openings

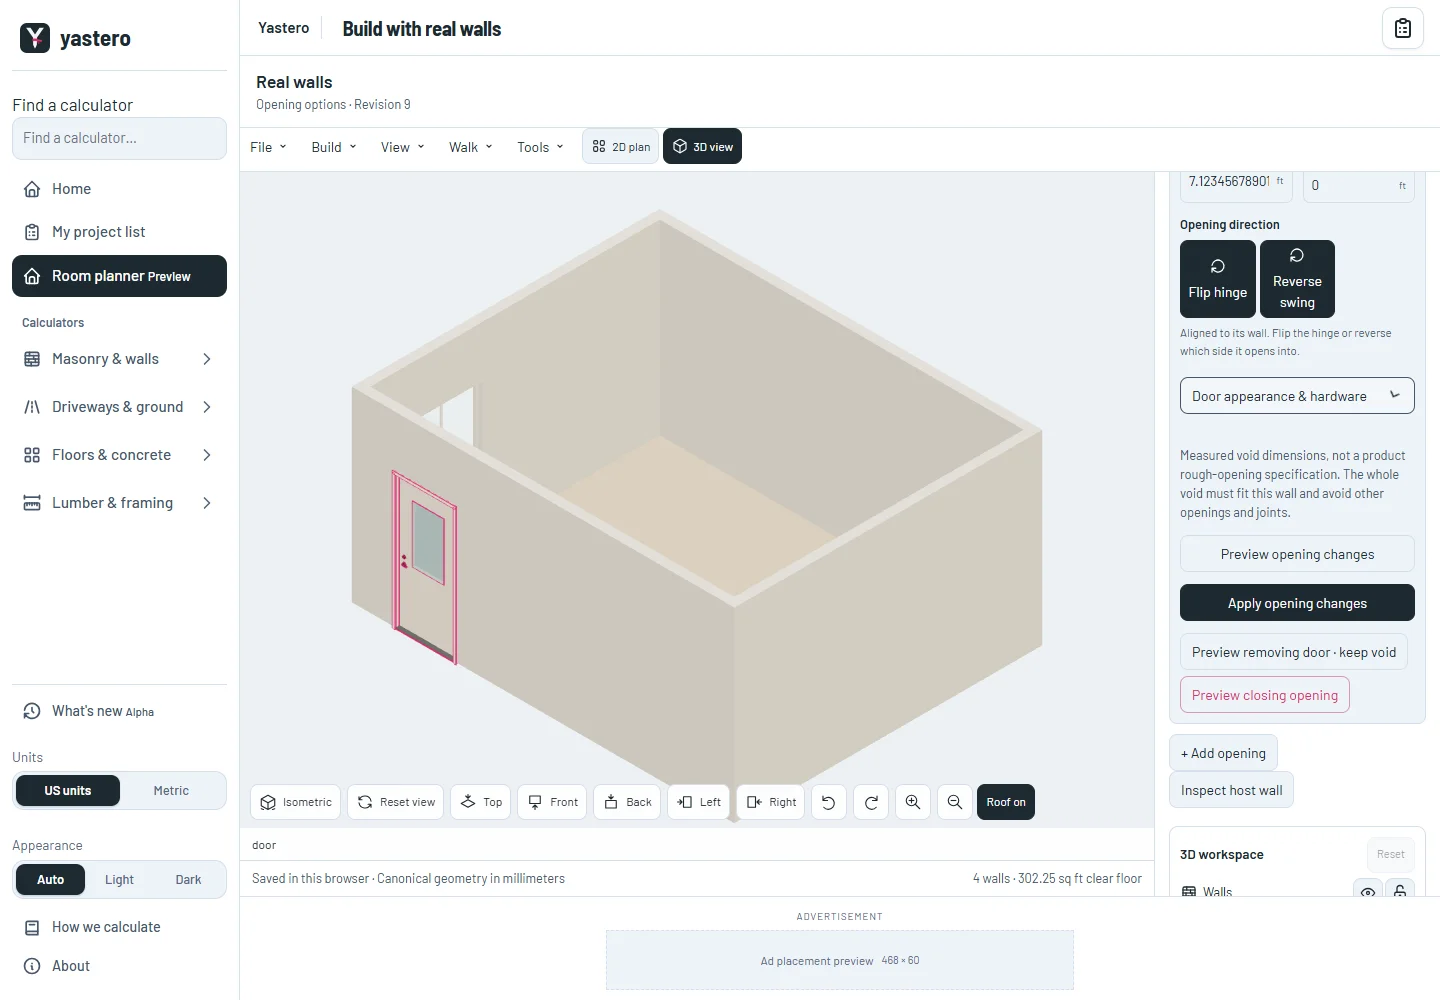
Use the familiar door styles, hardware, window models and pane controls in the real-wall inspector. Preview your changes, return to the same form, and keep exact measurements.

  • Choose paneled, modern or glazed doors, change hardware, and flip the hinge or swing.
  • Choose window styles, curtains, projection and preset or custom pane counts.
  • Preview before saving, keep typed values when you cancel, and use Undo to recover an installed filling.
Real-wall model with the selected door and its physical opening inspectorView larger
Choose a door finish while keeping its measured void separate.Development screenshot ·
Read the update
v0.1.0-alpha.63Planner

A clearer workspace for real-wall projects

Find project actions in familiar menus, choose a home from visual previews, and keep active tools easy to close on desktop and phone.

  • File, Build, View, Walk and Tools reuse the classic editor’s keyboard and phone menus.
  • Review a new blank project or furnished example before accepting it. Your previous building remains saved.
  • Use visible exit shortcuts, open menus in full screen and inspect the native renderer’s resource measurements.
Real-wall workspace with File, Build, View, Walk and Tools menus above the canvasView larger
Project and editing actions use the shared application menu.Development screenshot ·
Read the update
v0.1.0-alpha.62Planner

Keep your unapplied measurements in view

Apply or discard the current form before changing elements or tools in the real-wall workspace. Move the camera and use layer eyes and locks while your measurements stay available.

  • A visible notice keeps Apply and Discard within reach.
  • Preview and return to the same form, fix a validation error, or accept the reviewed change.
  • Changing units, selecting another element or closing the phone inspector cannot silently replace your input.
Real-wall editor with an unapplied-measurements notice beside the modelView larger
Keep the current edit visible while navigating the camera.Development screenshot ·
Read the update
v0.1.0-alpha.61Planner

Familiar camera controls for the real-wall model

Use the same camera icons and presets in both editors. Switch between a true isometric view and a perspective reset, with a compact View drawer on phones.

  • Isometric uses parallel projection with equal axis scale. Reset view sits beside it and restores perspective.
  • Top, front, back and both sides are orthographic views; rotate and zoom keep their familiar controls.
  • On a phone, park your roof draft, move the camera from View, then resume the same roof tool.
Real-wall model in parallel isometric view with the shared camera toolbarView larger
A true isometric view keeps equal foreshortening on all three axes.Development screenshot ·
Read the update
v0.1.0-alpha.60Planner

Shape and inspect roofs over real walls

Use the familiar four-step roof builder in the real-wall workspace, preview your ceiling and drainage, and save the roof as one reversible change.

  • The shared roof builder keeps its shape, materials, ceiling, drainage and drawing tools.
  • Look up inside a room with a separate inspection camera and temporary fill light.
  • Preview freely, return to the canvas on a phone, and apply only when the roof is ready.
Shared roof finishing tools open over the real-wall building modelView larger
Finish a roof while its native building stays visible.Development screenshot ·
Read the update
v0.1.0-alpha.59Planner

Select real building elements and control their layers

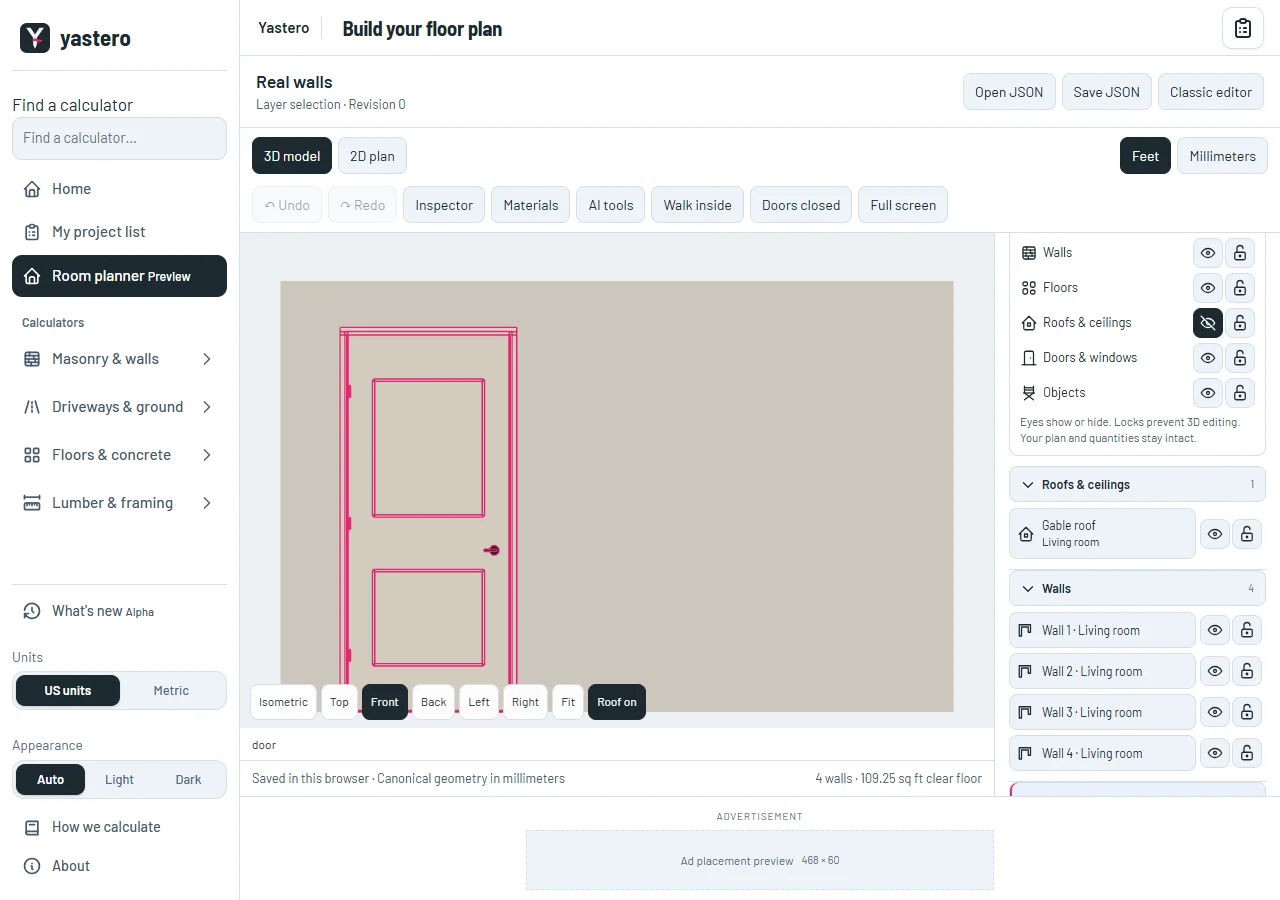
Select roofs, objects, floors, doors and windows directly in the real-wall model. Use the familiar eyes and locks to reveal your work and protect elements from 3D selection.

  • The model highlights the actual element under the pointer and keeps the selected element outlined.
  • Picking a door or window opens its measured void and filling controls at the top of the inspector.
  • Category and individual visibility and locks affect the workspace while the saved building and quantities stay intact.
Door geometry outlined in pink in the real-wall model with its specific opening inspectorView larger
A picked door identifies its own measured opening and physical wall.Development screenshot ·
Read the update
v0.1.0-alpha.58Planner

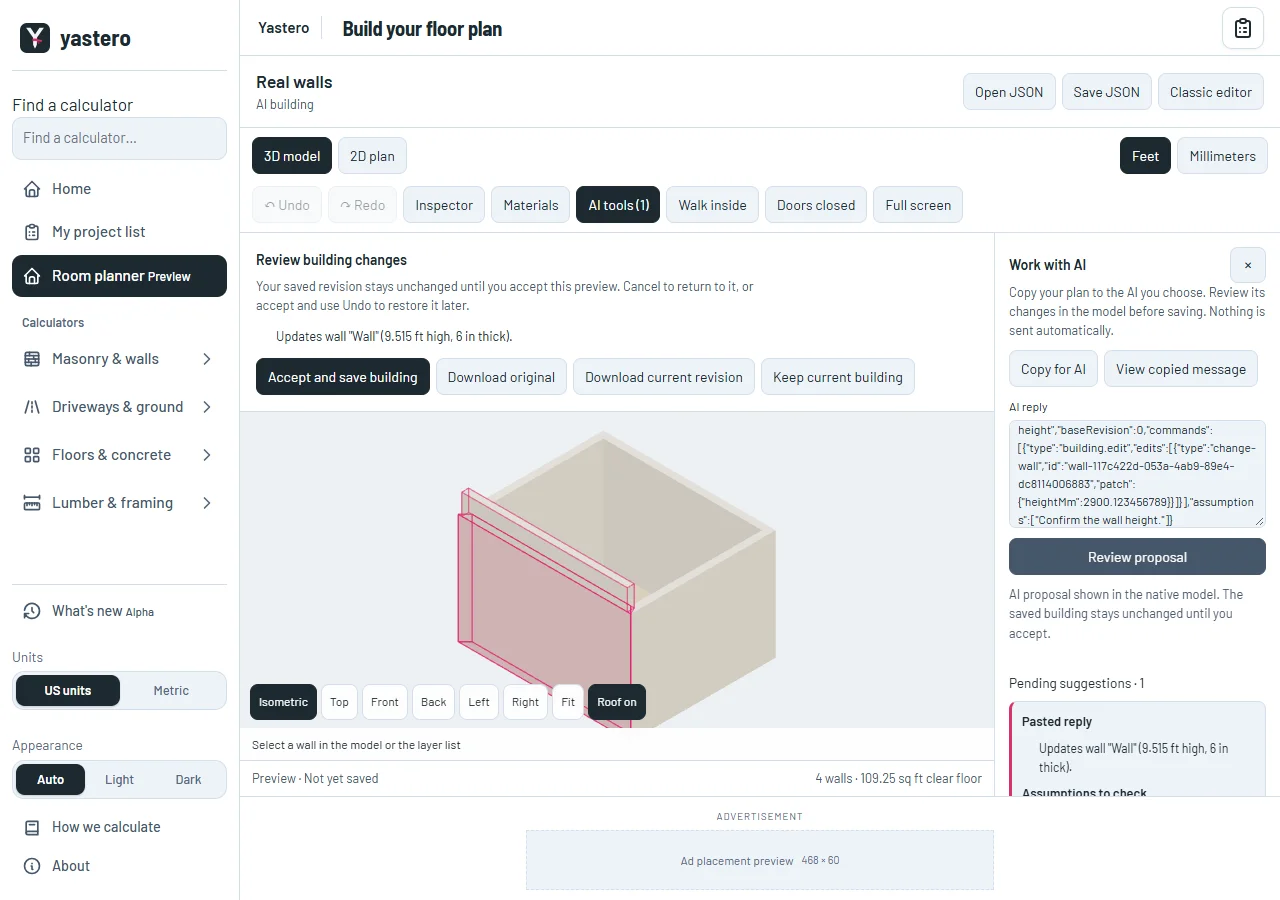
Review AI suggestions on your real-wall model

Copy the active building to your AI, review its proposed changes in 3D and accept them as one saved transaction. Keep an activity list with an Undo for each AI session.

  • See affected wall geometry in pink before saving; the previous wall shape stays visible as a translucent reference.
  • Reject a proposal without changing the saved building, or undo an accepted AI transaction while preserving independent edits.
  • Read material estimates from the same measured coverage recipes, sources and pending requirements used by the manual list.
Real-wall workspace with a proposed wall height outlined in pink and its previous geometry visible as a translucent referenceView larger
Review the affected model while the confirmed building stays unchanged.Development screenshot ·
Read the update
v0.1.0-alpha.57Planner

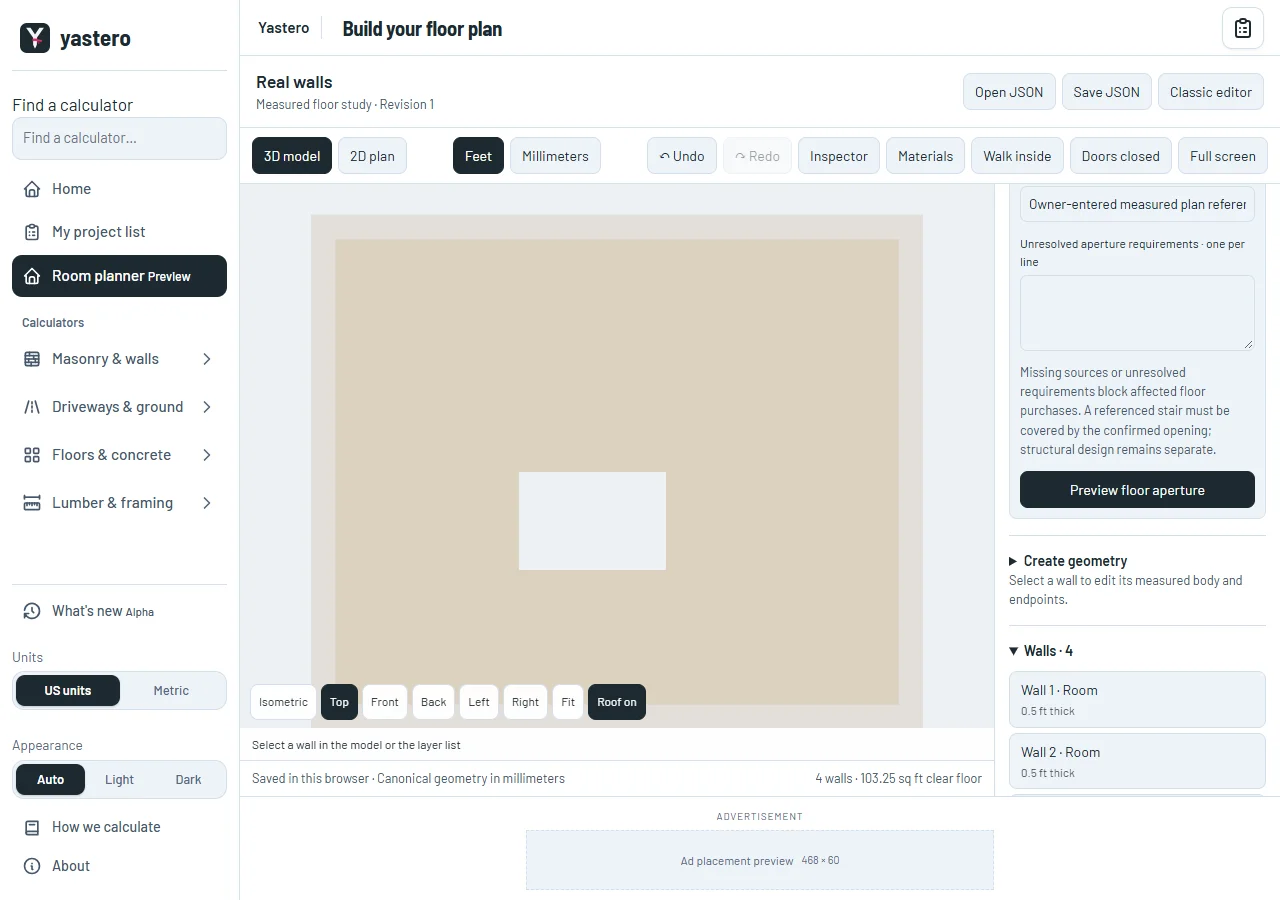
Measure floor apertures and work on the right floor

Preview a measured floor opening, see the same hole in plan and 3D, and deduct its actual area from flooring estimates. Create floors with explicit design elevations.

  • Enter a rectangular or polygonal floor aperture with a source, pending requirements and an optional stair reference.
  • Choose the editing floor, add its room geometry and walk at that floor’s actual elevation.
  • Preview circular wall splits and merges; unchanged formatted curve fields preserve the saved analytic axis exactly.
Orthographic top view of a room with a measured rectangular opening cut through the floorView larger
The 3D floor and clear floor quantity use the same measured aperture.Development screenshot ·
Read the update
v0.1.0-alpha.56Planner

Build an addition and estimate materials from real wall bodies

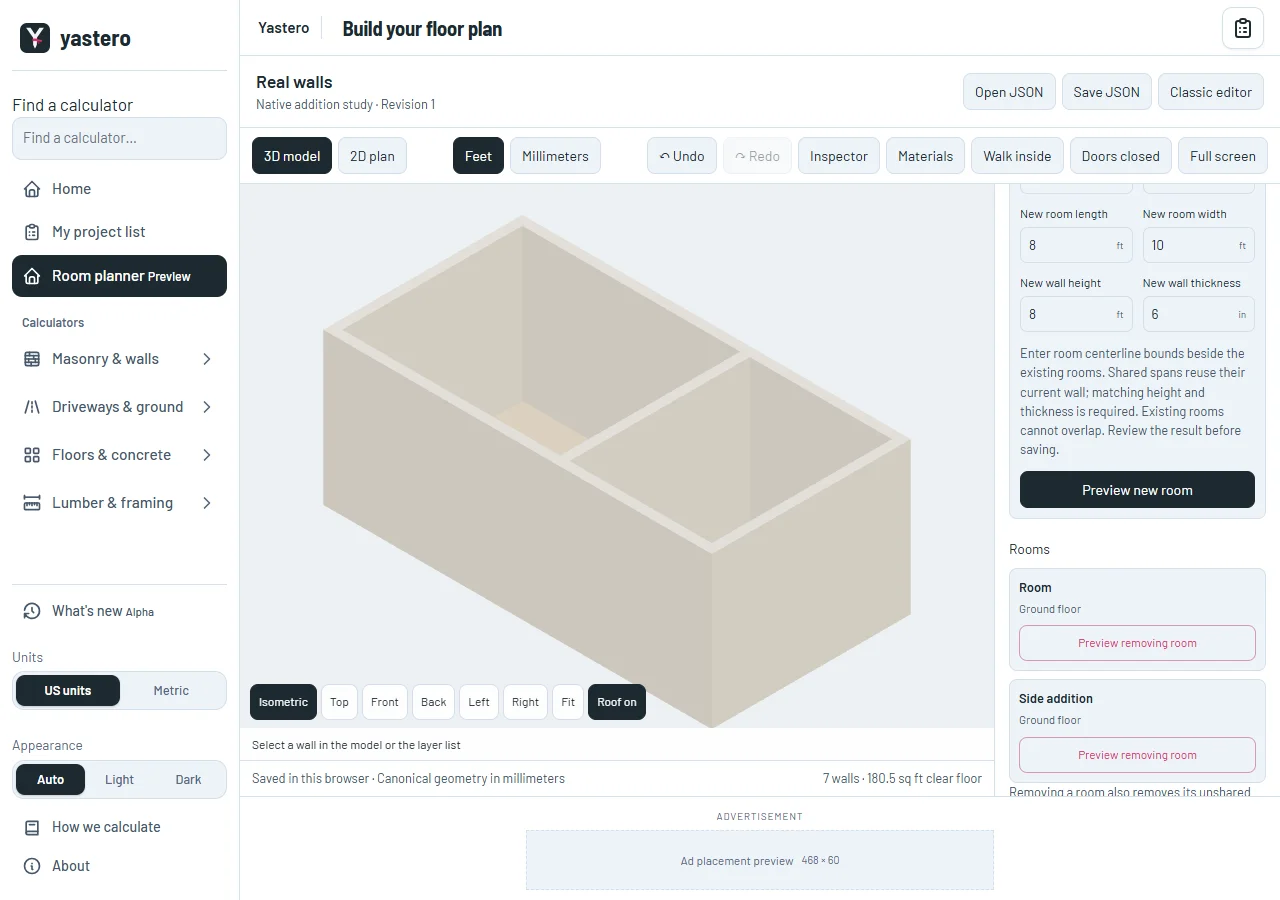
Review a new room beside your house, reuse its shared wall, and edit openings, construction layers and product coverage inside the real-wall workspace.

  • Create a rectangular room or independent wall with explicit measurements, then accept or cancel the proposed geometry.
  • Edit a void separately from its door or window; preview removing the filling or closing the opening.
  • Read a material list with pictograms, per-room measurements, source, allowance and optional cost; export the estimate as CSV.
Two connected rooms in the real-wall editor with one shared wallView larger
An addition reuses the physical shared wall instead of drawing it twice.Development screenshot ·
Read the update
v0.1.0-alpha.55Planner

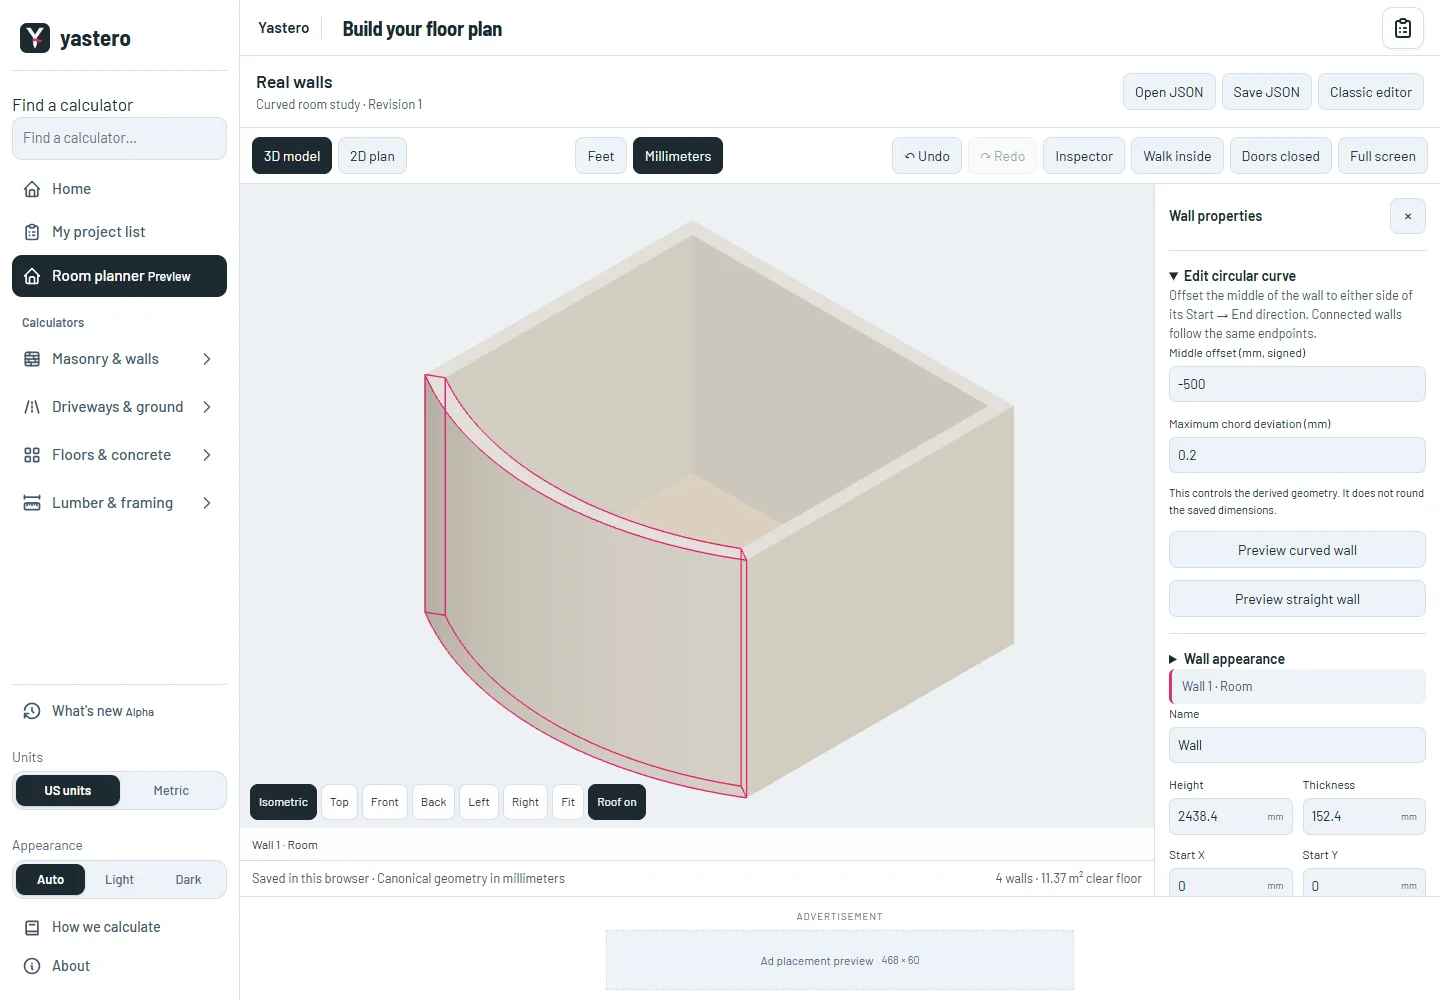
Preview curved walls and walk inside the real-wall model

Bend a wall with a review before accepting, keep its analytic curve in millimeters, and explore the physical wall body with keyboard or on-screen movement controls.

  • Preview a circular wall without replacing the saved revision; accept, cancel or undo the change.
  • Curve lengths, cuts, joints and layer envelopes use the directed analytic axis with an explicit chord-deviation limit for derived geometry.
  • Walk inside with continuous wall collisions, matching open/closed door poses and furnishing envelopes. Native floor finishes retain their actual zones.
Circular wall selected in pink in the real-wall editor with its signed offset and curve tolerance controlsView larger
Preview and edit a real circular wall while keeping persistent wall identity.Development screenshot ·
Read the update
v0.1.0-alpha.54Planner

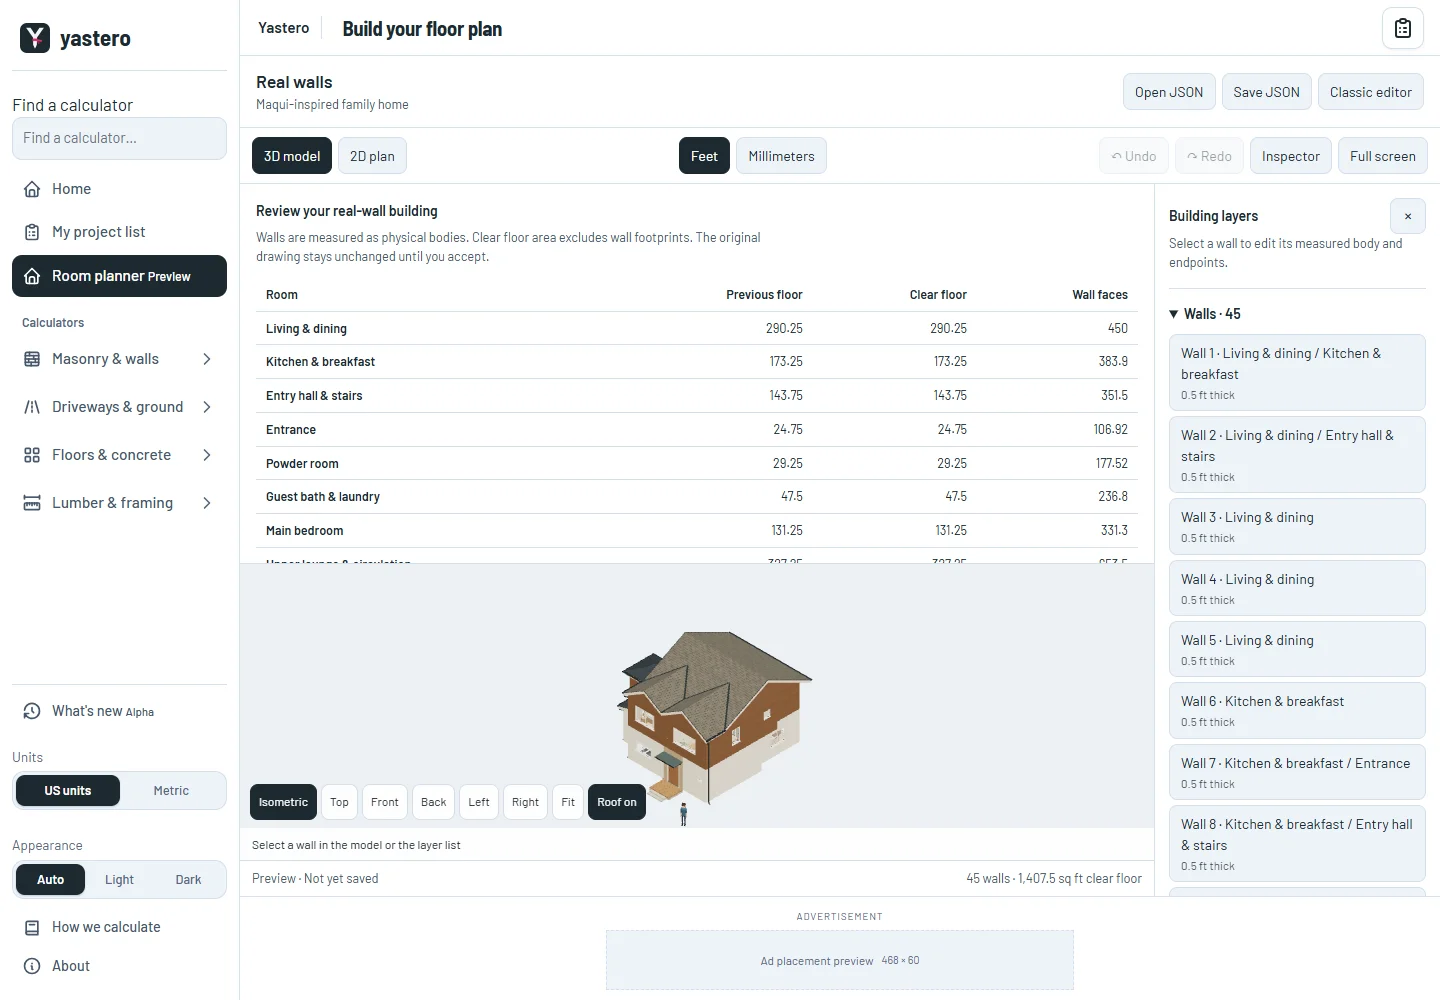
Review physical walls in a separate building workspace

Open the real-wall preview from Build, compare clear floor areas, then accept a separate building saved in millimeters. Edit wall measurements with native Undo and Redo.

  • Review the migration before saving and download the exact original drawing.
  • Select physical walls in 2D or 3D, change their thickness and shared endpoints, and switch between feet and millimeters.
  • Keep separate saved buildings in the browser; a failed or conflicting save leaves the confirmed revision unchanged.
Real-wall migration review comparing room floor areas beside the physical house previewView larger
Compare measured areas and keep the original drawing before accepting the native building.Development screenshot ·
Read the update
v0.1.0-alpha.53Website

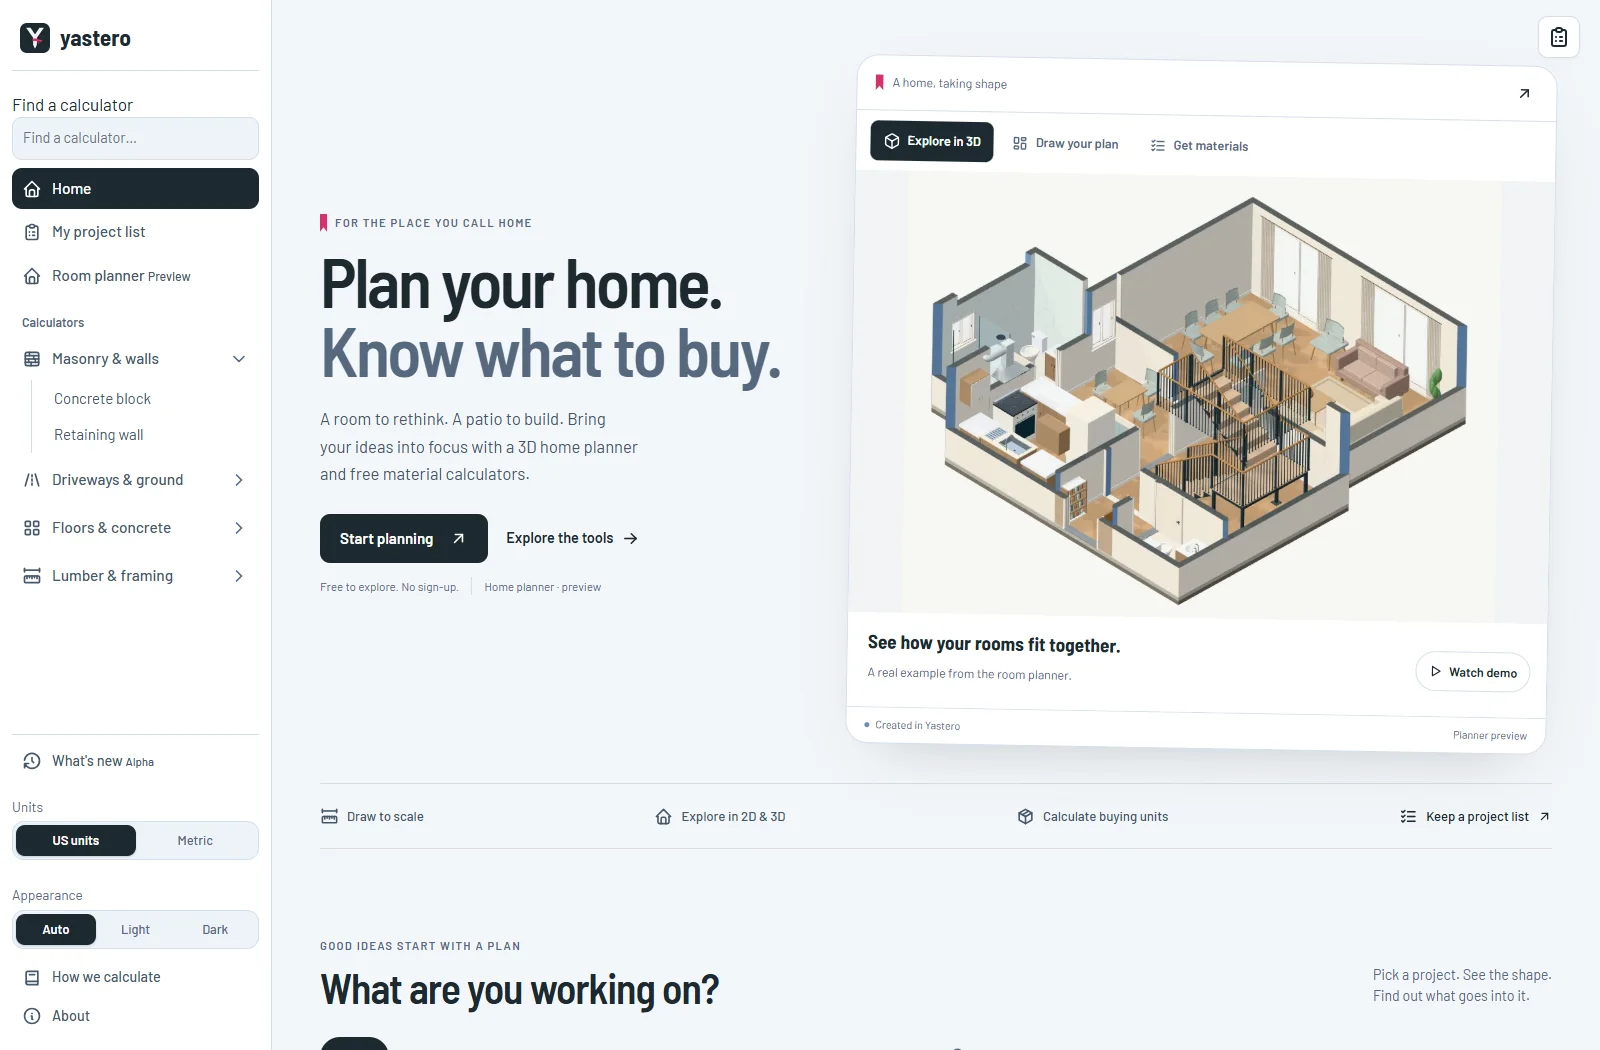
A more visual way to start your next home project

Explore the home planner first, switch between real previews and browse material calculators through project images, filters and a touch-friendly gallery.

  • Start with the home planner and real views of a furnished house, its floor plan and a material estimate.
  • Watch a short recording of the actual planner when you choose, with captions and playback controls.
  • Find a calculator by project type or search, then browse illustrated tools with touch, arrows or the keyboard.
Yastero home page with a large home planner preview beside the main start-planning actionView larger
The home planner is the first thing to explore, with real output from the tool.Development screenshot ·
Read the update
v0.1.0-alpha.52Planner

Baseboards that continue around wall ends

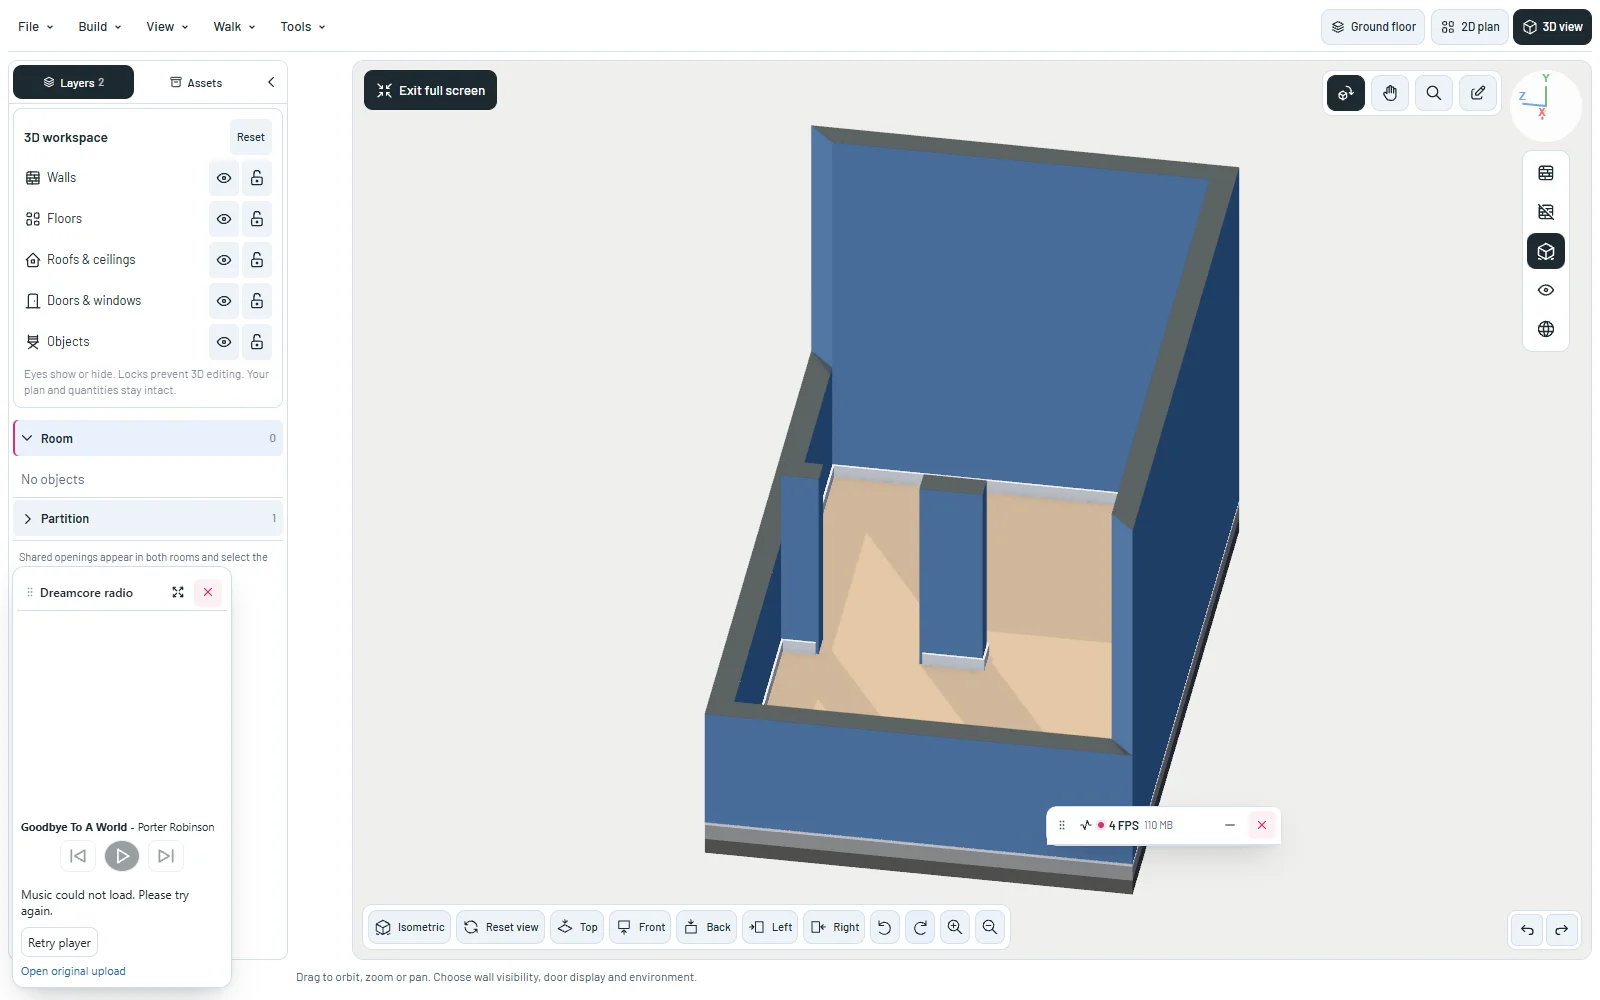
Baseboards follow exposed partition faces and wrap their ends, instead of disappearing into a wall or stopping before a corner.

  • Interior partitions get continuous baseboards around their exposed sides and ends.
  • Neighboring wall projections are followed rather than hiding the trim.
  • Doorway cuts, raised sills and separate floors retain their intended gaps.
Blue room walls and a partition with continuous white baseboardsView larger
Baseboards follow the room and partition, with a clear opening through the divider.Development screenshot ·
Read the update
v0.1.0-alpha.51Planner

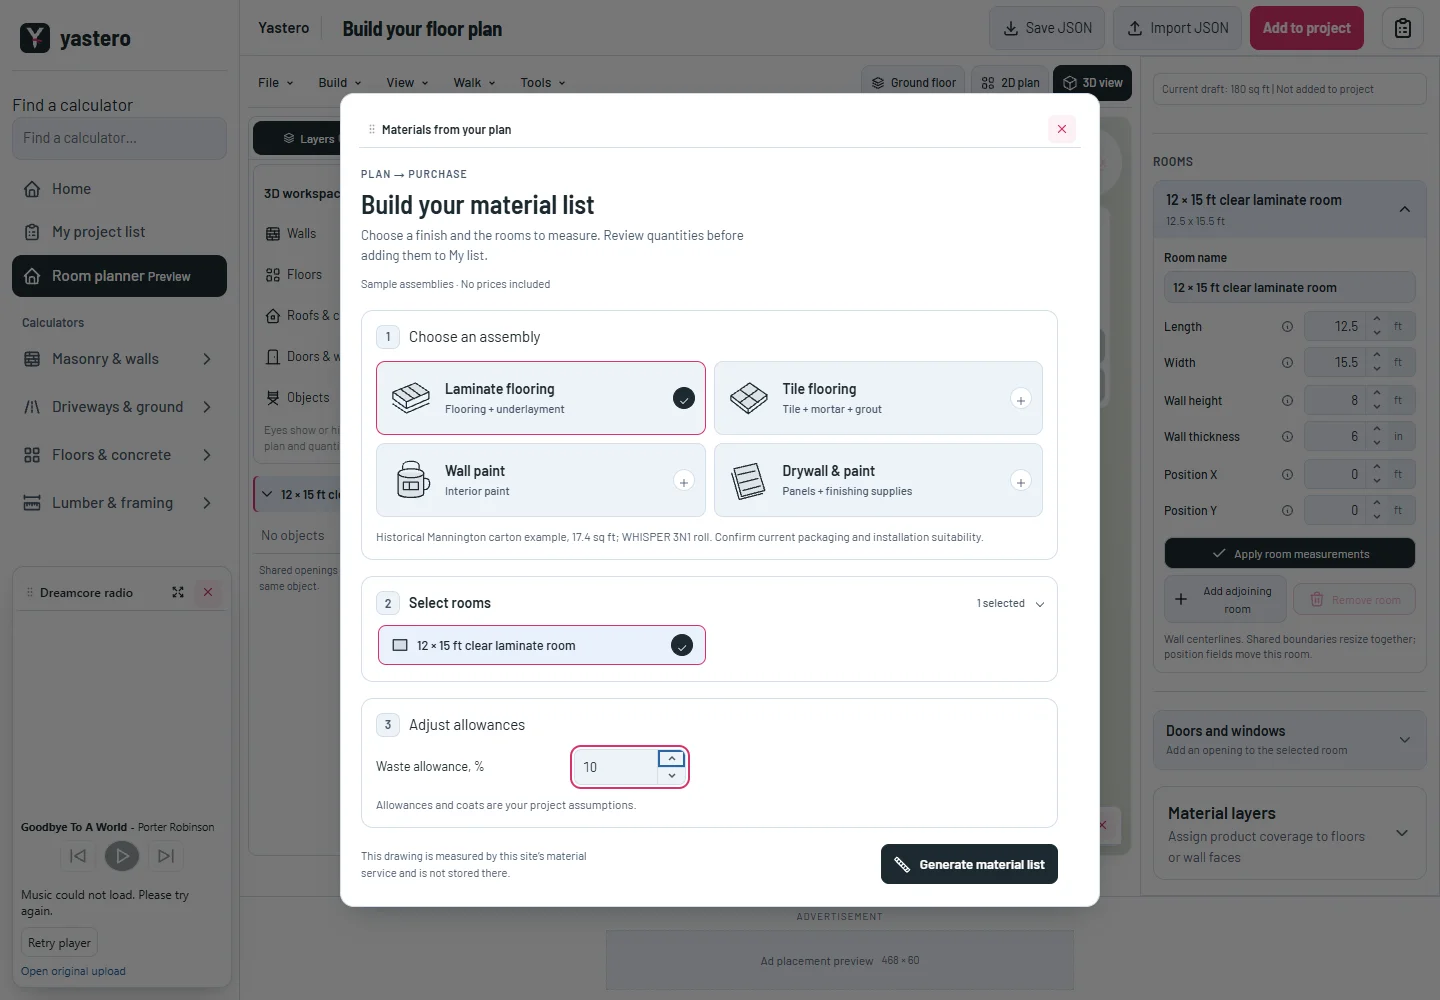
Material lists with clear quantities and visual categories

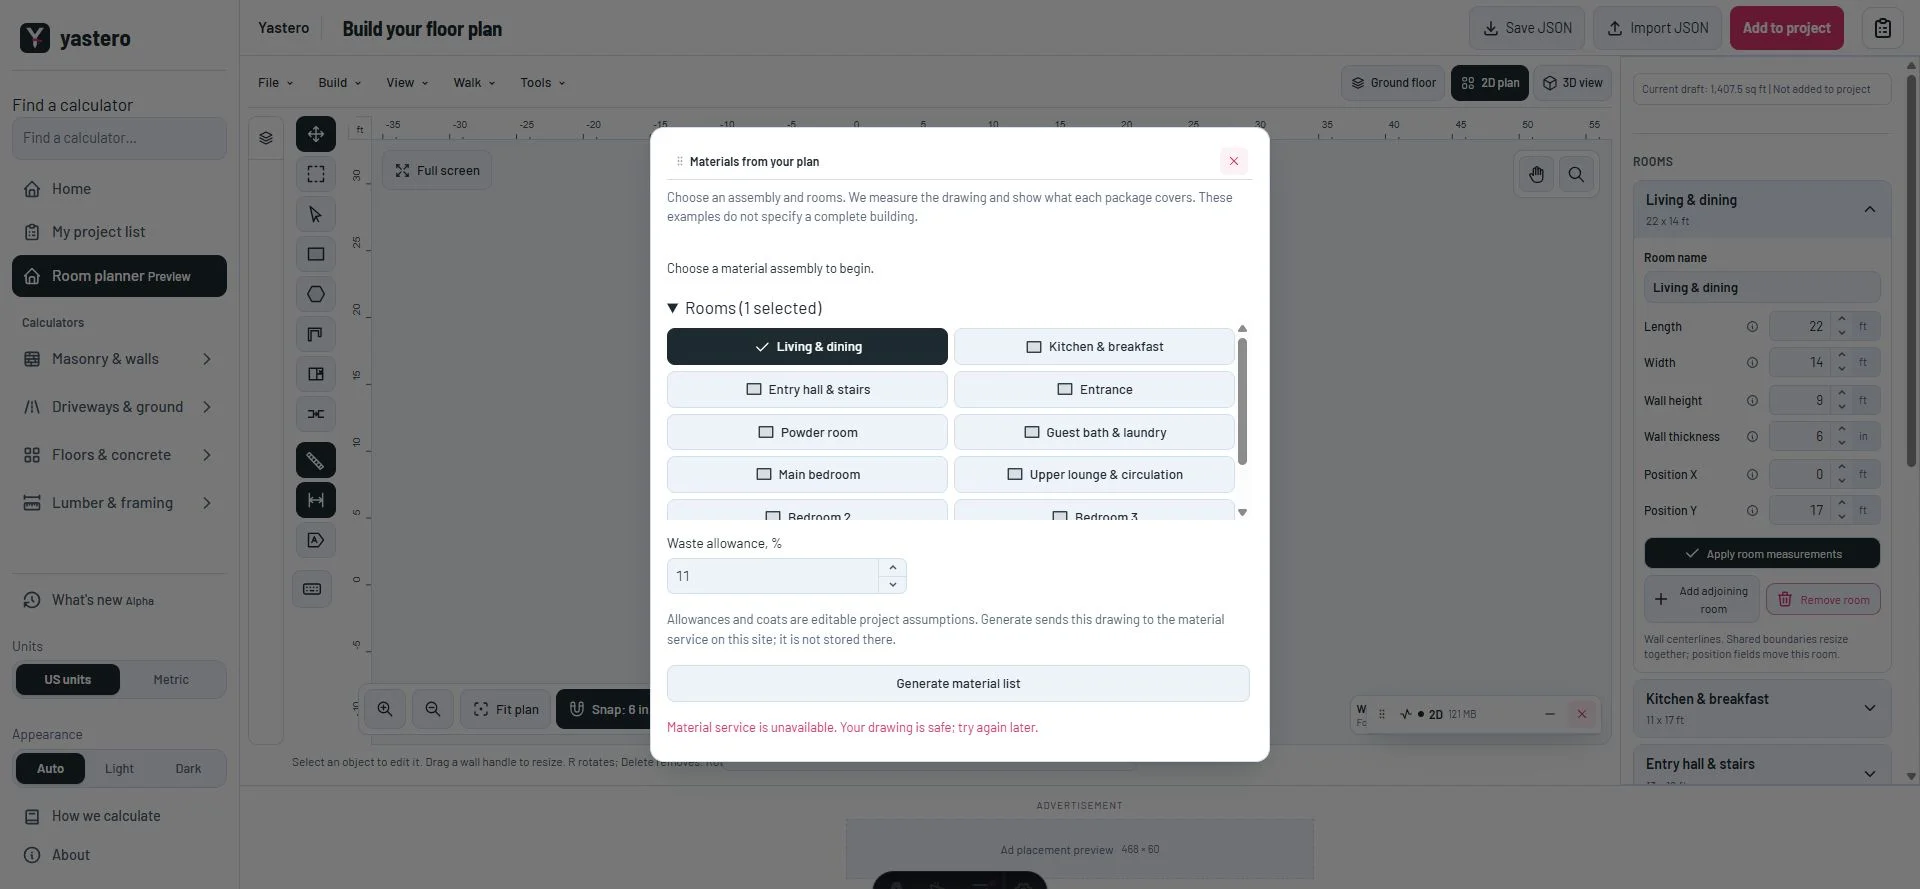
Choose an assembly in three clear steps, then read each product, package and purchase quantity in its own illustrated card.

  • Choose an assembly, select rooms and adjust allowances in separate sections.
  • Recognize material categories with pictograms and read package counts at a glance.
  • Expand a product’s calculation and sources, or retry if assemblies cannot load.
Material estimate window with pictogram assembly choices and three numbered sectionsView larger
Choose an assembly, select rooms and adjust allowances in separate sections.Development screenshot ·
Read the update
v0.1.0-alpha.50Planner

Wall properties that fit and clearer measurement drawings

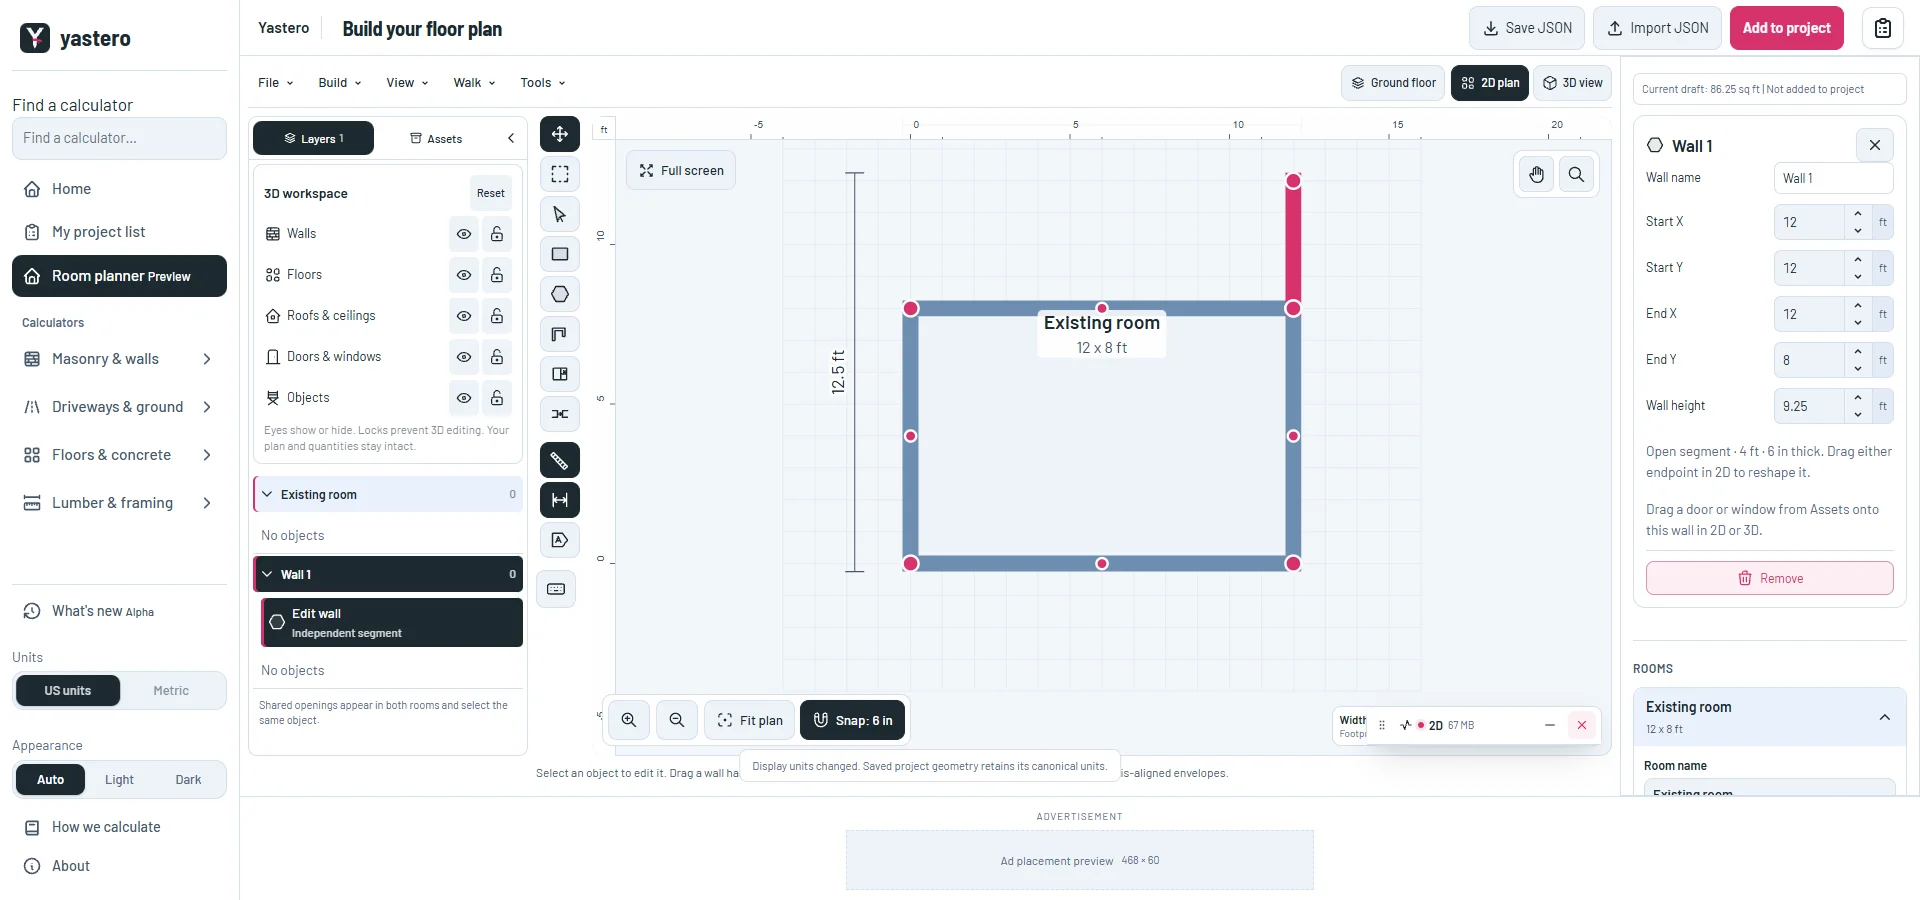
Keep wall coordinates inside their inspector, and read dimension lines with aligned end marks in calculator illustrations.

  • Wall values, steppers and units share the available space without overflowing or collapsing.
  • Dimension lines use connected witness lines and centered end marks, with room for their labels.
Floor planner with the selected independent wall inspector fitting the right panelView larger
The selected wall keeps its fields and actions inside the docked inspector.Development screenshot ·
Read the update
v0.1.0-alpha.49Planner

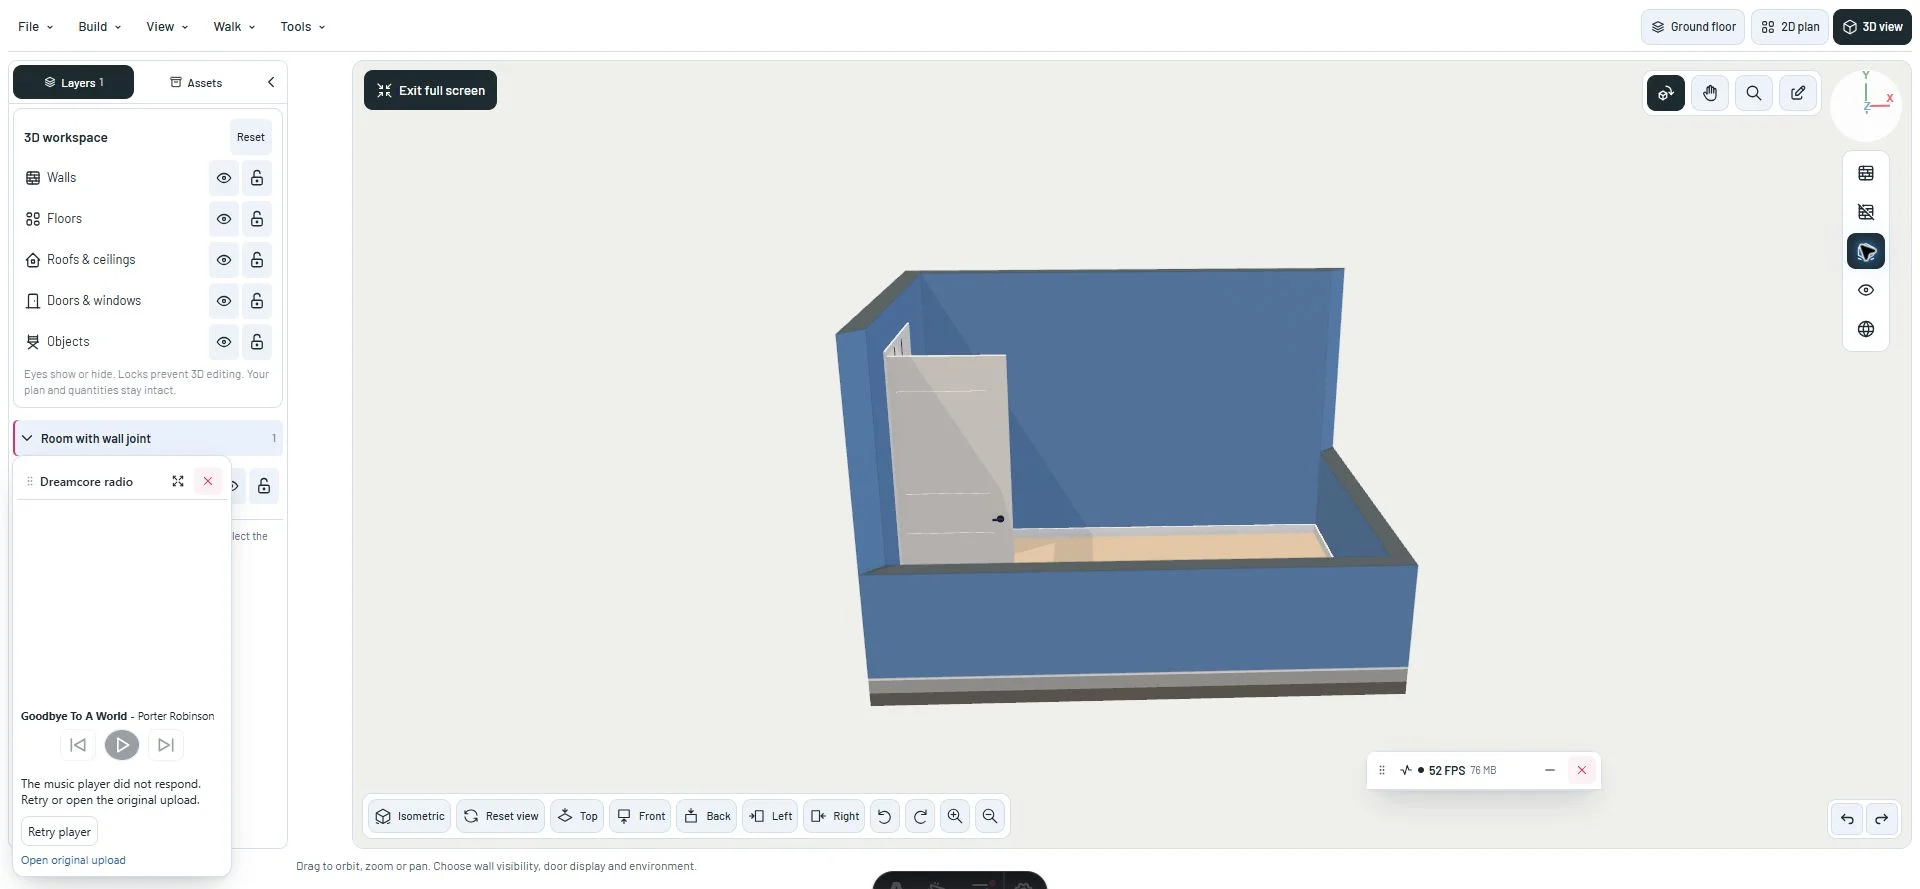
Baseboards follow the wall continuously

Interior baseboards meet at corners and continue across intermediate wall vertices, with clear openings at doors.

  • Baseboards follow the finished interior wall face instead of ending short at each segment.
  • Doorways stay clear, and raised openings retain the baseboard below their sill.
Dollhouse interior with continuous baseboards and a clear doorwayView larger
The baseboard follows the room wall face and stops at the doorway.Development screenshot ·
Read the update
v0.1.0-alpha.48Planner

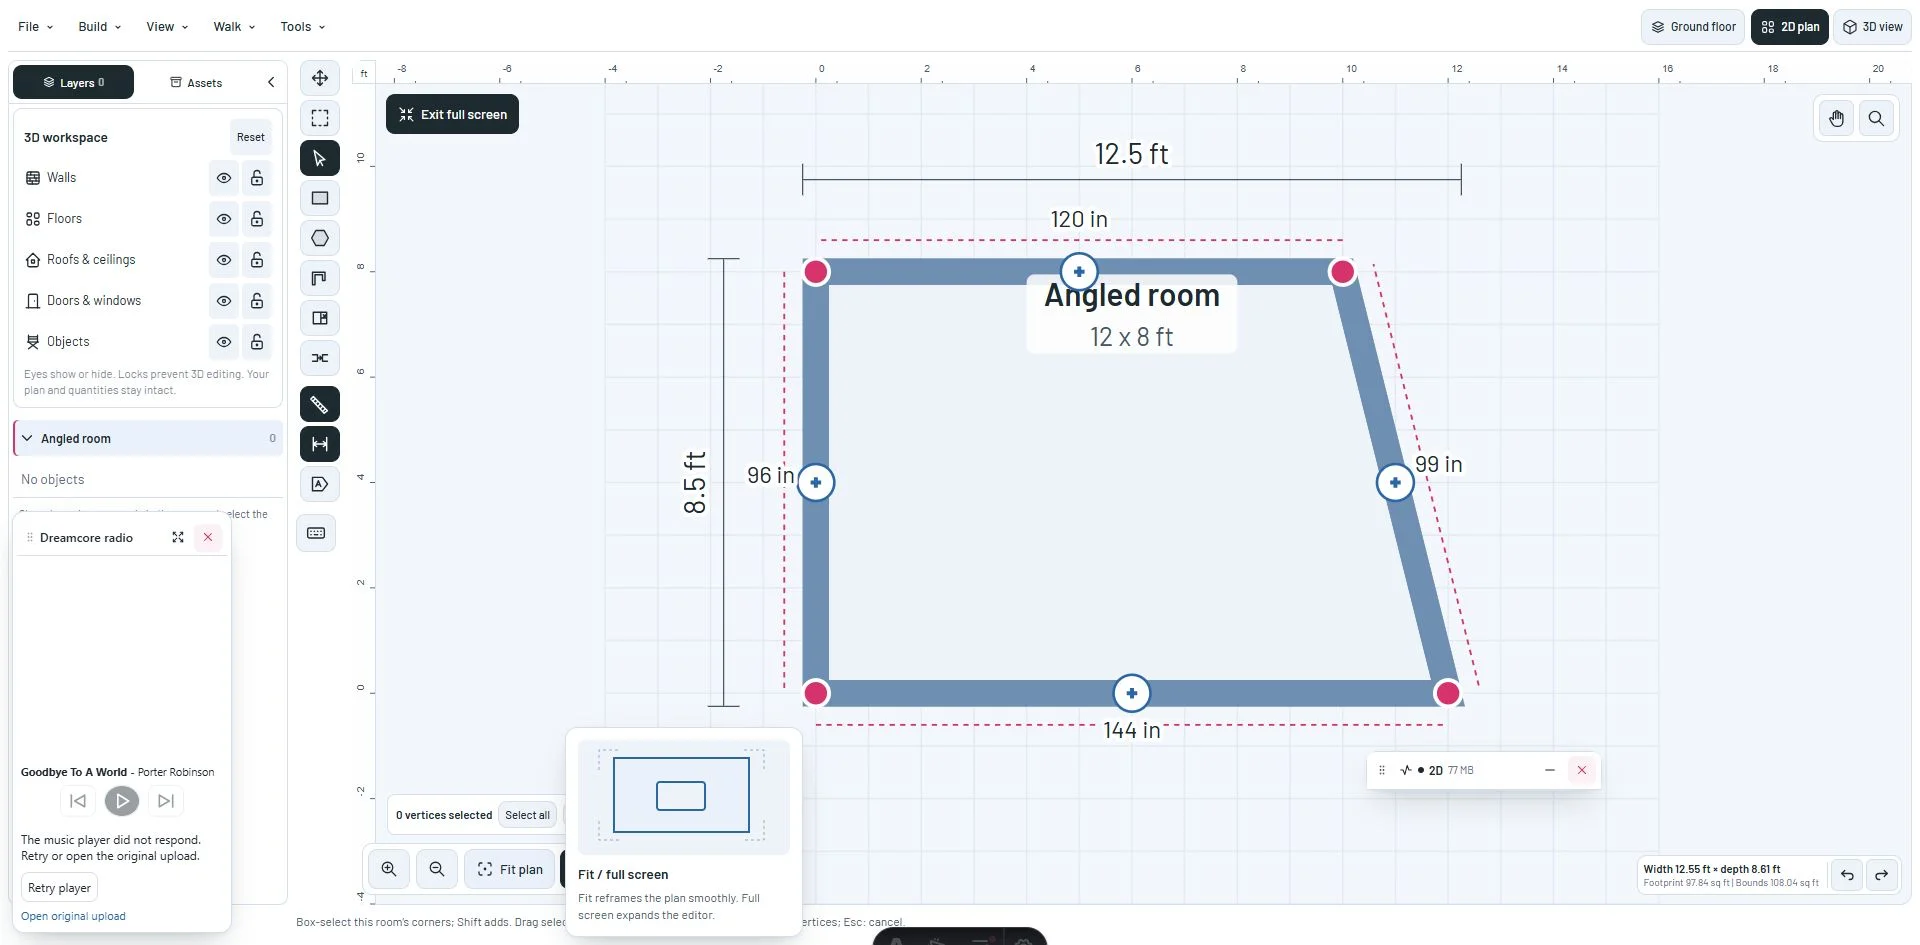
Cleaner angled corners in the plan

Angled room walls meet in one continuous outline, without square tips protruding beside the corner handle.

  • Room corners use a continuous join instead of overlapping square wall ends.
  • Individual walls remain selectable, with openings and vertex editing preserved.
Fullscreen plan of a room with a clean angled wall corner and editable verticesView larger
Adjacent walls meet in a continuous room outline without protruding square tips.Development screenshot ·
Read the update
v0.1.0-alpha.47Planner

Compact number controls for material estimates

Adjust allowances with arrows integrated into the number field, and return to the estimate from the mobile tool list.

  • Number fields keep their arrows inside one compact border.
  • On phones, larger side-by-side controls leave the explanatory text clear.
Material estimate dialog with a compact allowance number fieldView larger
A single allowance stays compact within the estimate dialog.Development screenshot ·
Read the update
v0.1.0-alpha.46Planner

Window close buttons stay visible

Find the close action clearly when pointing at a window or moving through its controls with the keyboard.

  • Close icons keep a contrasting background on hover and keyboard focus.
  • The shared window header applies the correction to tools, resources and other floating panels.
Floor planner with a contrasting close button on the resource monitorView larger
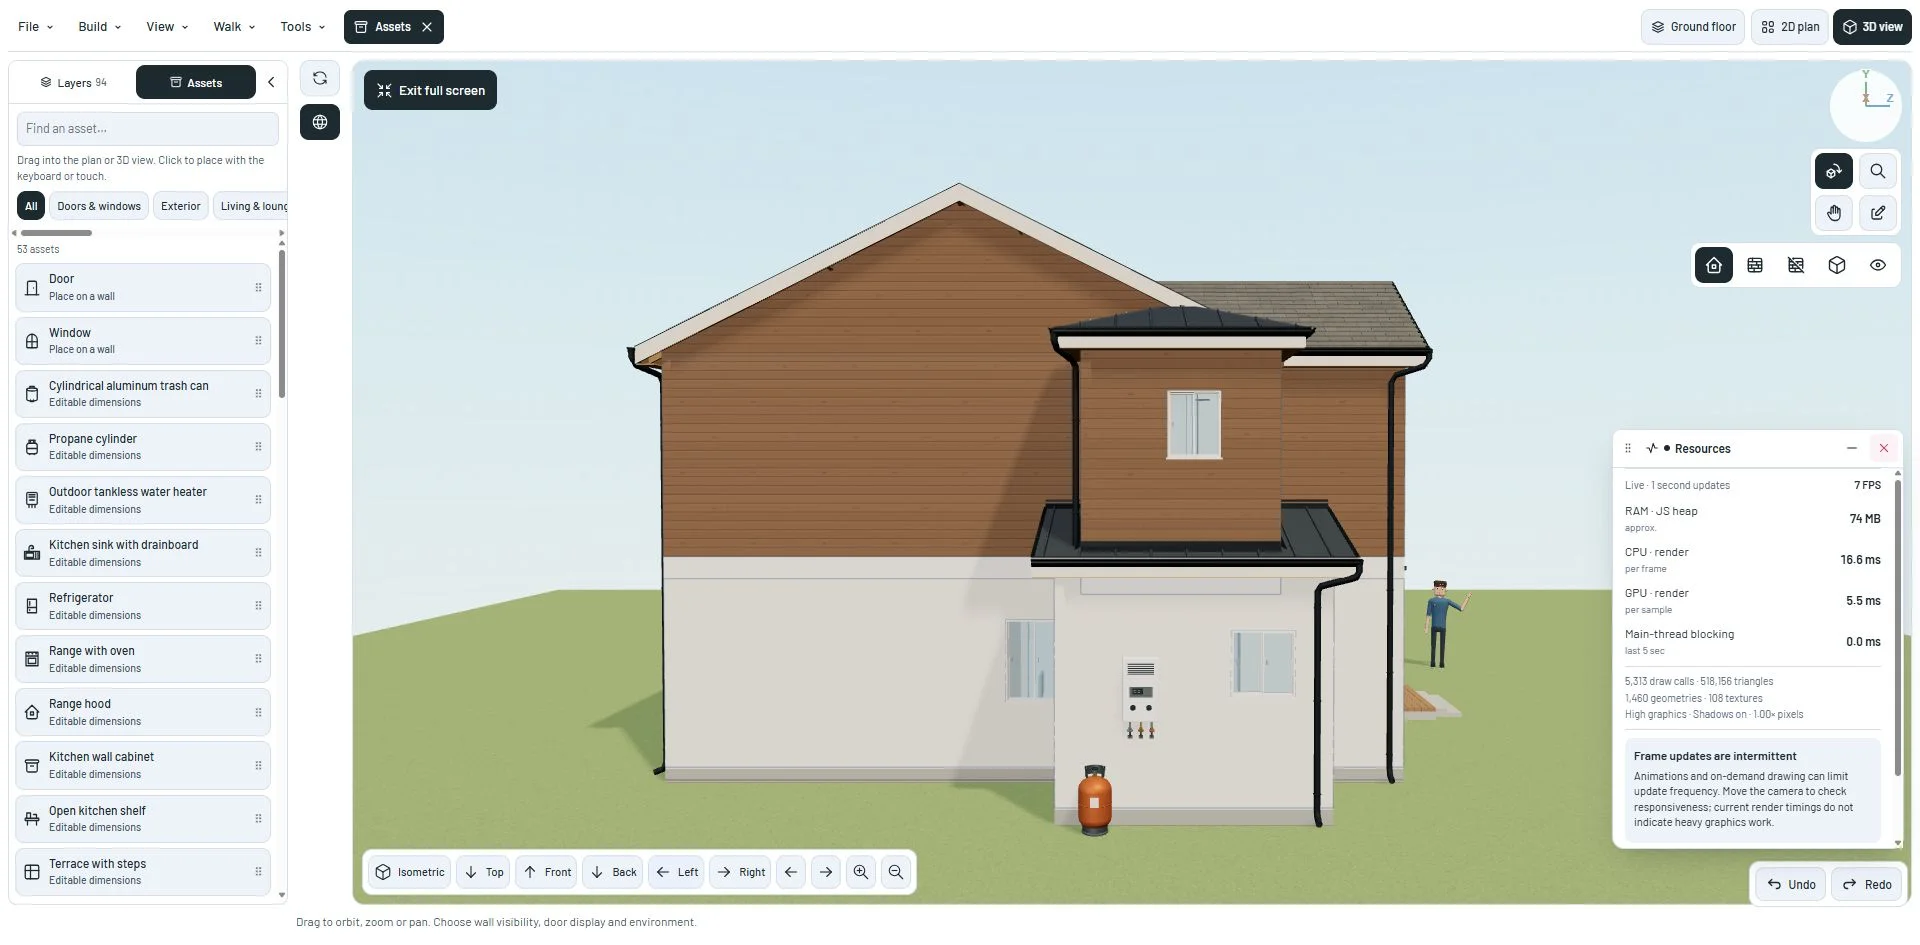
The close action stays visible in its window header while the pointer rests on it.Development screenshot ·
Read the update
v0.1.0-alpha.45Planner

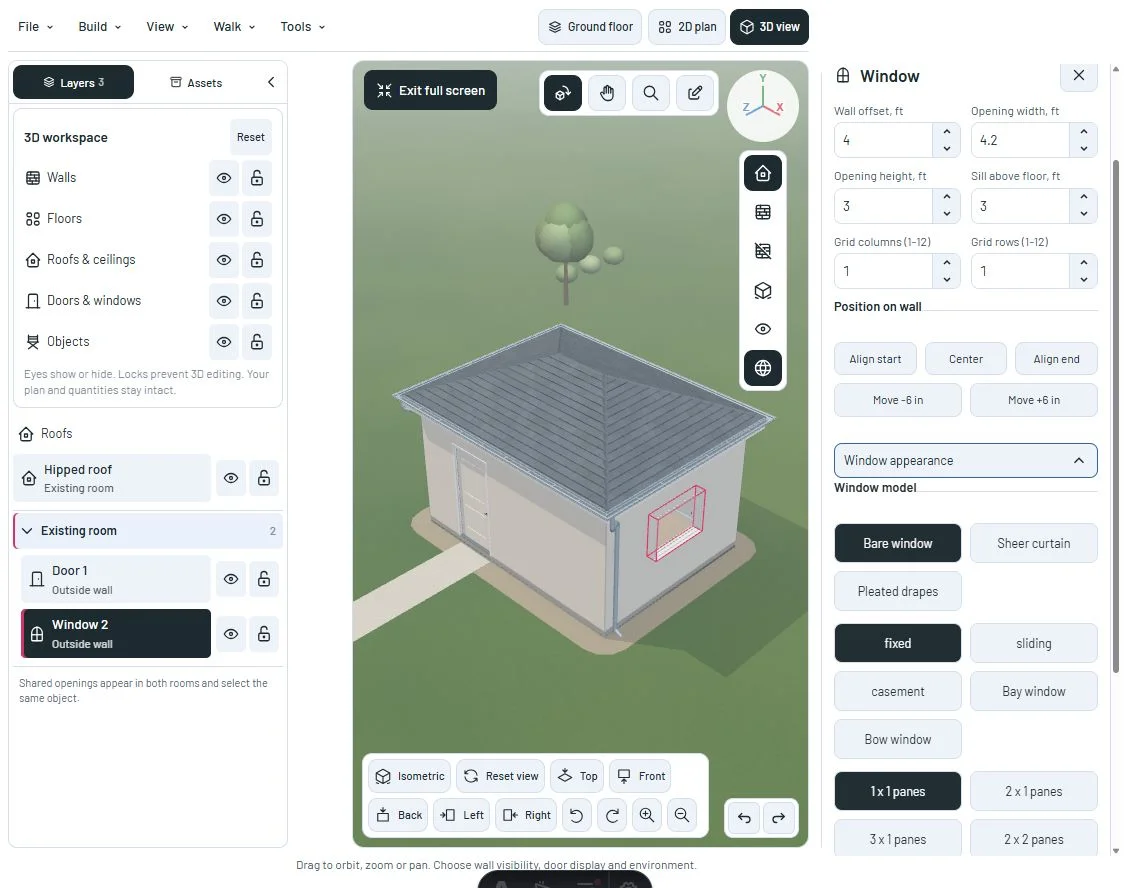
Fullscreen properties and smoother gutter finishes

Keep the selection inspector available in fullscreen, and inspect roof drainage with smoother curves and a more coherent metal finish.

  • Keep your inspector and draft while changing views or entering fullscreen.
  • Curved gutters and outlets have continuous highlights with crisp folded edges.
Fullscreen 3D model with the selected window inspector visible on the rightView larger
Keep editing the selected window in fullscreen. The inspector has its own scroll area beside the viewport.Development screenshot ·
Read the update
v0.1.0-alpha.44Planner

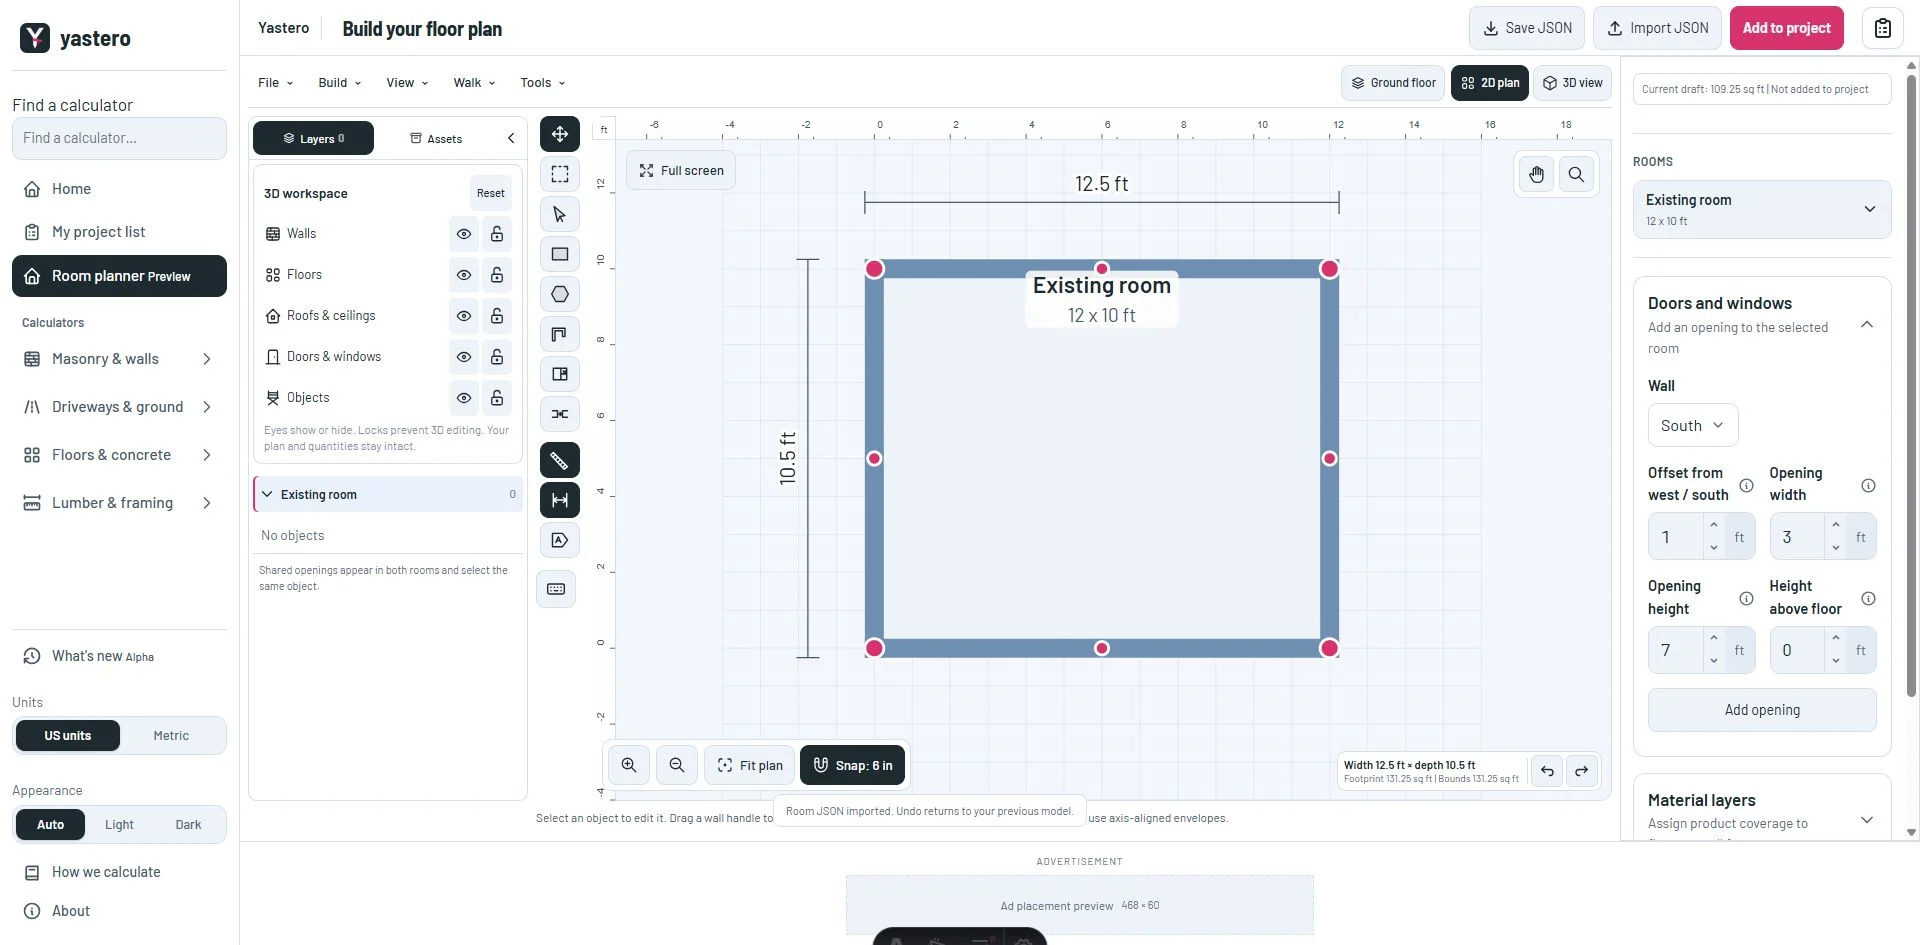
Opening controls that match your room measurements

Add doors and windows from a compact, aligned form that follows the room card scale. Phone controls retain room for touch.

  • Wall, offset, width, height and floor clearance share one aligned column of controls.
  • Desktop fields match the room measurements; phone rows stay touch-sized.
Previous doors and windows setup with tall fields beside a compact room cardView larger
Before: calculator-sized fields and a tall heading did not match the room measurements.Development screenshot ·
Read the update
v0.1.0-alpha.43Planner

Gutters that connect through the bottom

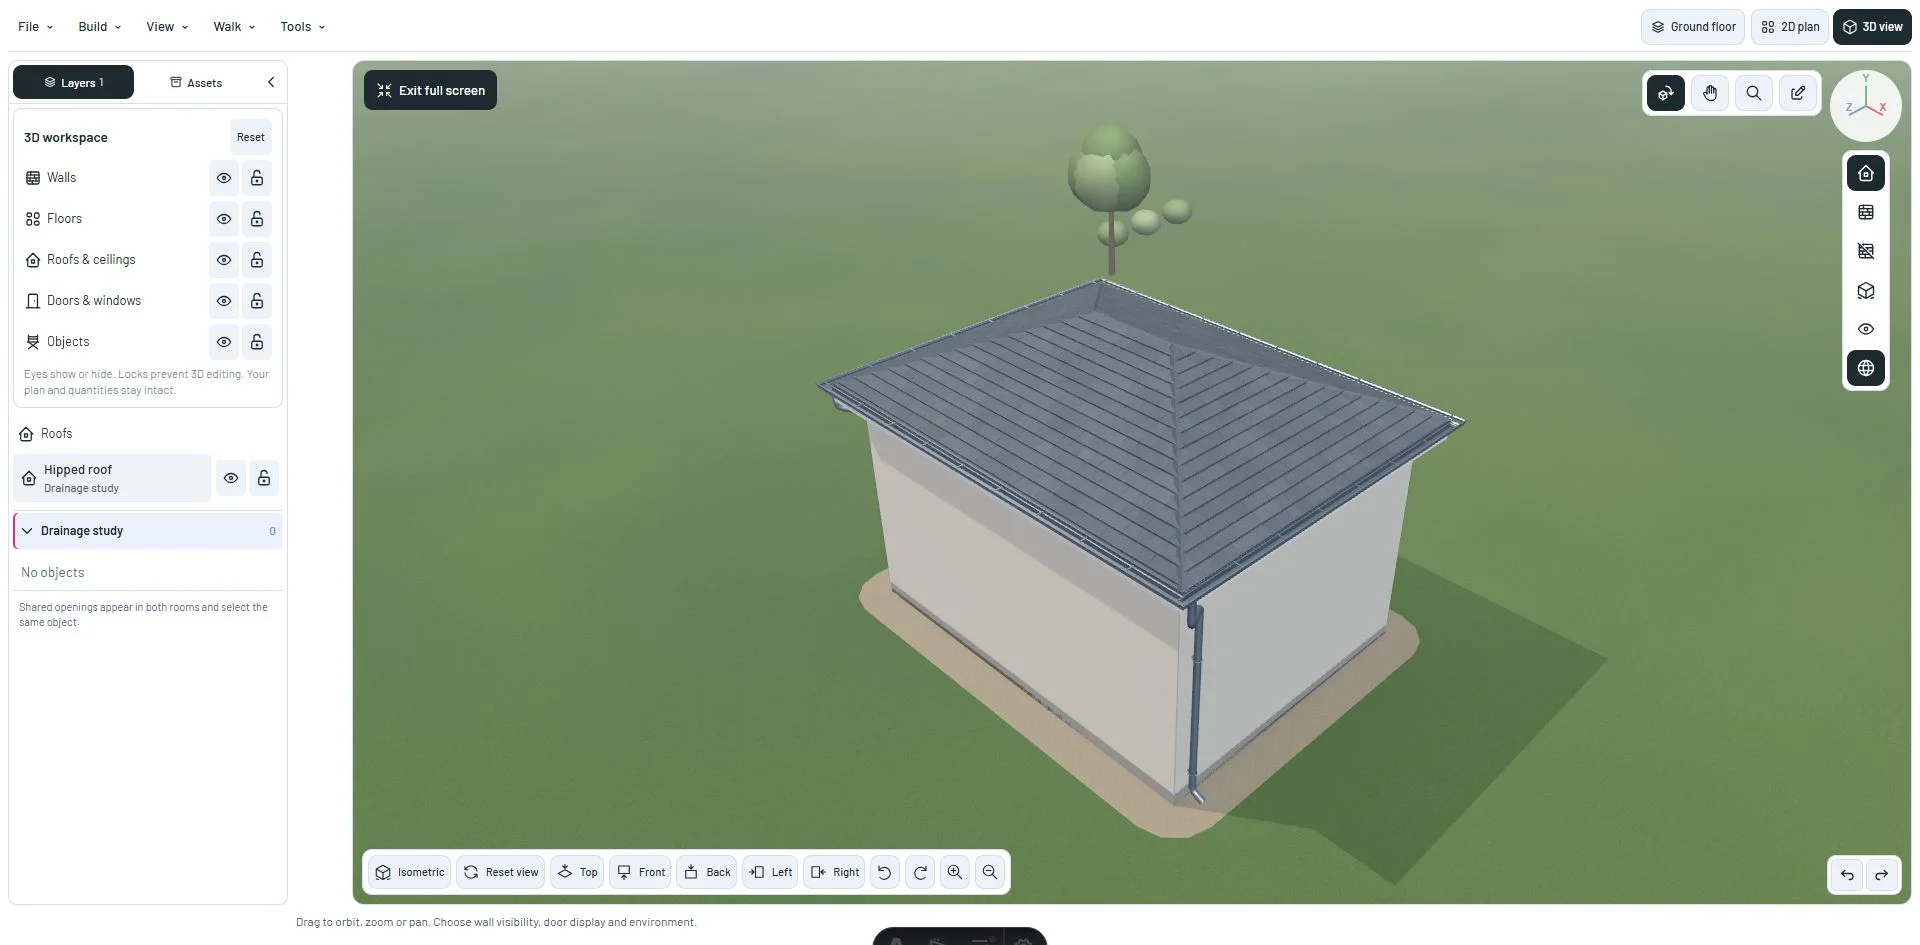
Inspect closed gutter ends, continuous corners and inset bottom outlets that connect to hollow downspouts. The detail now shows how the pieces meet.

  • Closed stopends and matching miters replace open corner gaps.
  • Bottom cut-outs and flanged adapters connect the pan to the pipe.
Continuous gutters around a hipped roof in the room plannerView larger
Inspect the complete roof and its gutter-to-downspout routes in the 3D workspace.Development screenshot ·
Read the update
v0.1.0-alpha.42Planner

A clearer workspace on phones and smaller screens

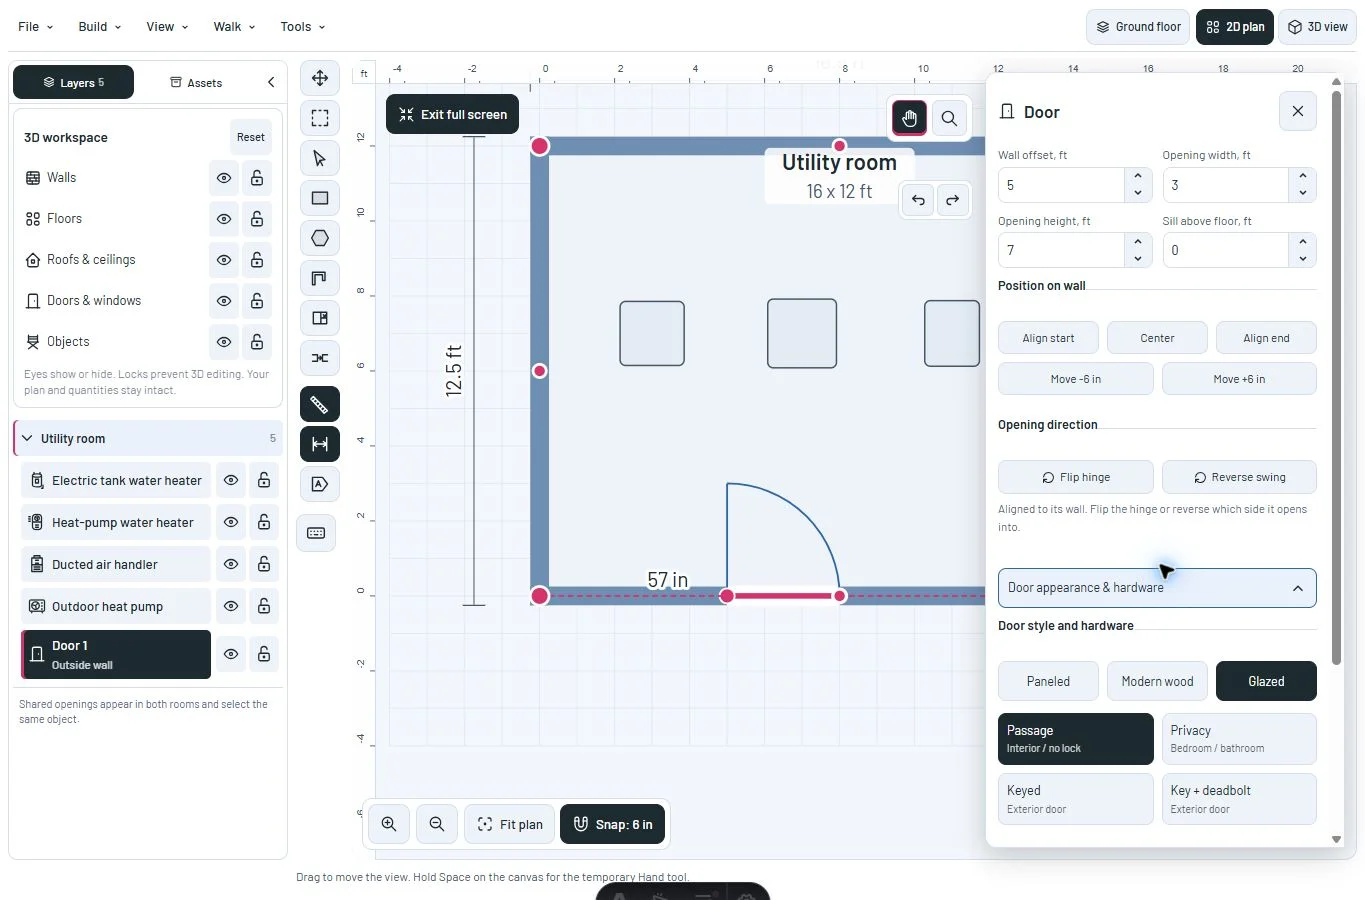
Edit in one readable sheet at a time, return to the canvas and resume tools without losing your place. Property forms use consistent field sizes and separated option groups.

  • Switch between Layers, Selection, open Tools and View from the bottom navigation.
  • Keep dimensions first; expand appearance and support only when you need them.
Desktop plan with a scrollable door inspector and separate camera controlsView larger
Keep dimensions, direction and appearance in one inspector, with camera and history controls beside it.Development screenshot ·
Read the update
v0.1.0-alpha.41Planner

Plan a utility space with recognizable U.S. home equipment

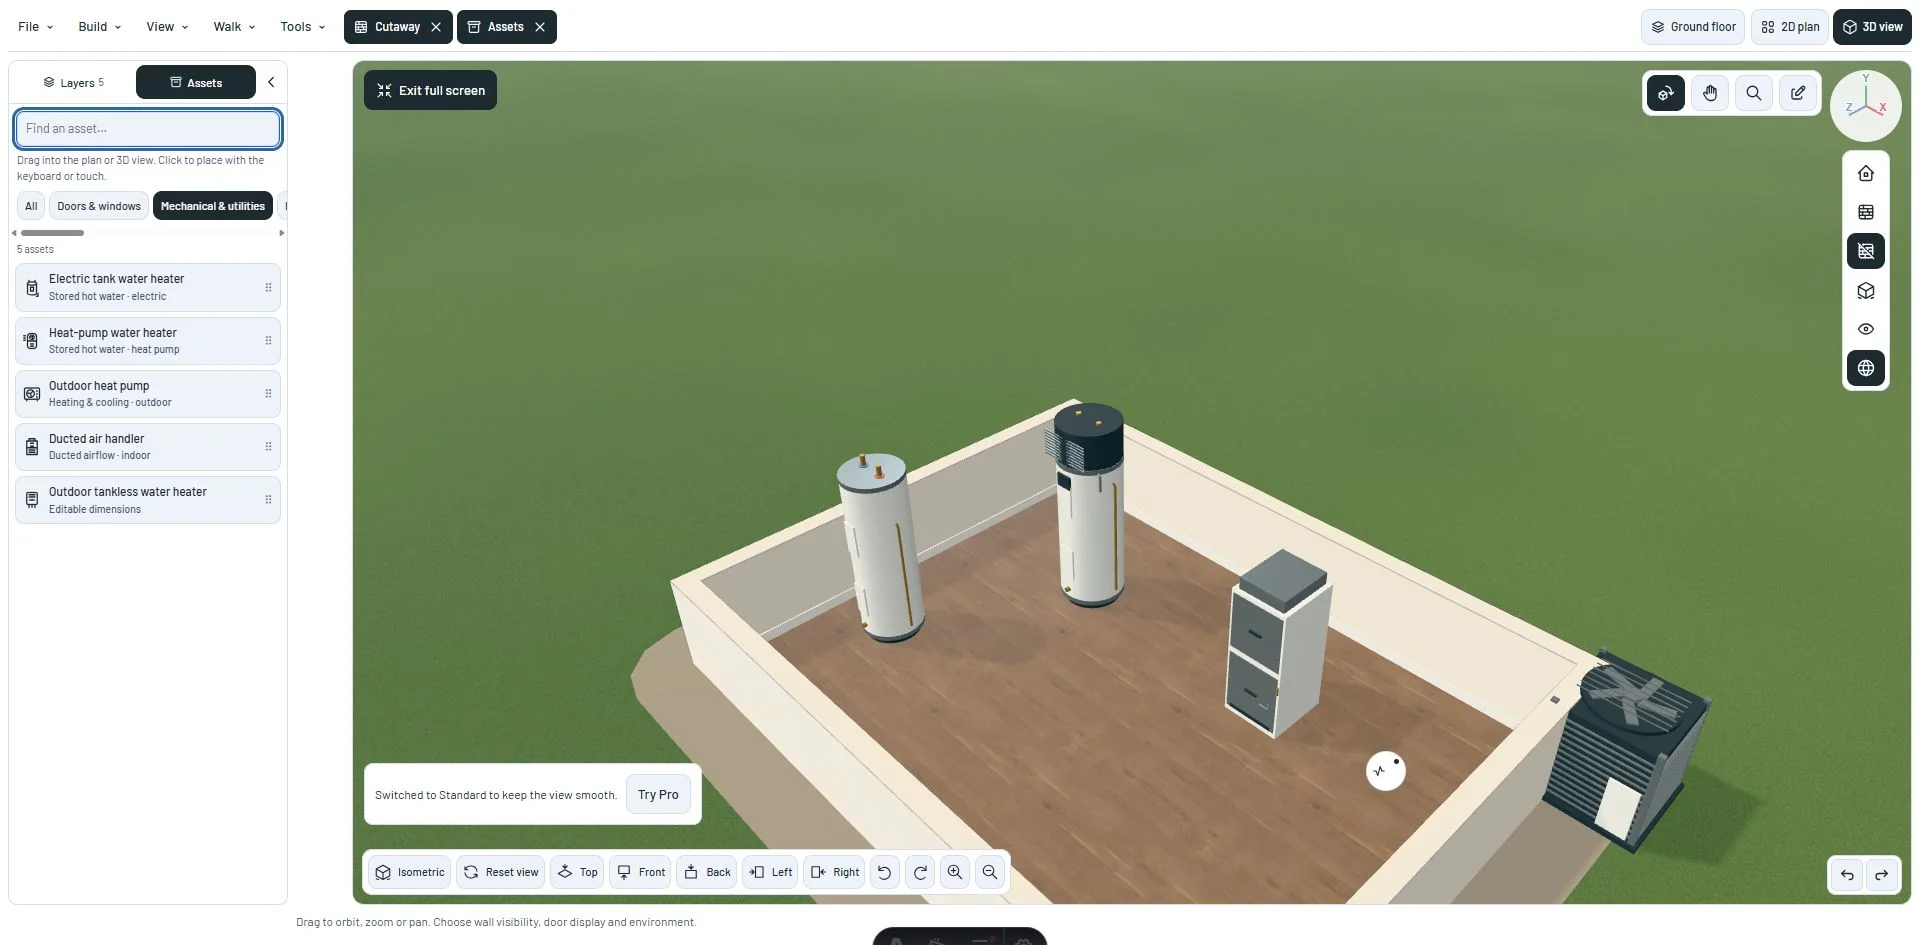
Place electric tank and heat-pump water heaters, an outdoor heat pump and a ducted air handler. Inspect what each piece does and what still needs planning.

  • Find four distinct models in Assets → Mechanical & utilities.
  • Check connections, service space and sourced reference dimensions for the selected equipment.
Mechanical equipment category beside the 3D roomView larger
Find storage water heating and heating/cooling equipment in Mechanical & utilities.Development screenshot ·
Read the update
v0.1.0-alpha.40Planner

Keep the whole scene in reach while choosing materials

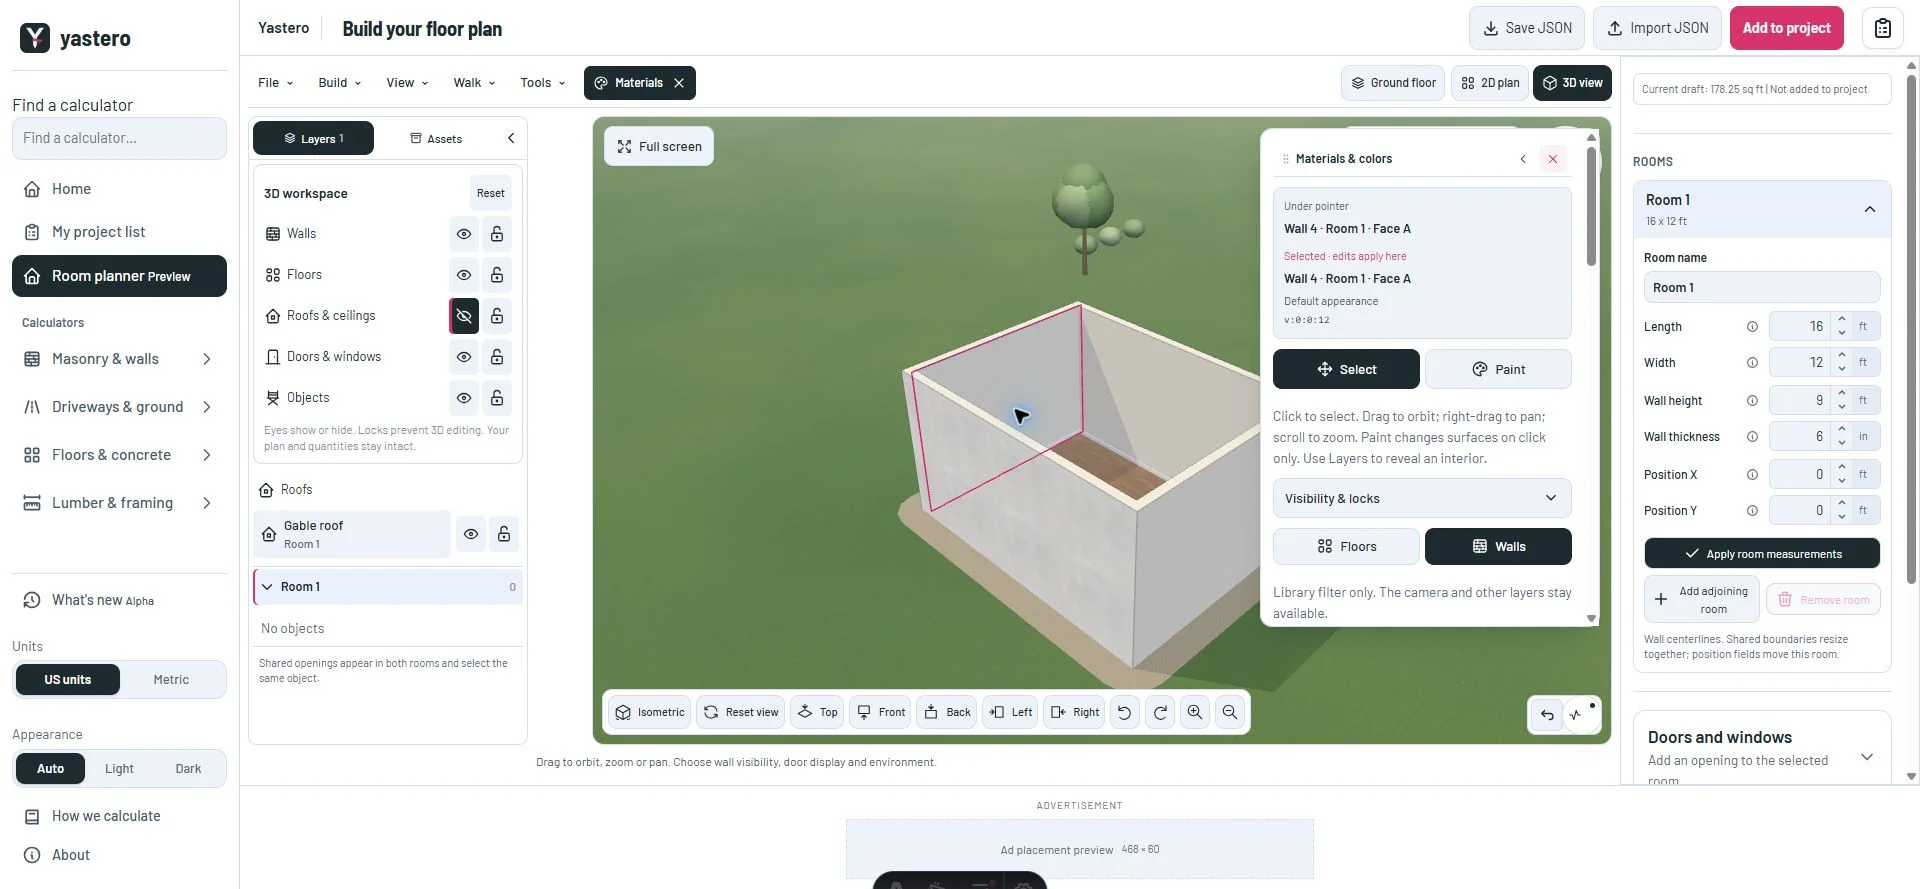
Select and inspect surfaces without changing the camera. Hide or lock 3D layers, paint deliberately, and keep the building and garden visible while you work.

  • Use eyes and locks for the 3D workspace, plus individual roof, door, window and object controls.
  • See the wall face under the pointer and the surface that will receive your changes.
Material editor with a selected interior wall, layers and camera controlsView larger
Select a surface while keeping the building in view.Development screenshot ·
Read the update
v0.1.0-alpha.39Planner

Give your rooms real surface detail

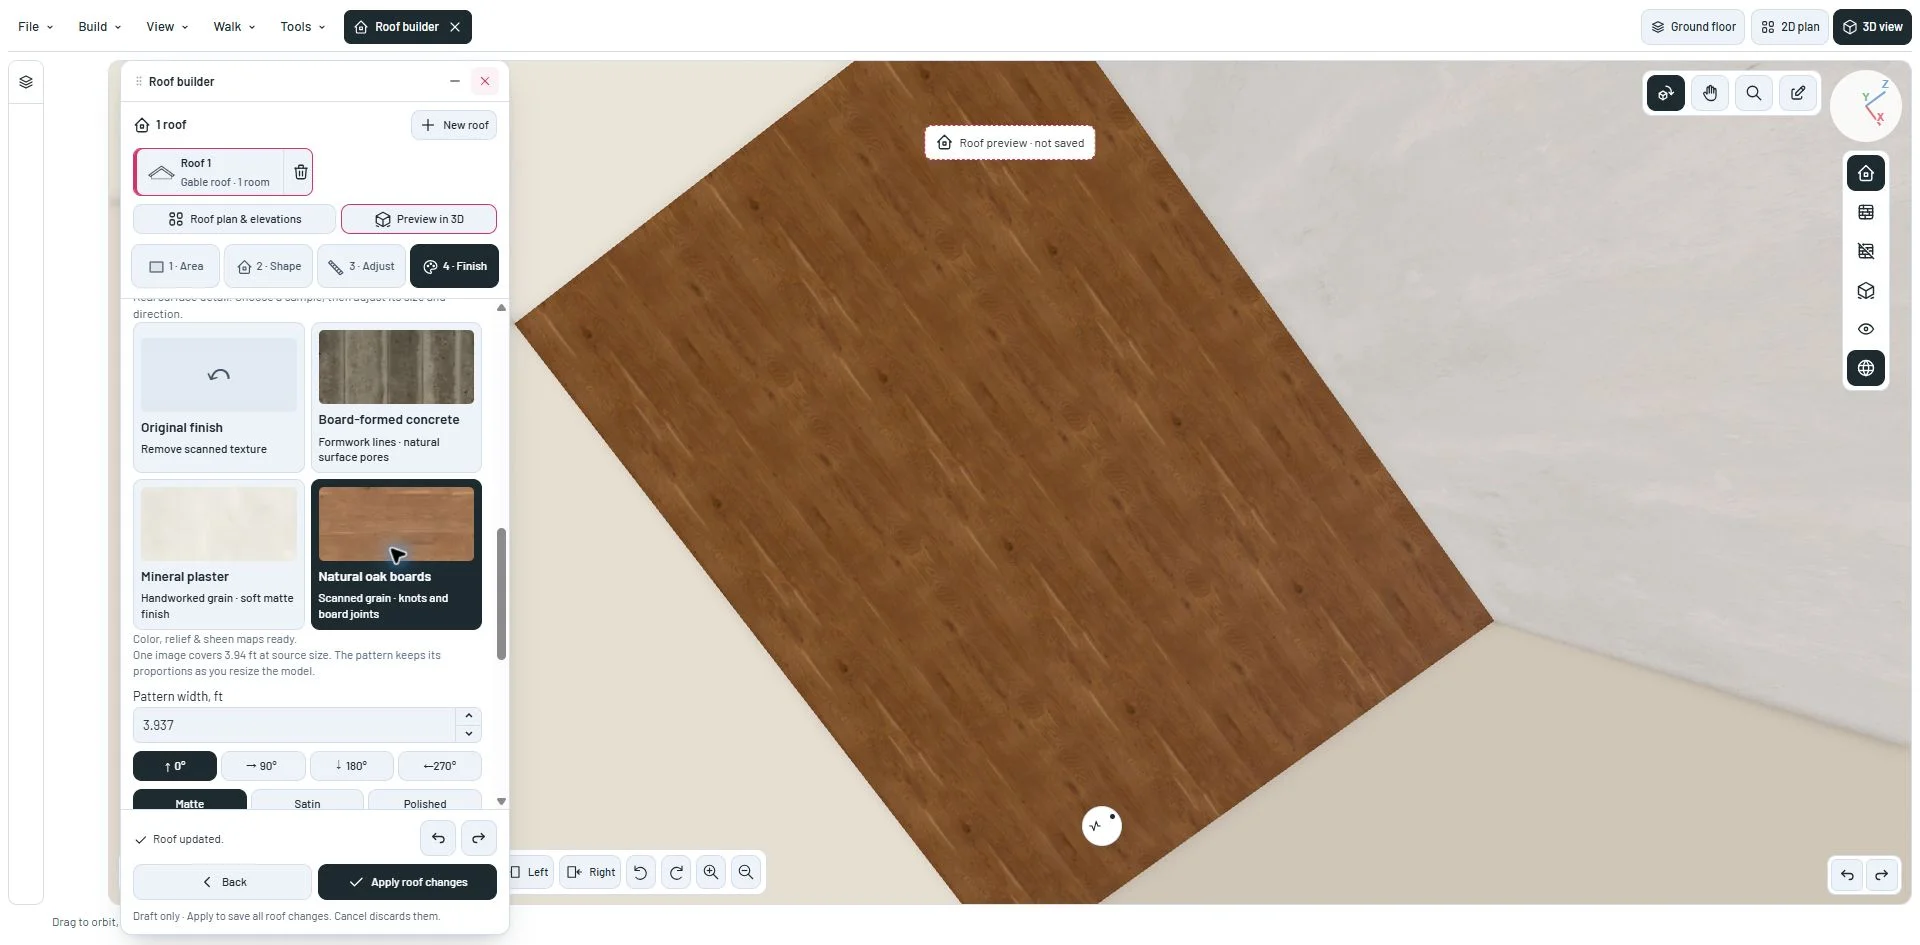
Apply scanned oak, mineral plaster and board-formed concrete to floors, wall faces and continuous ceilings. Adjust their physical size and direction while you design.

  • Scanned color, normal and roughness maps respond to the scene lighting.
  • Keep texture proportions while changing the size of the building.
Roof builder and a room with a scanned oak ceiling and softly textured mineral wall.View larger
Use scanned material maps directly on the room you are designing.Development screenshot ·
Read the update
v0.1.0-alpha.38Planner

Choose the ceiling you see from inside

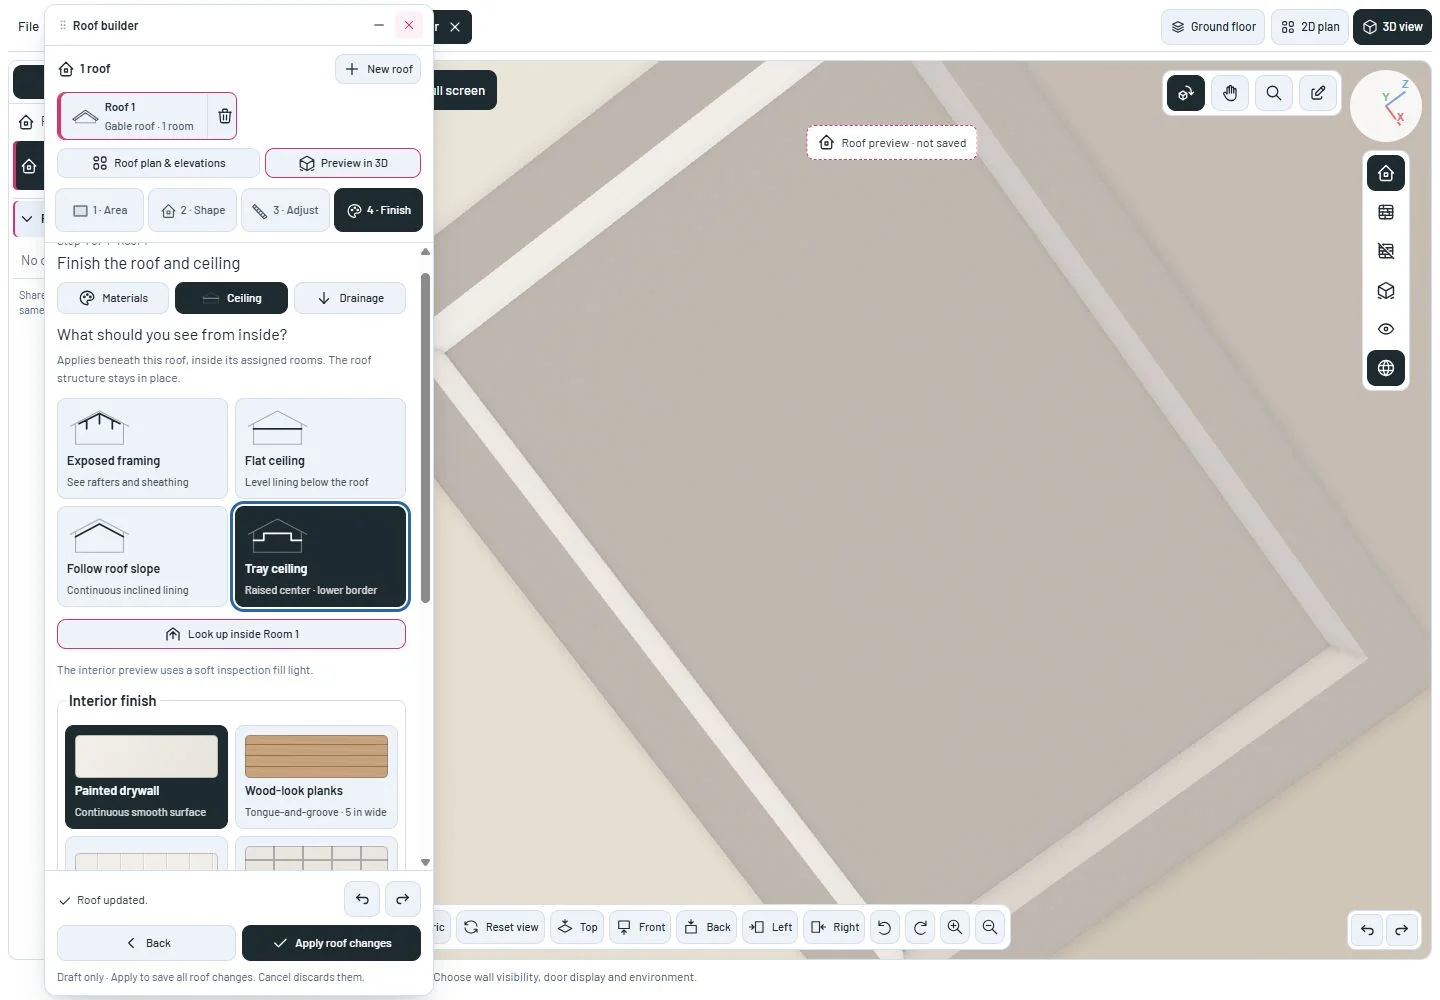
Keep the roof structure and add a flat, sloped or tray ceiling. Compare painted drywall, decorative planks, PVC and a suspended tile grid from inside the room.

  • Choose ceiling shape and finish separately, with a live interior preview.
  • Keep exposed framing, or cover it without removing the structure.
Roof builder showing a raised-center drywall ceiling from inside the room.View larger
Choose a ceiling shape, then inspect it from inside.Development screenshot ·
Read the update
v0.1.0-alpha.37Planner

Move planner windows anywhere on your screen

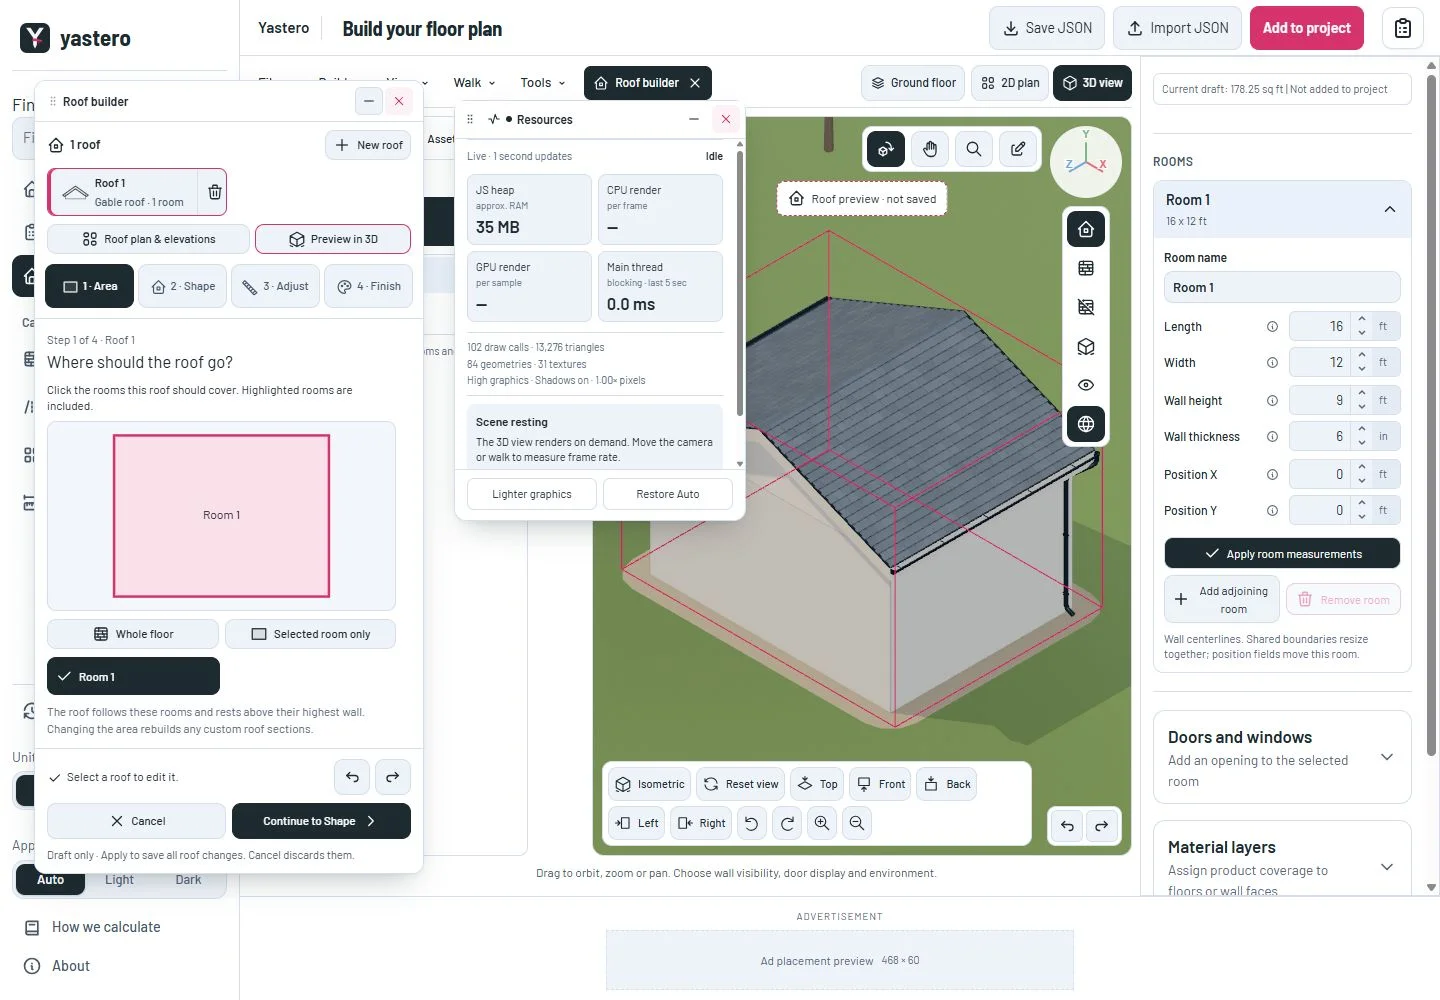
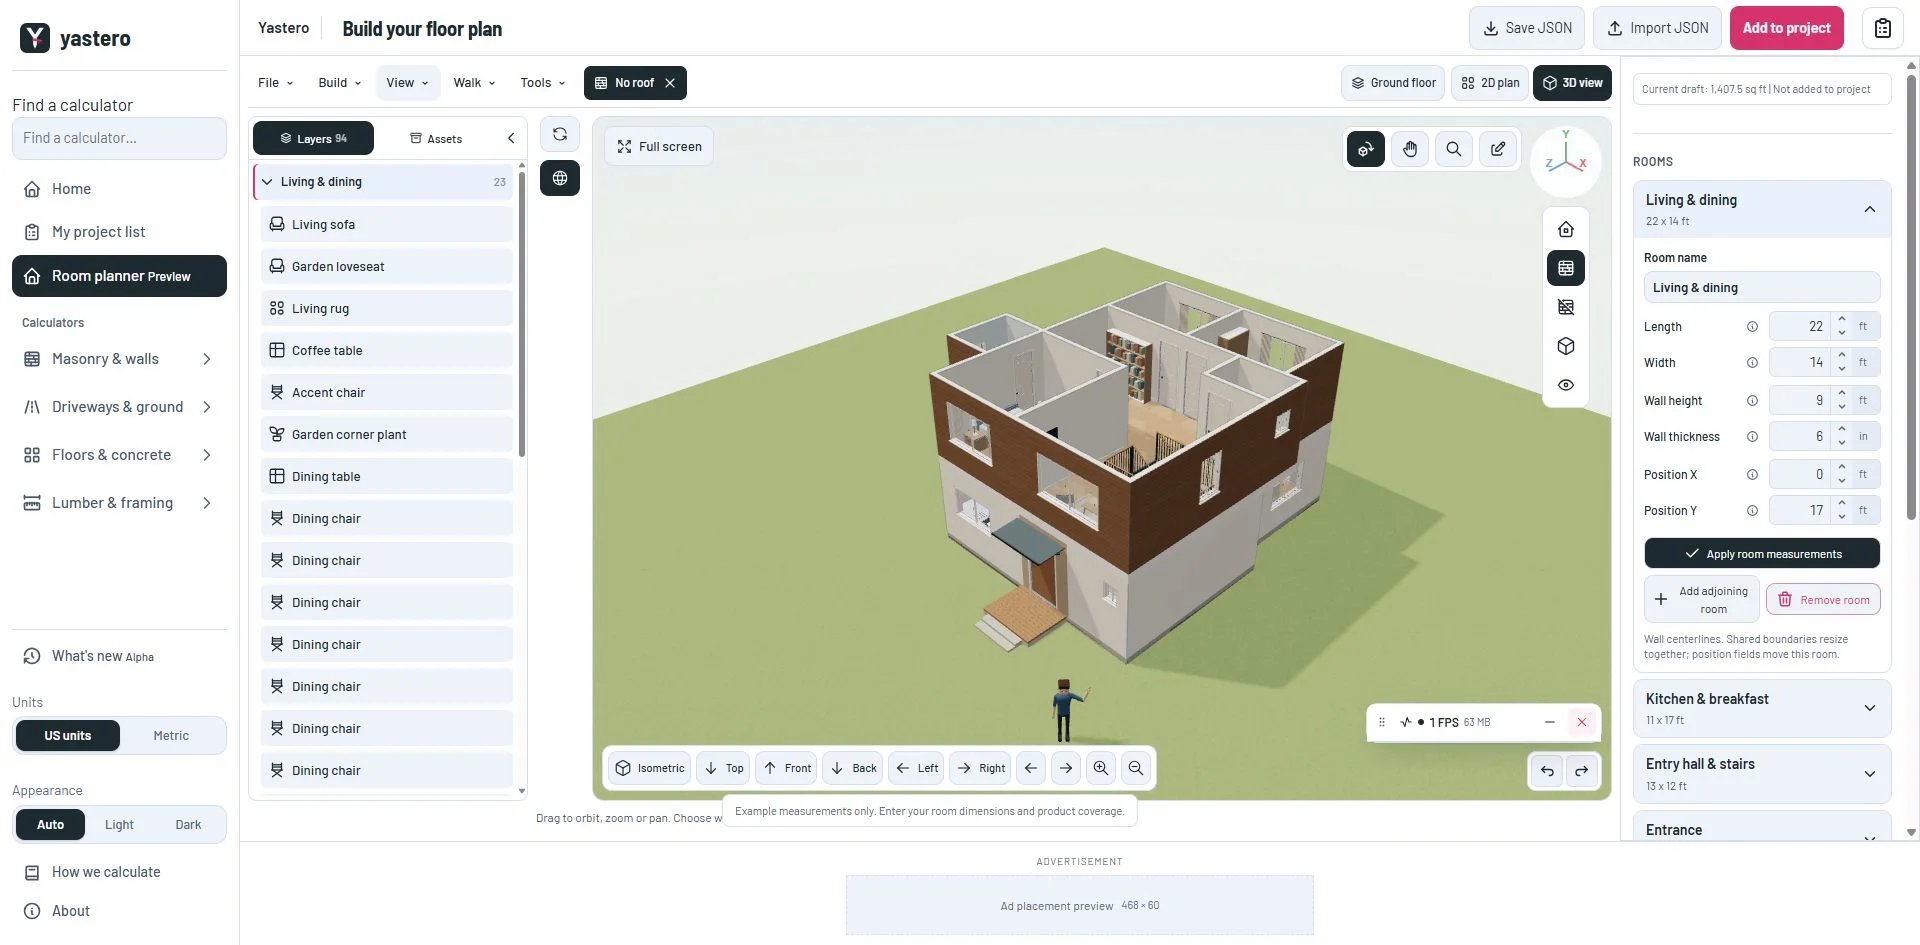
Drag Roof builder, Resources and other floating tools beyond the 2D or 3D preview. Keep the model clear while the controls stay within reach.

  • Place floating tools over the surrounding page without clipping at the preview edge.
  • Keep the same screen position when expanding, with only the adjustment needed to fit.
Roof builder over the site navigation and Resources over the Layers panel, both outside the 3D preview with the house visible.View larger
Drag the title bar beyond the preview edge to clear the model.Development screenshot ·
Read the update
v0.1.0-alpha.36Planner

Choose one or two downspouts for each gutter strip

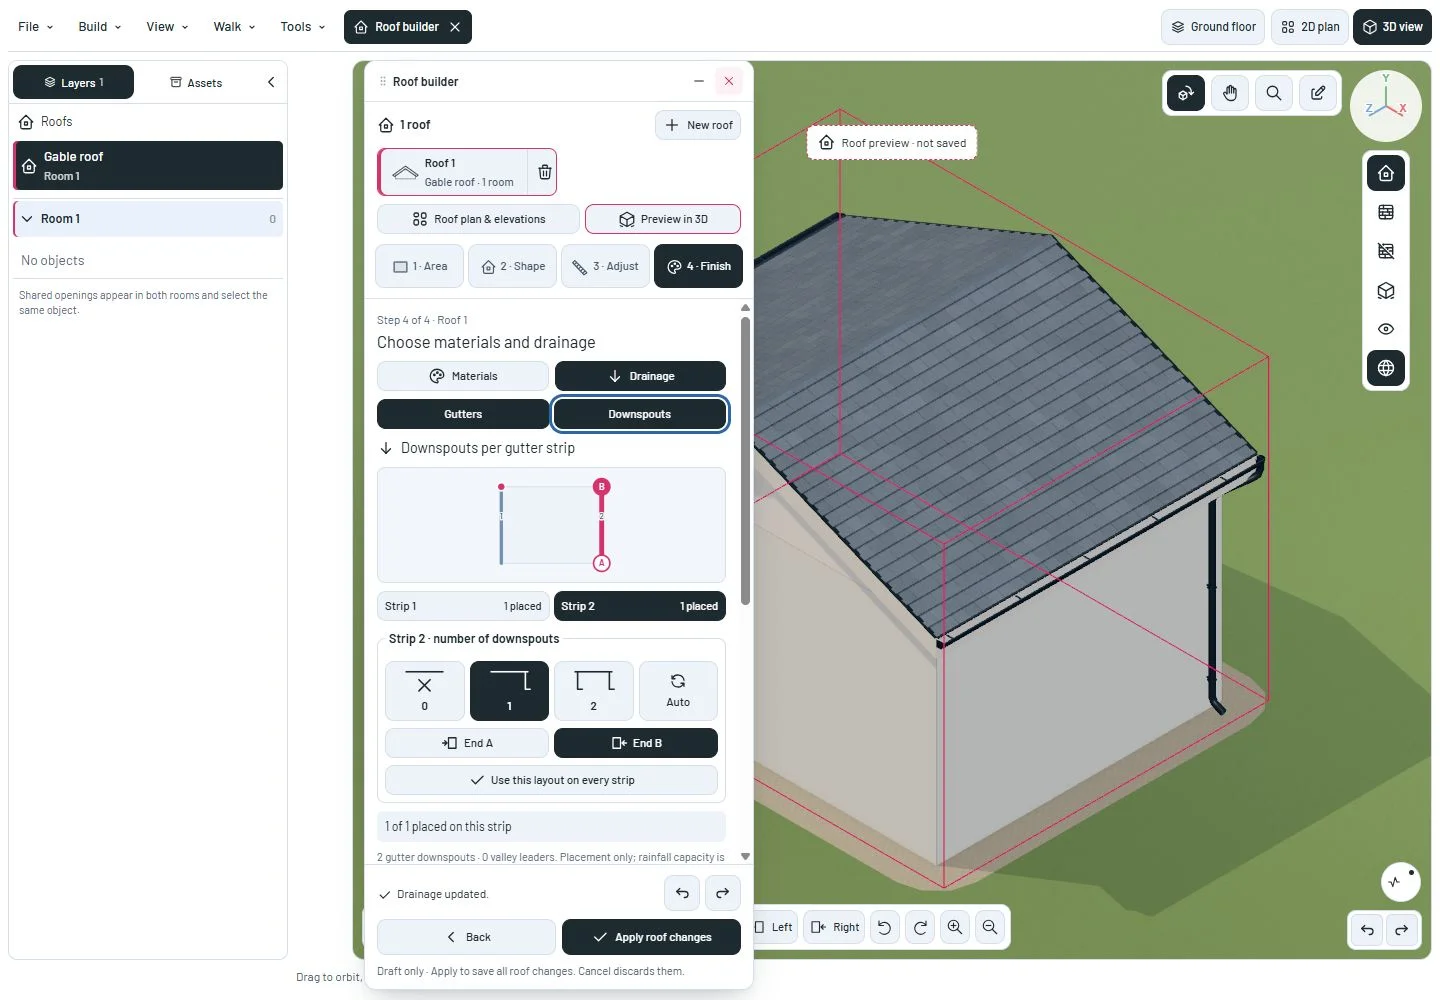
Select a gutter on the roof plan, choose zero, one or two downspouts, and see the actual result in 3D. For a single outlet, choose end A or B.

  • Control each straight gutter strip independently, or apply its layout to the whole roof.
  • Check placed outlets on the plan and undo changes before saving.
Roof builder Drainage panel with one outlet per gutter strip, end B selected and a matching single pipe on the visible facade.View larger
Finish → Drainage: select a strip, choose 1, then A or B.Development screenshot ·
Read the update
v0.1.0-alpha.35Planner

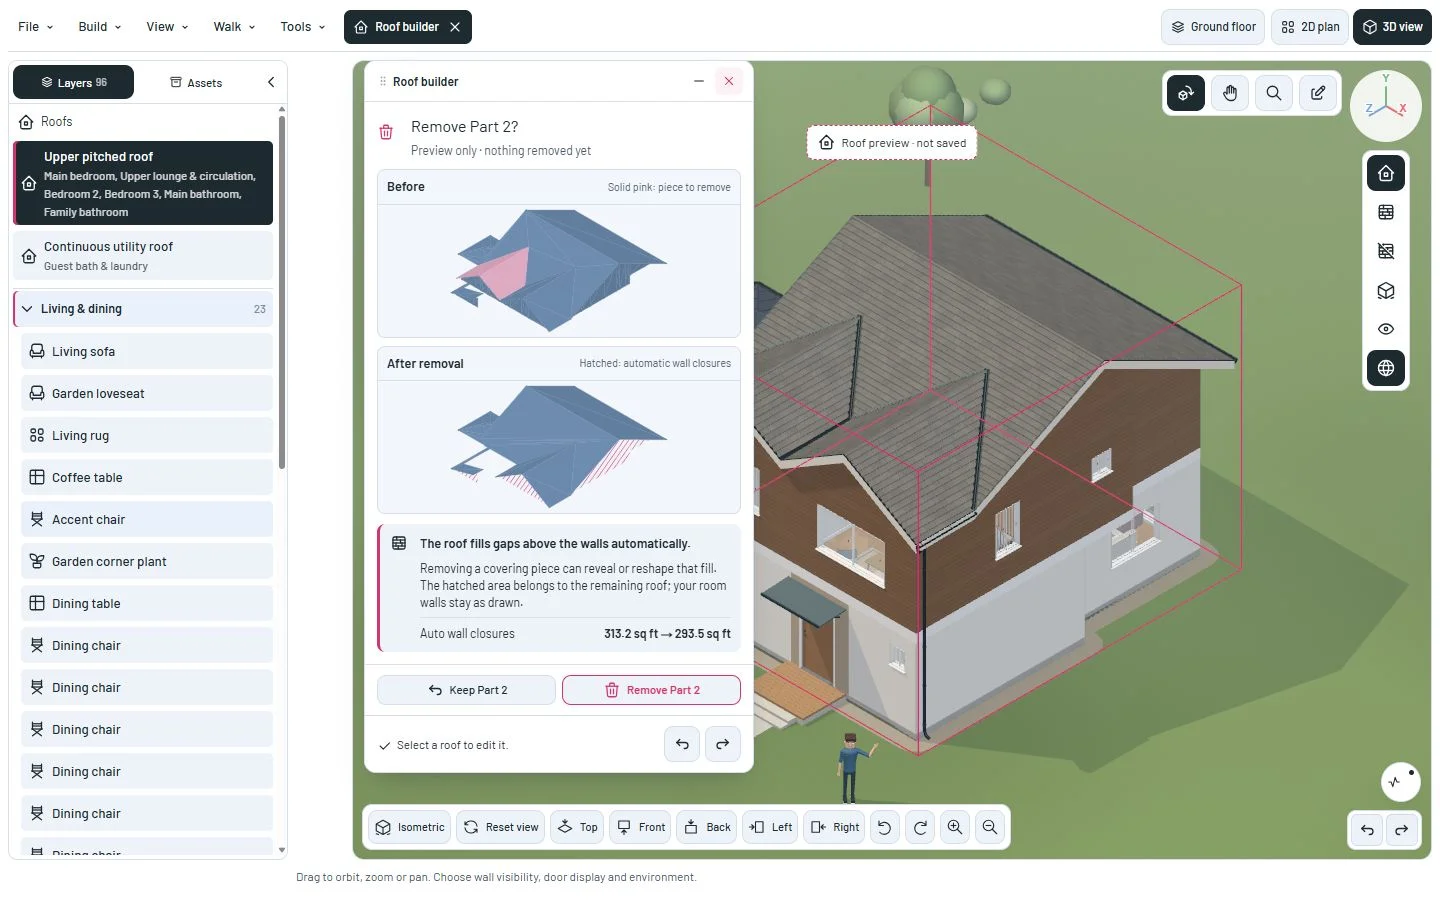
See what removing a roof piece will change

Compare the roof before and after removal, including the fill above supporting walls. Keep the piece, remove it, or undo without losing track of the remaining pieces.

  • Preview the exact piece to remove and the automatic roof-wall closures.
  • Keep stable piece numbers and choose the next editing target yourself.
Roof removal review beside the house with before and after diagrams and automatic closures hatched.View larger
Preview the result while the main scene keeps its current roof.Development screenshot ·
Read the update
v0.1.0-alpha.34Planner

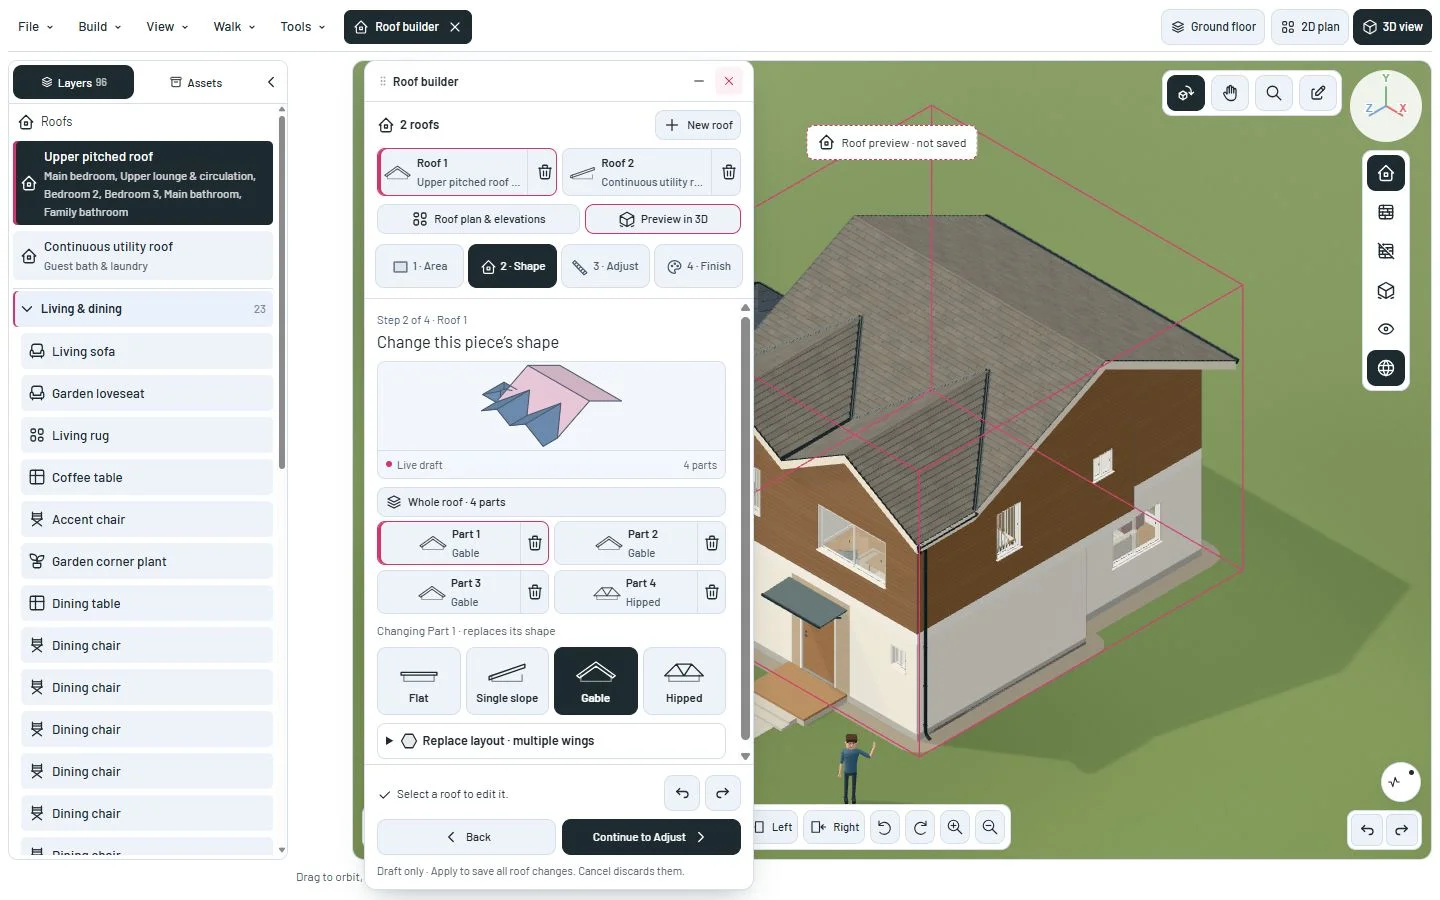
See which roof piece you are changing, and undo any draft edit

Numbered roofs and parts, visible delete buttons and a live shape preview make roof editing easier to follow. Changes stay in one draft until you apply them.

  • Change a piece’s shape without adding another roof.
  • Delete, undo and redo while keeping your other pending roof edits.
Roof builder beside the house, with two numbered roofs, four parts and Gable selected.View larger
Select a roof and a part before changing its shape.Development screenshot ·
Read the update
v0.1.0-alpha.33Planner

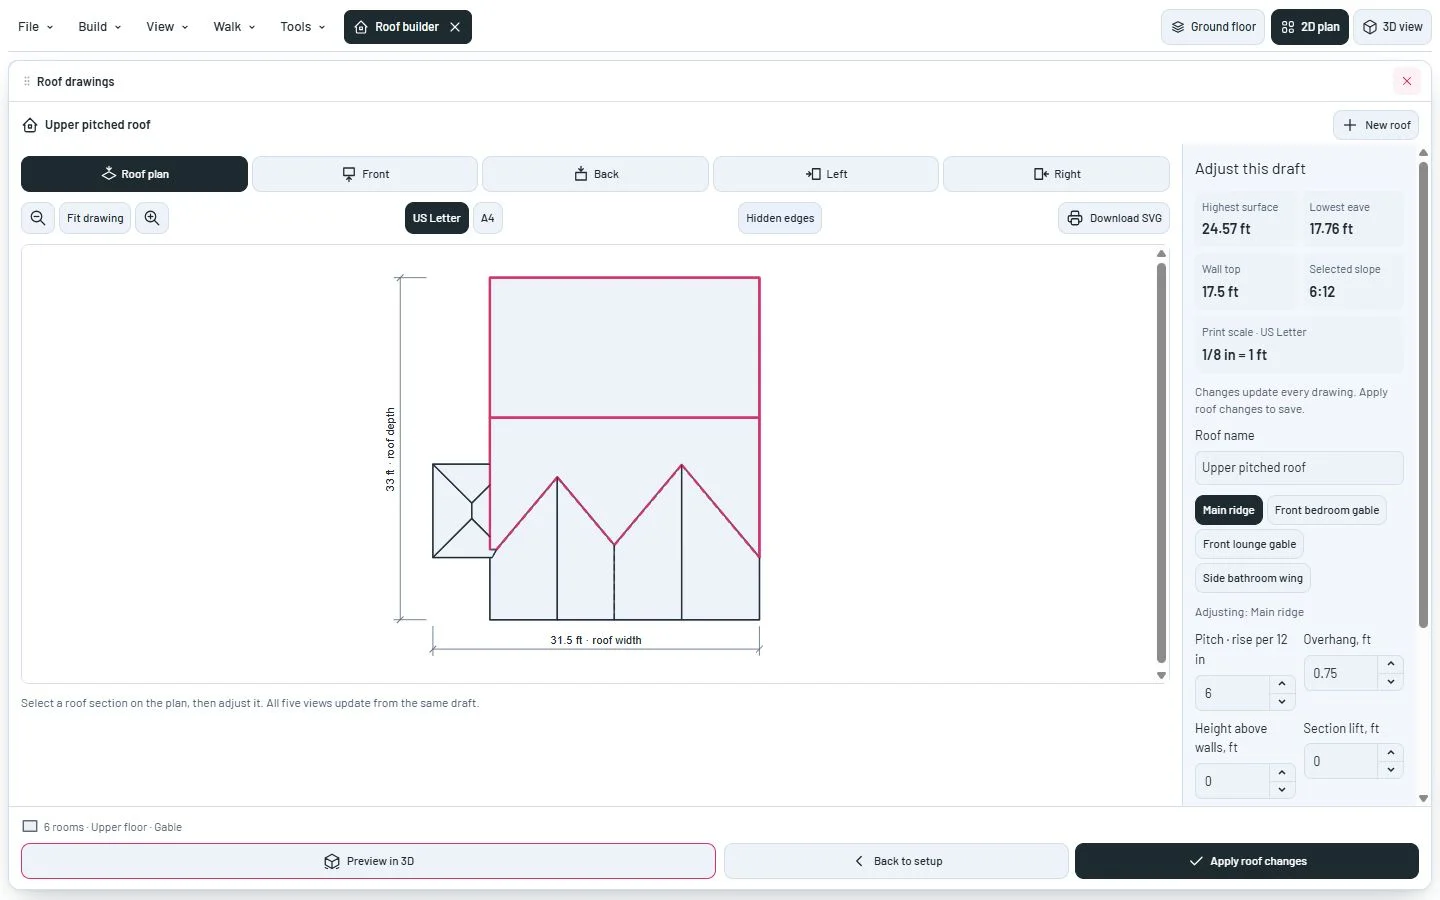
Design your roof from a plan and four elevations

Roof builder now has a drawing desk with a roof plan, front, back and both side elevations. Adjust the draft and check its dimensions before saving.

  • Compare five orthographic views with actual roof dimensions and heights.
  • Download a scaled vector sheet for US Letter or A4.
Roof drawing desk with a dimensioned plan, five view tabs and section settings.View larger
The roof plan and four elevations share the same editable draft.Development screenshot ·
Read the update
v0.1.0-alpha.32Planner

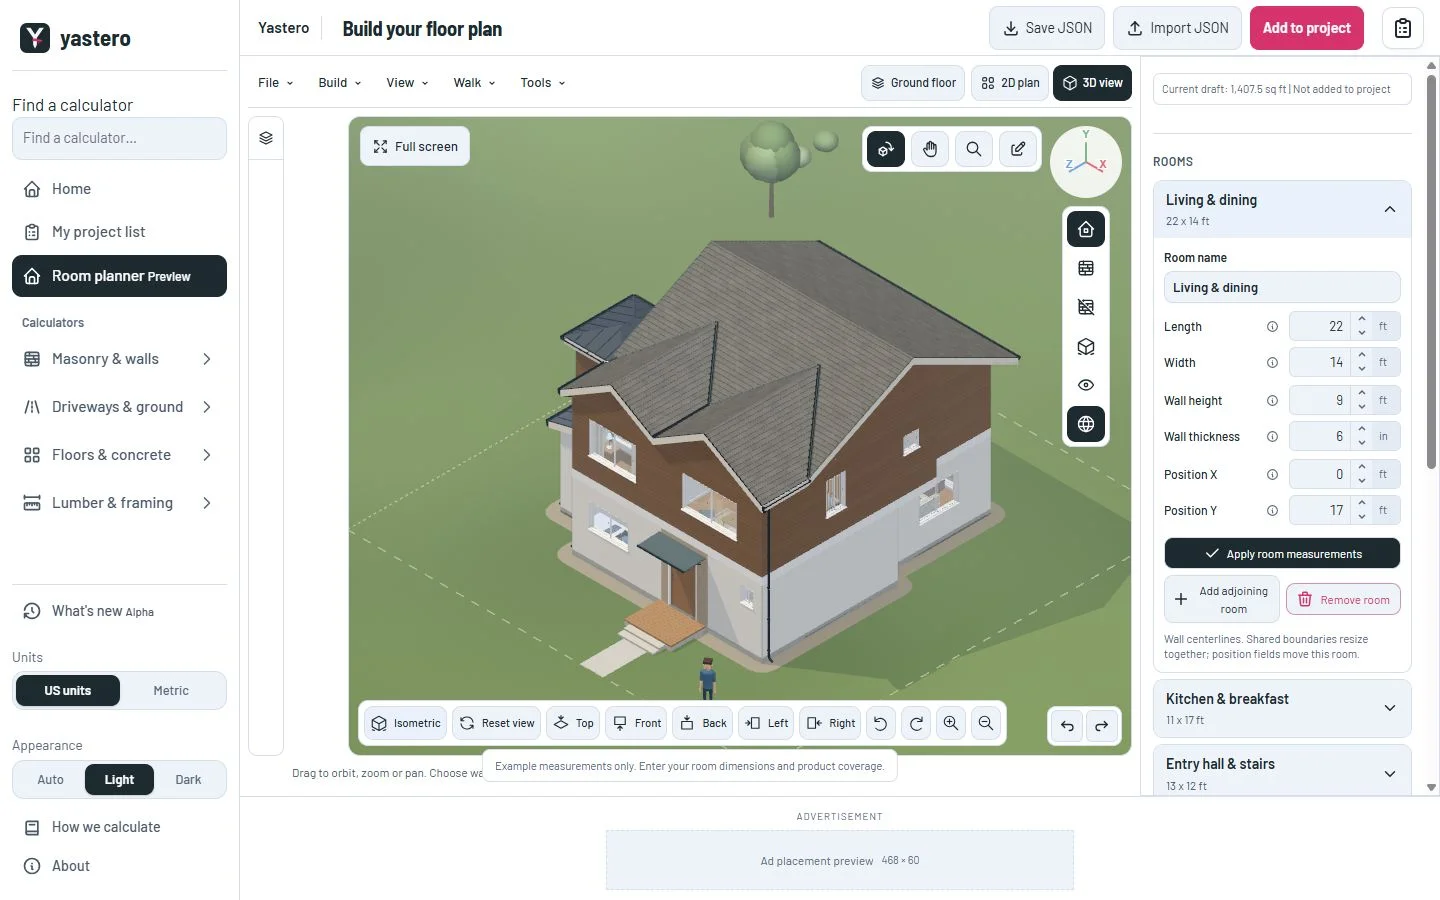
Keep your wall colors, with finer Pro surface detail

Pro adds subtle paint and plaster relief, background planting and an optional illustrative lot outline.

  • Keep your chosen wall colors while adding fine surface detail.
  • Show or hide an example garden boundary from View.
The sample house with preserved wall colors, background planting and a dashed illustrative boundary.View larger
Pro surface detail and background planting, with an optional example boundary.Development screenshot ·
Read the update
v0.1.0-alpha.31Planner

Add depth at corners and joints with Pro contact shading

Pro adds subtle shading at nearby surfaces, with antialiased edges. The effect helps separate wall-floor joints, frames and roof details.

  • See local depth around corners and under nearby surfaces.
  • Return to Standard if rendering stays expensive, with Try Pro available.
The sample house in Pro with subtle contact shading and antialiased edges.View larger
Pro adds local contact shading while preserving the main image resolution.Development screenshot ·
Read the update
v0.1.0-alpha.30Planner

Place your house on a softer landscape, with an entry path

The garden now has varied grass, an illustrative path from an exterior ground-floor door and edging that follows the building footprint.

  • See the entrance connected to the surrounding garden.
  • Keep decorative landscaping separate from your plan and shopping list.
The sample house on varied grass with an entry path and a narrow border around its footprint.View larger
The garden, entry path and edging follow the house in Pro.Development screenshot ·
Read the update
v0.1.0-alpha.29Planner

Choose Pro lighting, balanced editing or a clean drawing view

Pro adds daylight reflections and sharper shadows after your house appears. Standard balances detail and editing; Flat keeps a clean studio view.

  • Switch between Pro, Standard and Flat from View → Graphics.
  • Keep your graphics preference across visits without changing the saved plan.
The Maqui-inspired sample house in the planner with daylight illumination and detailed roof shadows.View larger
Pro adds daylight illumination after the first view of the house.Development screenshot ·
Read the update
v0.1.0-alpha.28Planner

Find roofs in Layers and see your active selection

Each saved roof now appears in Layers. Select a roof to open its settings and keep a visible highlight on the element you are editing.

  • Access every roof from one list, including roofs on other floors.
  • Keep the selected roof, object or room visibly highlighted.
A utility roof selected in Layers with a dark active row, its exact name in Roof builder and an accent outline on the 3D building.View larger
The layer, editor and 3D outline identify the same roof.Development screenshot ·
Read the update
v0.1.0-alpha.27Planner

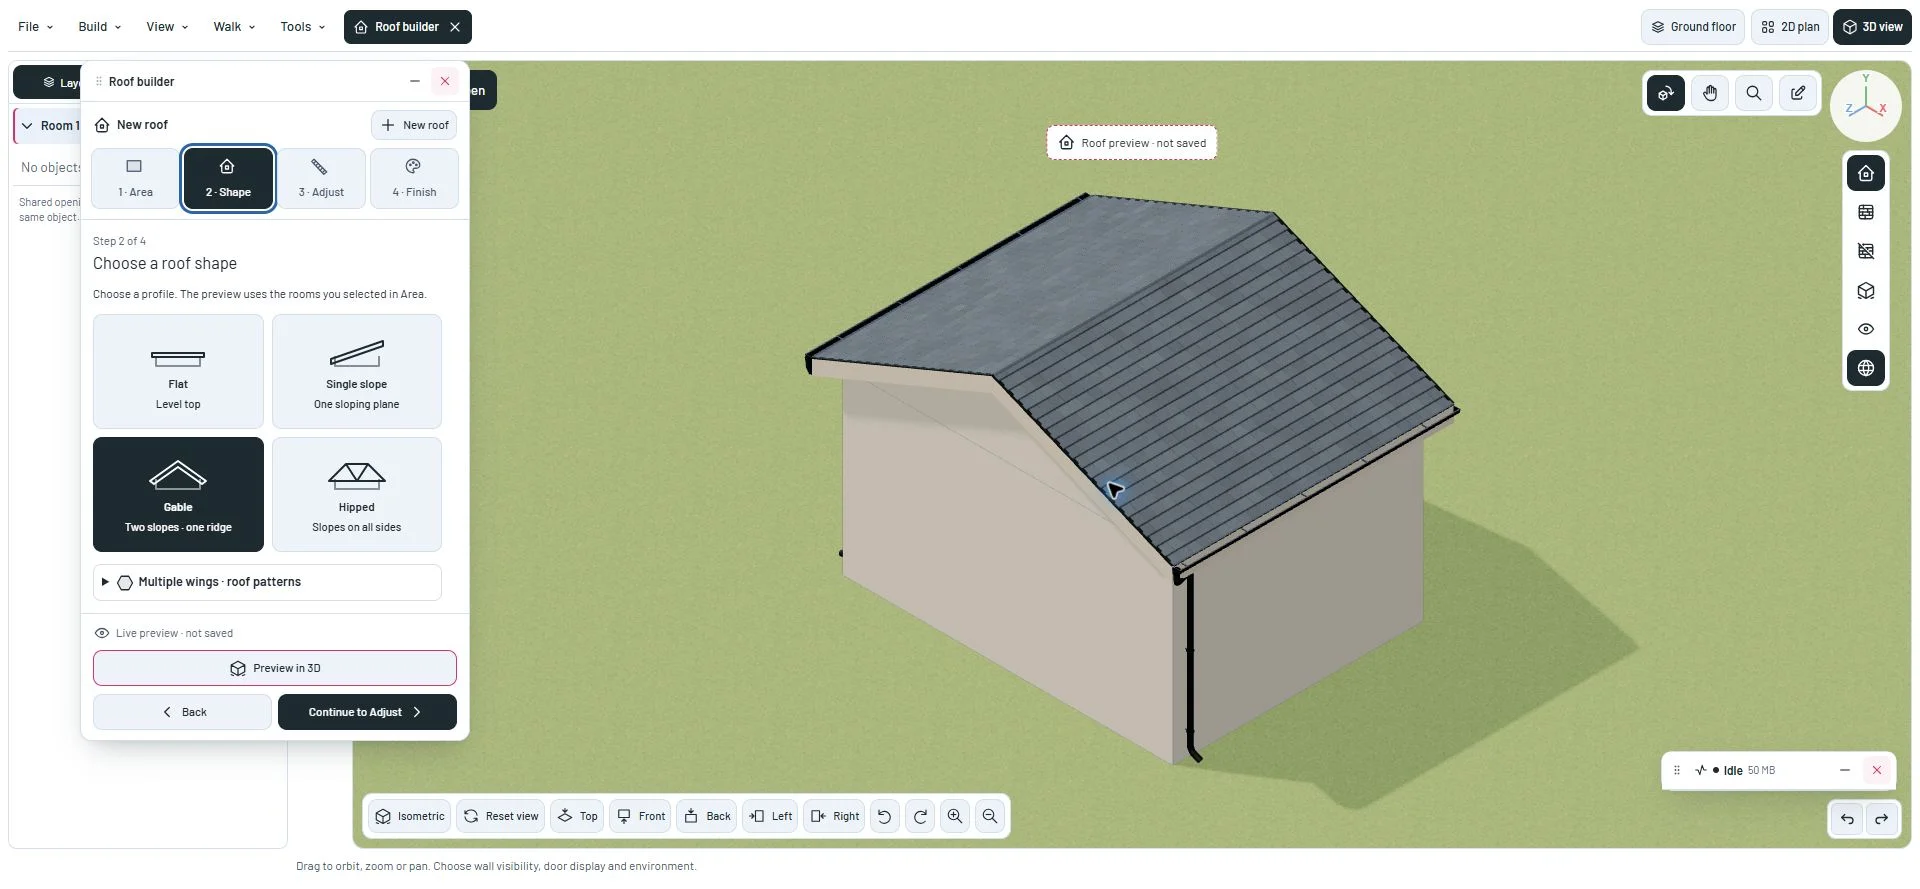
Build a roof in four clear steps, with a live preview

Choose the rooms on a coverage plan, pick an illustrated roof shape, adjust its slope and height, then finish the materials and drainage. Preview the result in 3D before saving.

  • Select roof coverage directly on a room map.
  • Preview, cancel or save the complete roof as one edit.
Roof builder at step two with illustrated Flat, Single slope, Gable and Hipped cards beside a live 3D roof preview marked not saved.View larger
Choose a profile and inspect the roof on the actual building before you save it.Development screenshot ·
Read the update
v0.1.0-alpha.26Planner

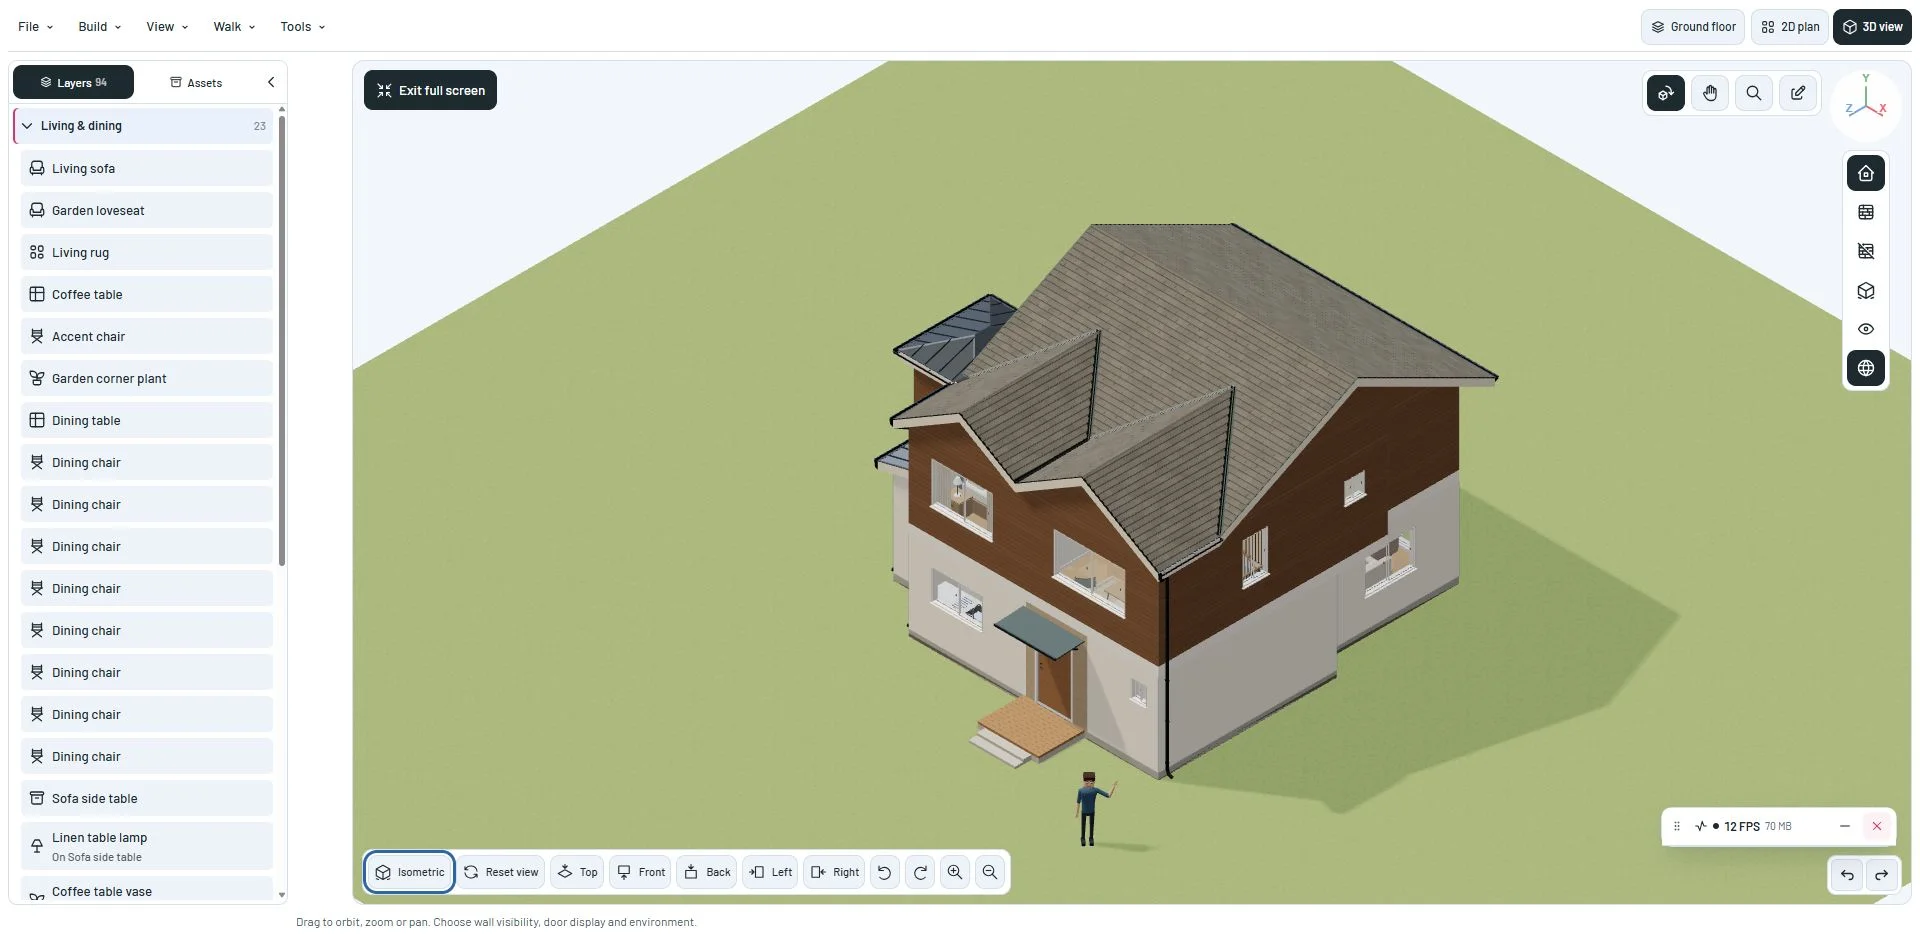
A true isometric view, with Reset beside it

Isometric now uses parallel projection with equal scale on all three axes. Reset view sits beside it on desktop and phones and restores the default perspective framing.

  • View parallel walls without perspective convergence.
  • Keep your isometric camera and zoom when returning from the 2D plan.
House shown in true isometric projection with parallel wall edges and Reset view immediately beside Isometric in the lower camera bar.View larger
Isometric uses equal axis scale; Reset view beside it restores the default perspective framing.Development screenshot ·
Read the update
v0.1.0-alpha.25Planner

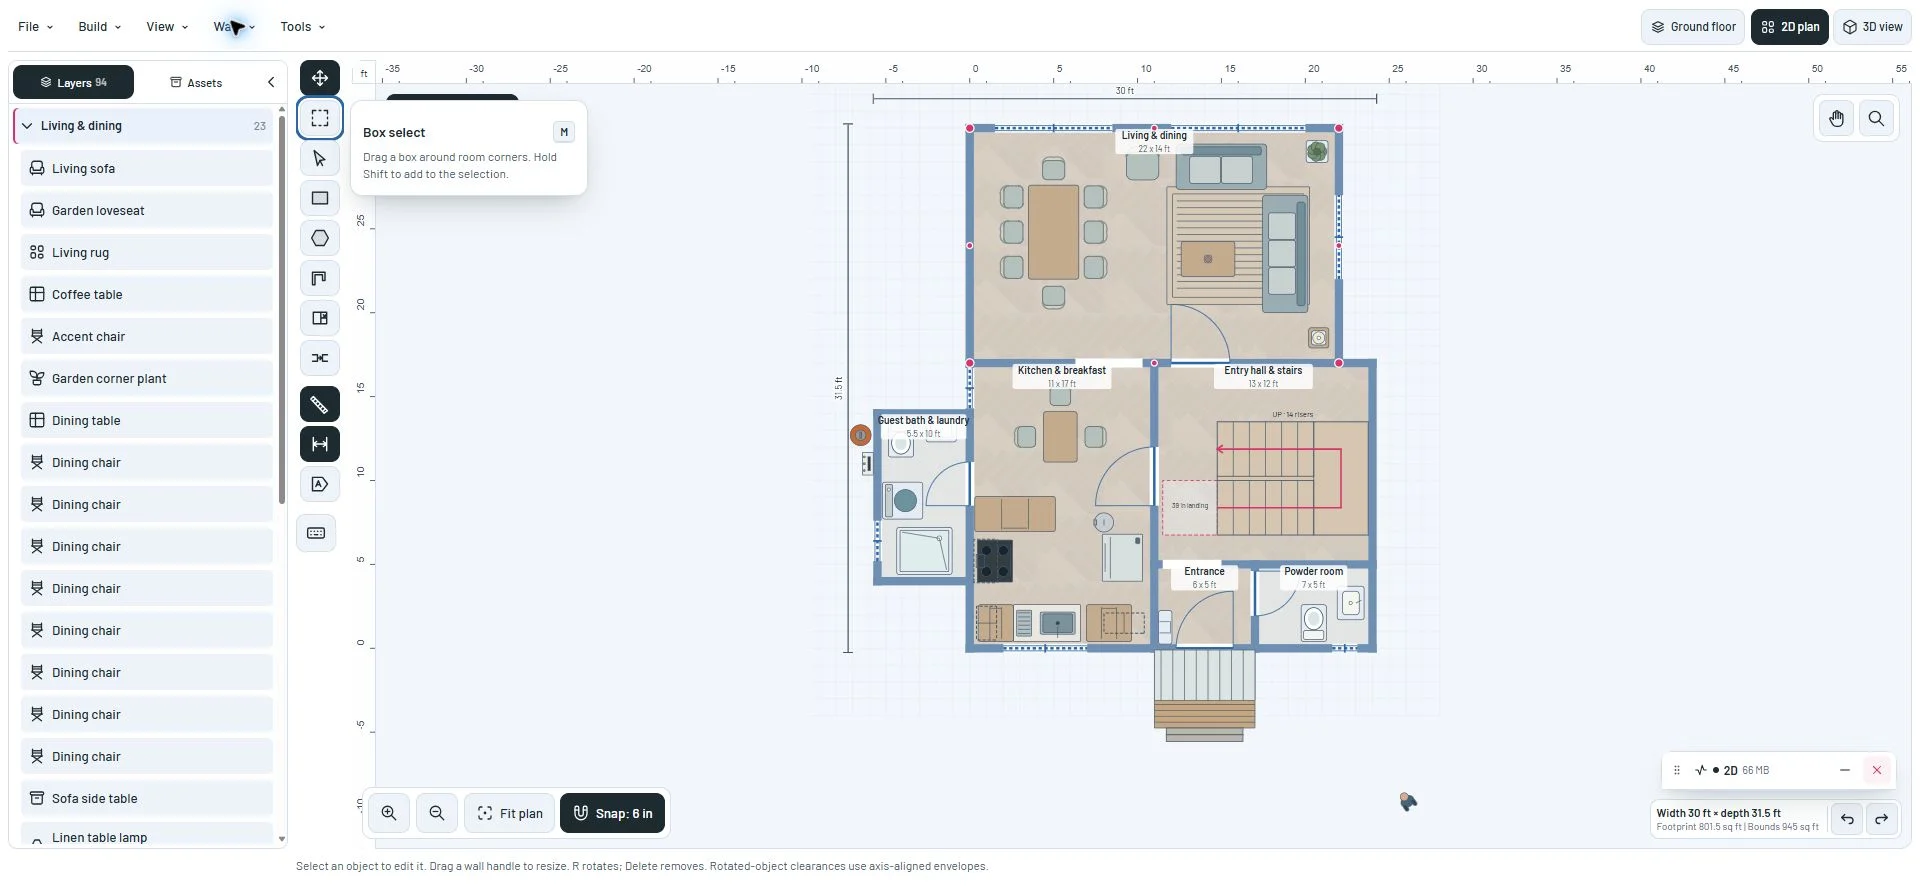
Clearer drawing tools with familiar keyboard shortcuts

The 2D toolbar has a cleaner icon family and keyboard shortcuts shown in contextual help. Hold Space to pan temporarily, and open the keyboard reference from the toolbar or with ?.

  • Use V to select objects, M to box-select corners and A to edit vertices.
  • Tooltips explain each action and show its keyboard shortcut.
2D floor planner with distinct vertical drawing icons and a Box select tooltip explaining Shift selection and showing the M shortcut.View larger
Tool actions and their actual keyboard bindings share the same contextual help.Development screenshot ·
Read the update
v0.1.0-alpha.24Planner

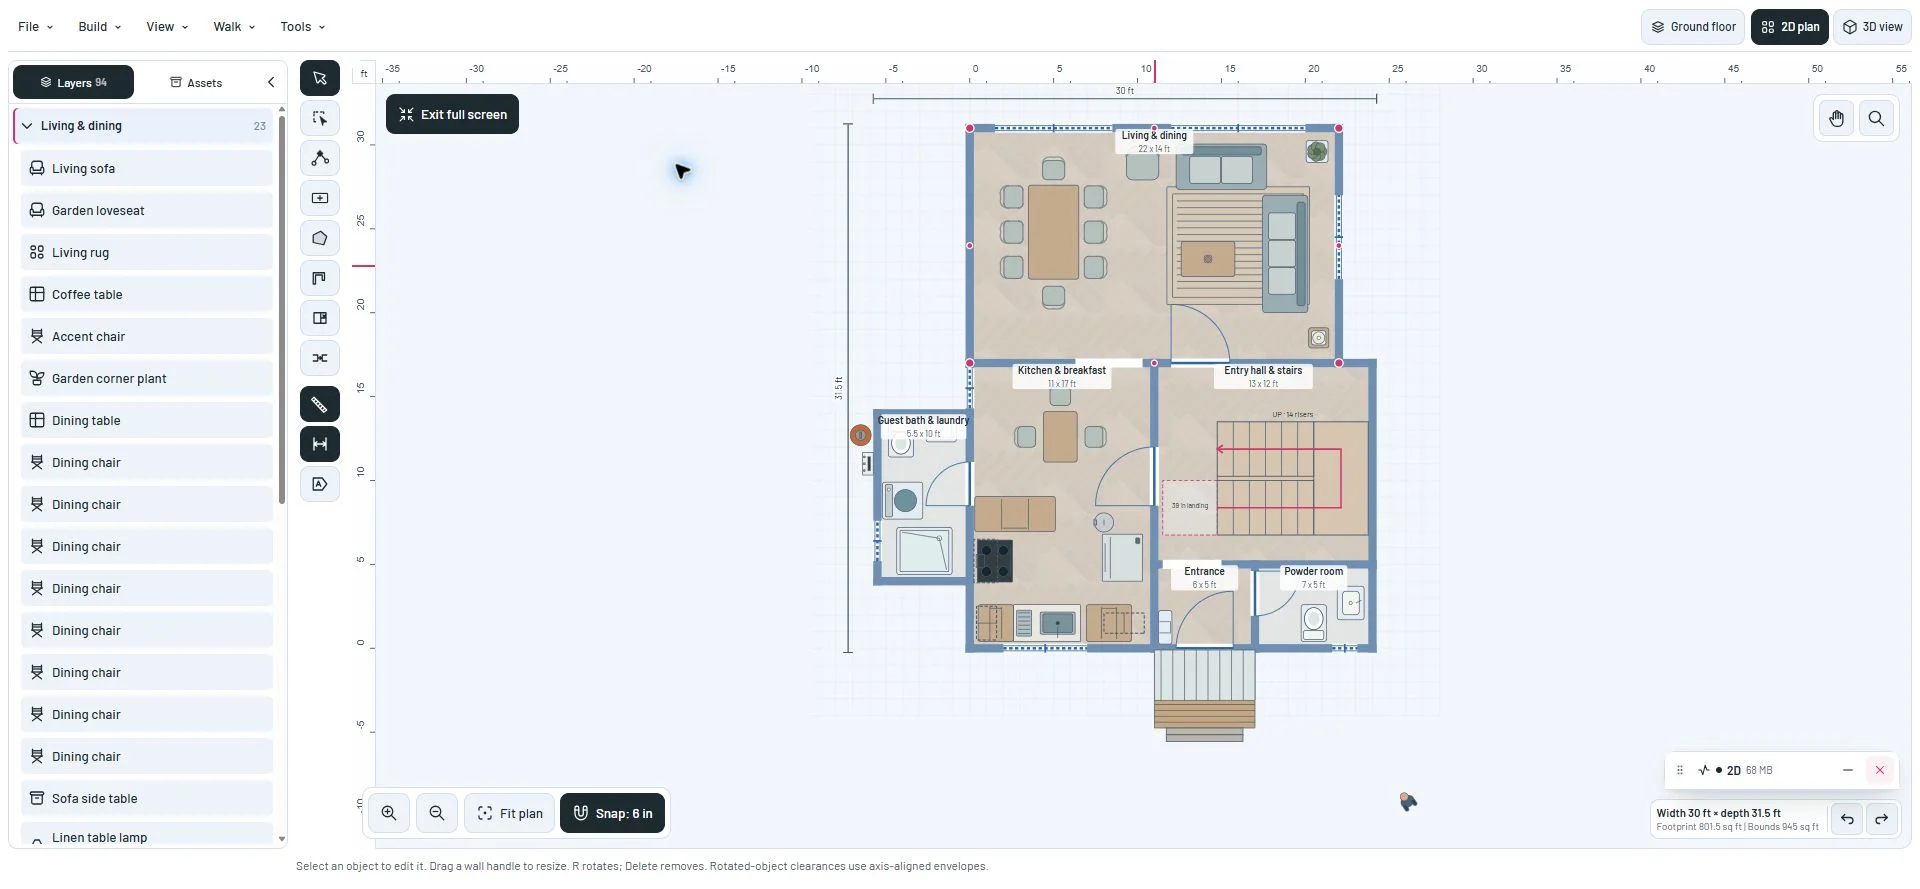
Draw open walls from the toolbar, with clearer tool icons

Draw wall now has its own open-ended wall icon and a direct place in the 2D toolbar. Drawing, selection, dimensions and camera controls use distinct symbols that explain their actions.

  • Choose Draw wall from the toolbar to begin an independent wall.
  • Wall opening now clearly means a passage in an existing wall.
2D planner with ruler, dimension-guide and object-label toggles in a vertical group below the drawing tools, and pan and zoom controls above the plan.View larger
Rulers, Guides and Labels share the left toolbar with drawing tools; pan and zoom stay above the plan.Development screenshot ·
Read the update
v0.1.0-alpha.23Planner

Box-select several room corners and move them together

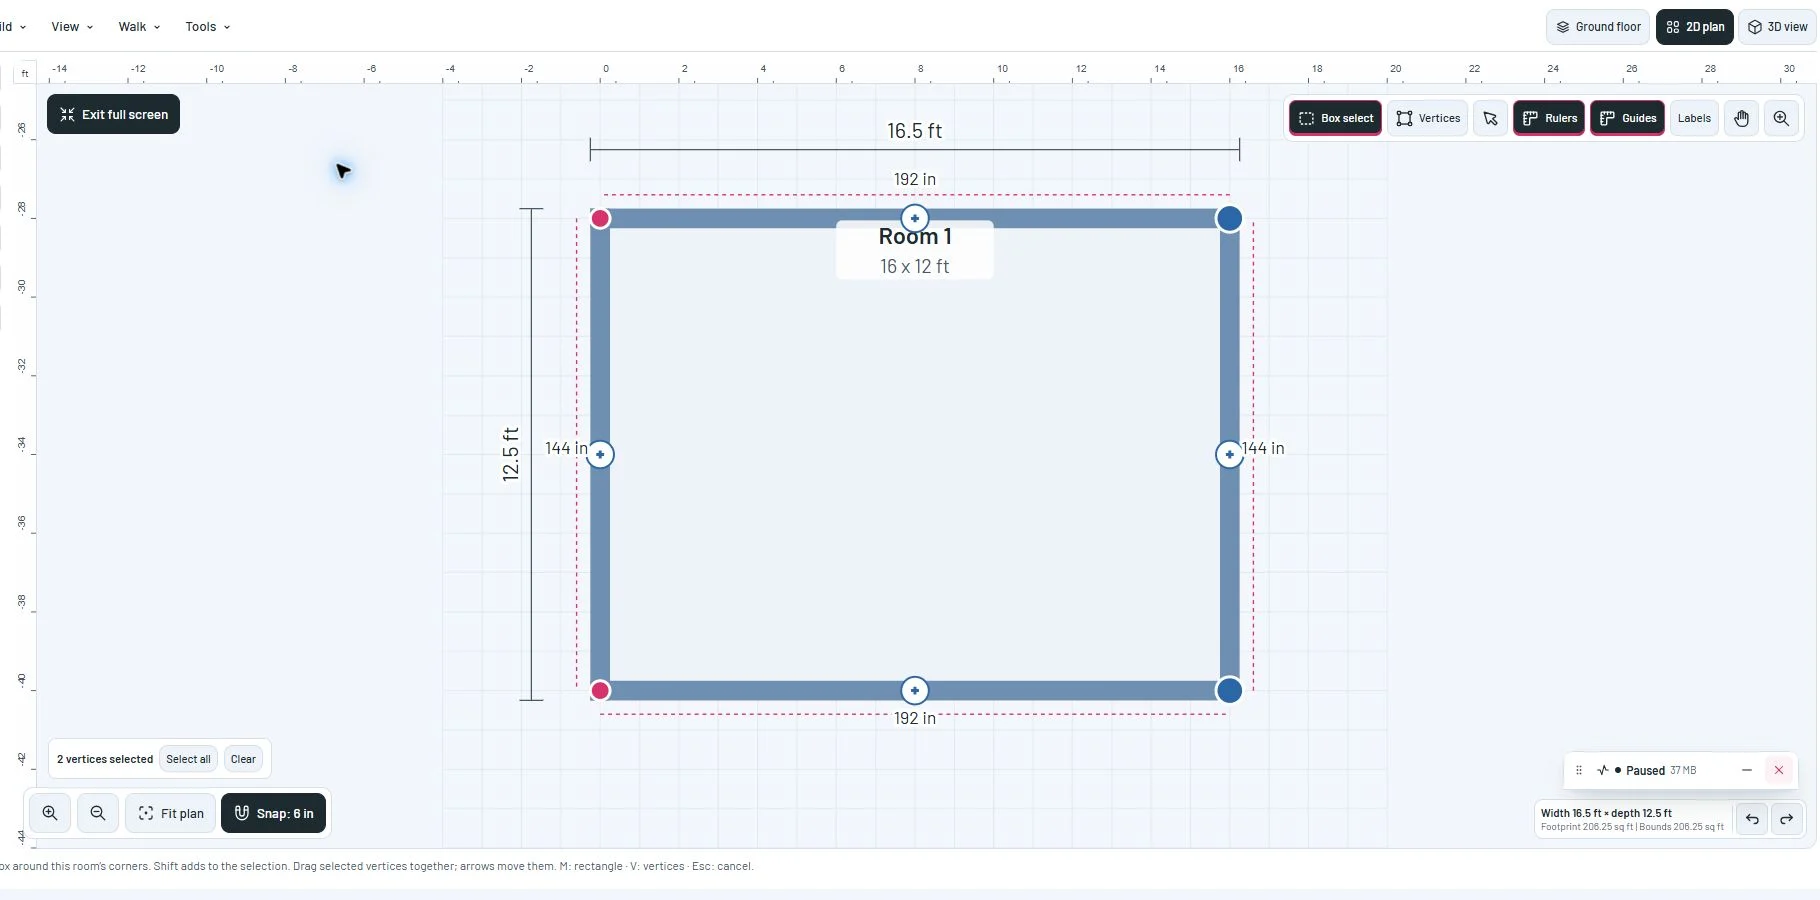
Use the rectangular selection tool in the 2D plan to select several corners of the active room. Add with Shift, then move the group by dragging a selected corner or using the arrow keys.

  • Choose Box select beside Vertices, or press M with the plan focused.
  • Draw over furniture and openings to select corners without moving those objects.
2D room plan with Box select active, the two right corners highlighted and a counter showing two vertices selected.View larger
Box select groups the two right corners so they can move together, with Select all and Clear beside the counter.Development screenshot ·
Read the update
v0.1.0-alpha.22Planner

A resource monitor that opens where you put it

The resource monitor keeps its anchor when switching between bar, bubble and expanded panel. Four metric cards make it easier to scan, with graphics actions always visible below.

  • Expand the bar beside Undo without sending the panel back to a corner.
  • Collapse to the same bar or bubble position after reading the details.
Expanded resource monitor in the room planner with four metric cards and a fixed footer for graphics actions, anchored near the history controls.View larger
The expanded monitor grows from its chosen anchor and keeps graphics actions visible below the scrolling details.Development screenshot ·
Read the update
v0.1.0-alpha.21Planner

Camera movement above, view modes down the side

Orbit, pan, zoom and object editing now share a horizontal row beside the axes. Building visibility modes form a separate vertical column below the axes.

  • Find movement controls together at the top of the 3D view.
  • Choose roof and wall visibility from the column on the right.
Room planner with orbit, pan, zoom and edit controls in a horizontal row beside the axes, and building visibility modes in a vertical column underneath.View larger
Movement stays in the top row; roof and wall visibility stays in the right-hand column.Development screenshot ·
Read the update
v0.1.0-alpha.20Planner

From your floor plan to a shopping list, with every quantity explained

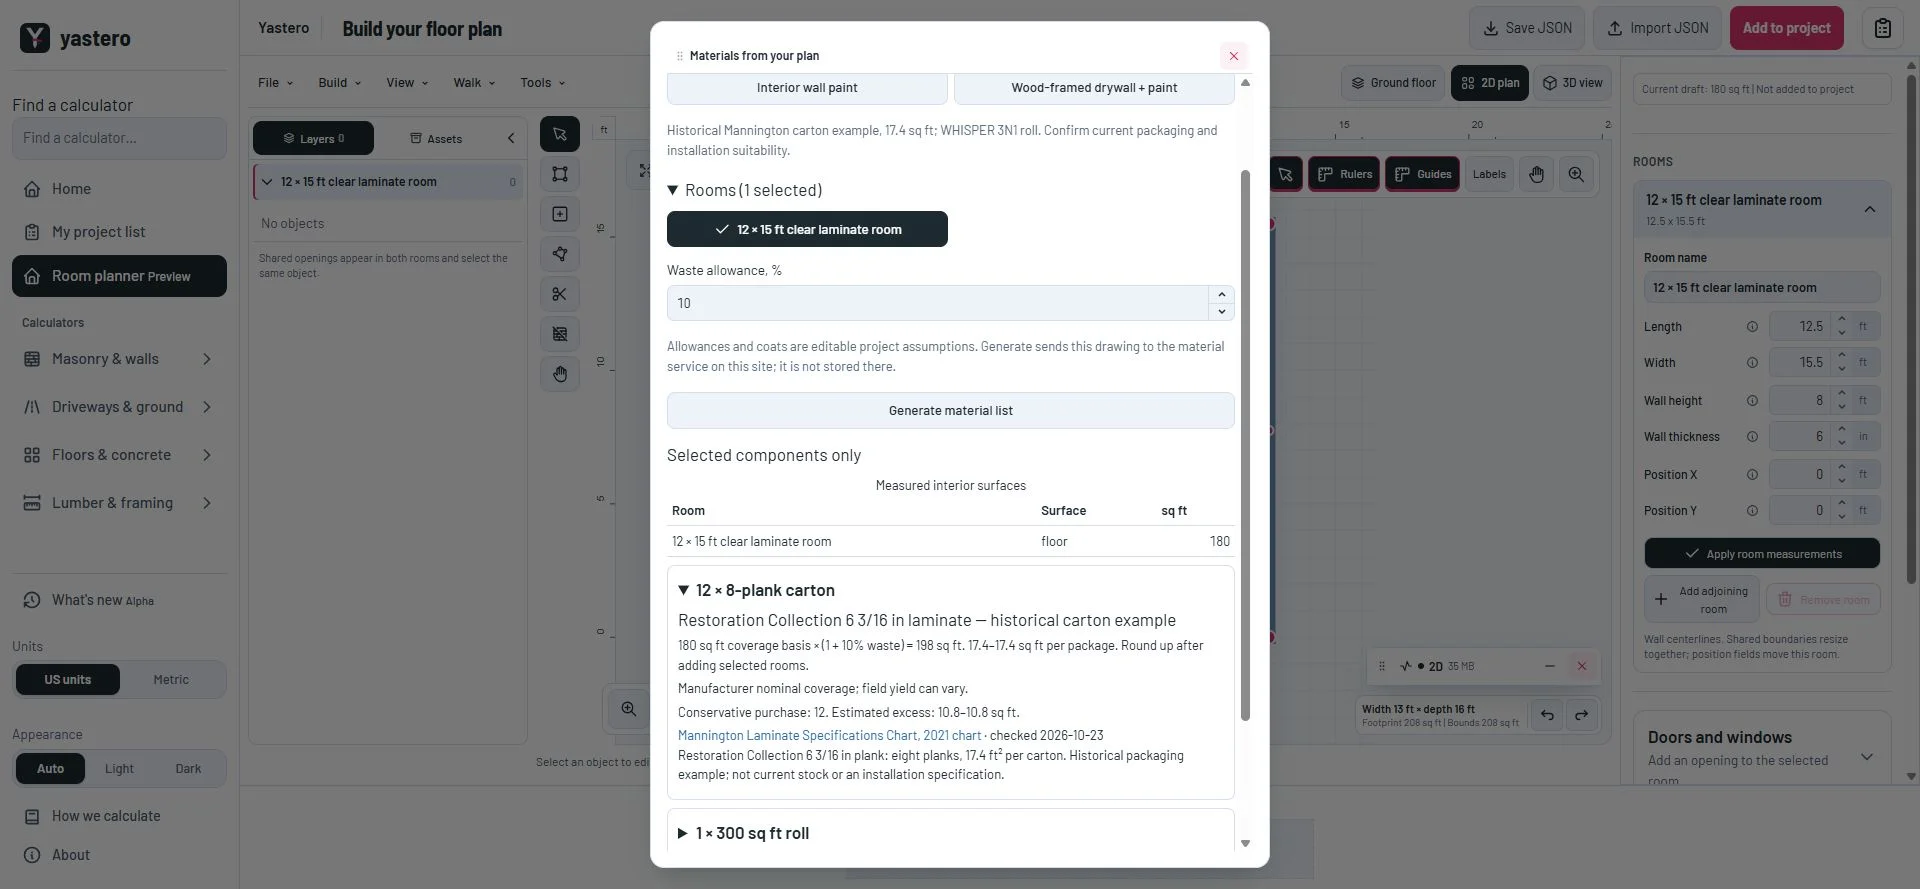
Choose rooms and a material system, then turn their measured surfaces into packages to buy. See the area, allowance, product coverage, rounding and sources behind each quantity.

  • Build → Materials from plan connects your drawing to My list.
  • Expand an item to see how its quantity was calculated, then export the list with its sources and plan.
Materials from plan panel showing a measured room and an expanded laminate carton quantity with area, waste, coverage, rounding and source.View larger
Expand a material to follow the measured area through the allowance and package coverage to the quantity to buy.Development screenshot ·
Read the update
v0.1.0-alpha.19Calculators

Six calculator guides that show how the numbers work

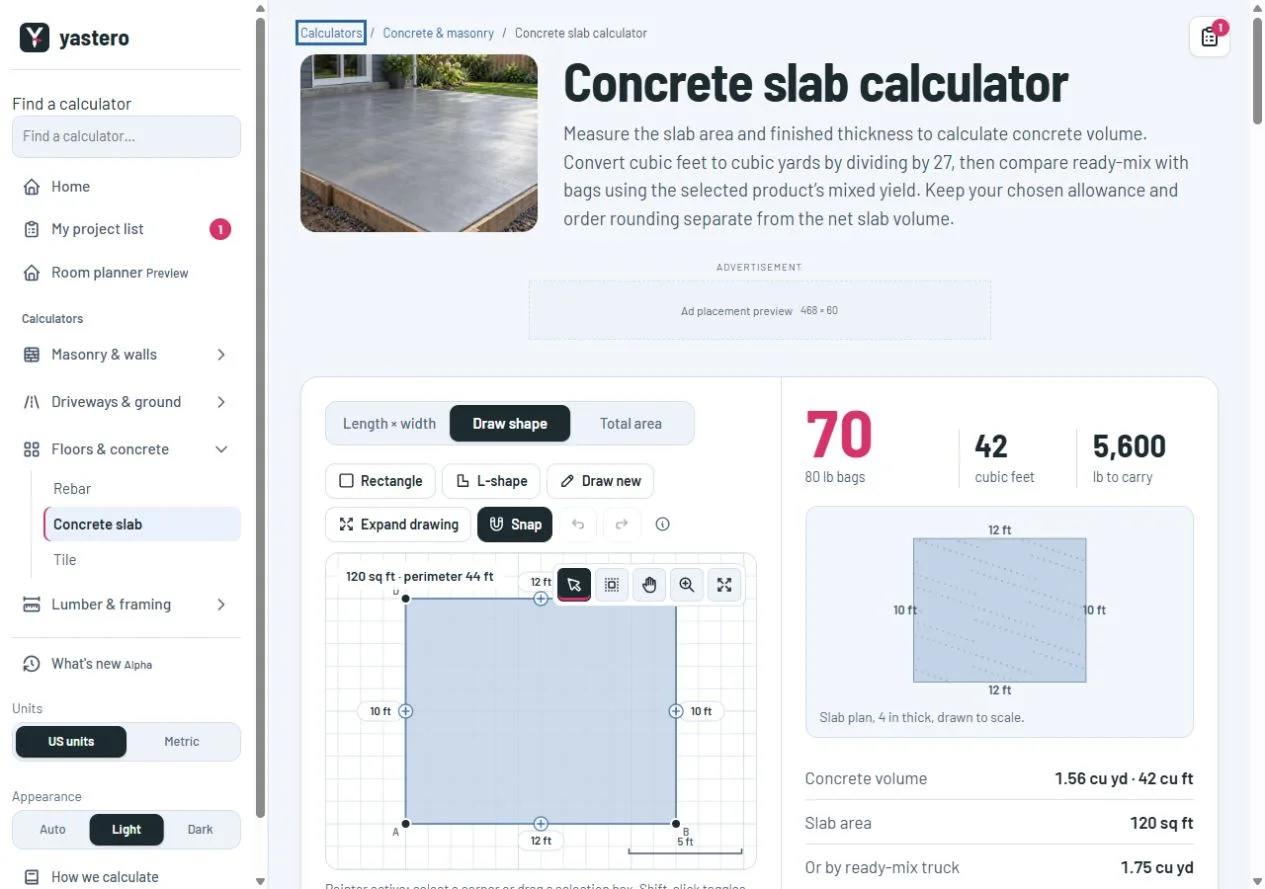
Asphalt, concrete slab, tile, retaining wall, board foot and sand now have complete guides with measurement steps, worked examples, reference tables, diagrams and sources.

  • Understand what to measure, how the formula works and what to check before buying.
  • Worked examples and tables use the same calculations as the tools.
Concrete slab calculator showing an editable slab drawing, concrete volume, bags and a ready-mix quantity.View larger
The concrete slab guide connects the measurements and drawing to concrete volume and purchase quantities.Development screenshot ·
Read the update
v0.1.0-alpha.18Planner

Finished roof edges and cleaner gutter and downspout routes

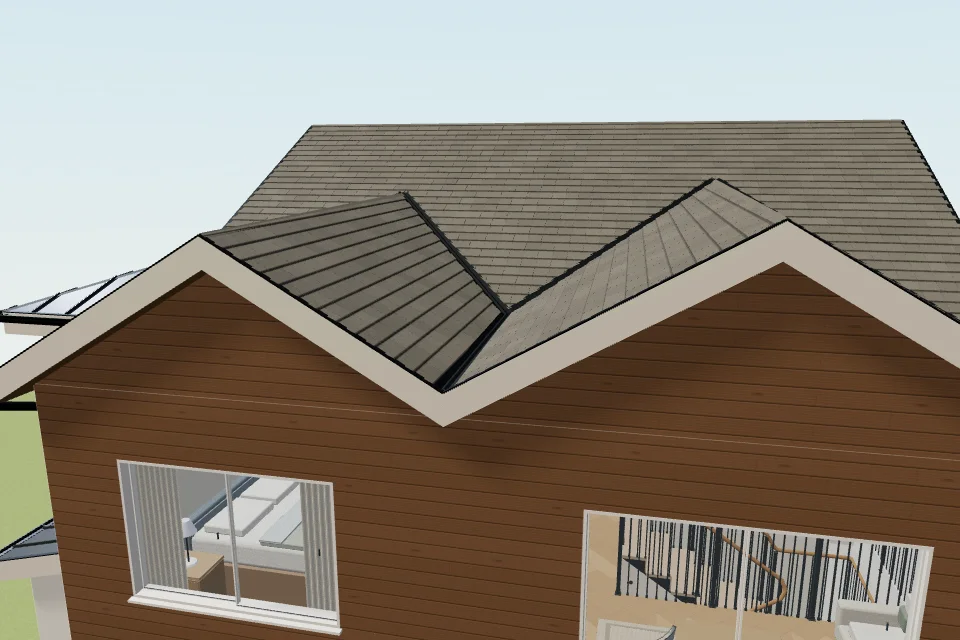
Roof edges, valleys, gutters and downspouts have been checked across all five example houses. The Maqui valley now has an editable fall and a continuous route to its outlet.

  • See closed eaves, aligned gutters and downspouts placed at real building corners.
  • Review the roof junctions across Single story, Maqui, Maqui spiral, L-shape and Curved.
Maqui roof with two front gables, closed fascia and a continuous central valley following the roof slopes.View larger
The Maqui valley meets the two roof slopes with closed edges and a continuous visual drainage route.Development screenshot ·
Read the update
v0.1.0-alpha.17Planner

Draw open walls and preview assets in 3D

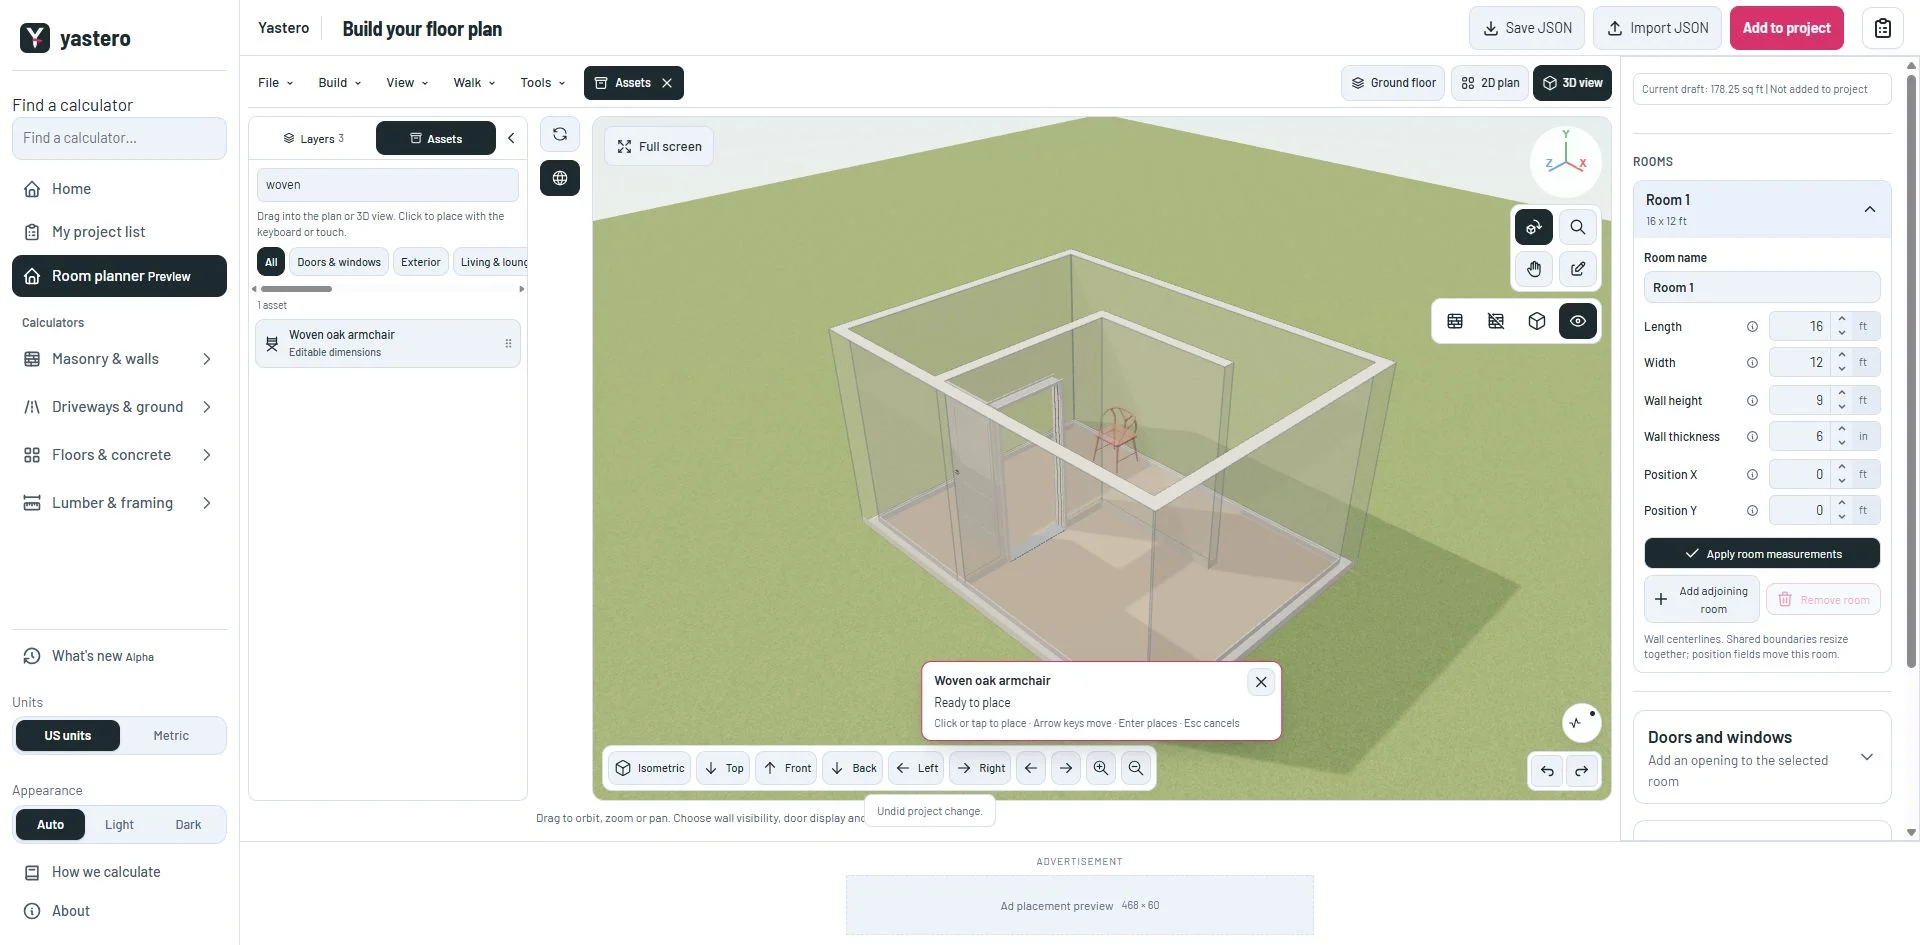
Draw independent wall segments without closing a room. Place doors, windows and furniture with a translucent 3D preview, and keep your plan framing when switching views.

  • Build → Draw wall: click endpoints, continue segments and press Escape to finish.
  • Choose an asset in 3D, position its ghost, then click or press Enter to place it.
Independent L-shaped partition and door in the 3D room planner, with a translucent chair preview ready to place.View larger
Open wall segments remain part of the editable house. A translucent asset preview shows the placement before it is saved.Development screenshot ·
Read the update
v0.1.0-alpha.16Planner

A gas enclosure with the connection details in place

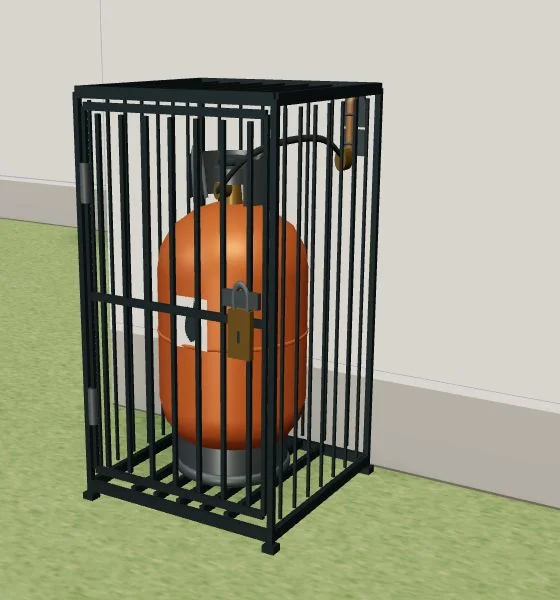
The propane cylinder now sits inside an open steel cage with a hinged front, latch and padlock. Its regulator and flexible hose meet a pipe supported by the nearby wall.

  • See the cage, padlock, regulator and hose as one editable asset.
  • Keep the wall connection attached to actual wall geometry.
Propane cylinder inside a ventilated steel cage with a padlocked front door, regulator, flexible hose and pipe fixed to the exterior wall.View larger
The cylinder, regulator and hose remain visible through the cage, with a padlock on the front and a supported pipe at the wall.Development screenshot ·
Read the update
v0.1.0-alpha.15Planner

Continuous roofs, cleaner edges and a steadier sidebar

The utility roof follows the upper walls with a continuous outer gutter. Roof and floor edges close cleanly, while Layers and Assets share a wider panel.

  • Join an older split lower roof without replacing your house.
  • Switch between Layers and Assets without changing the open panel width.
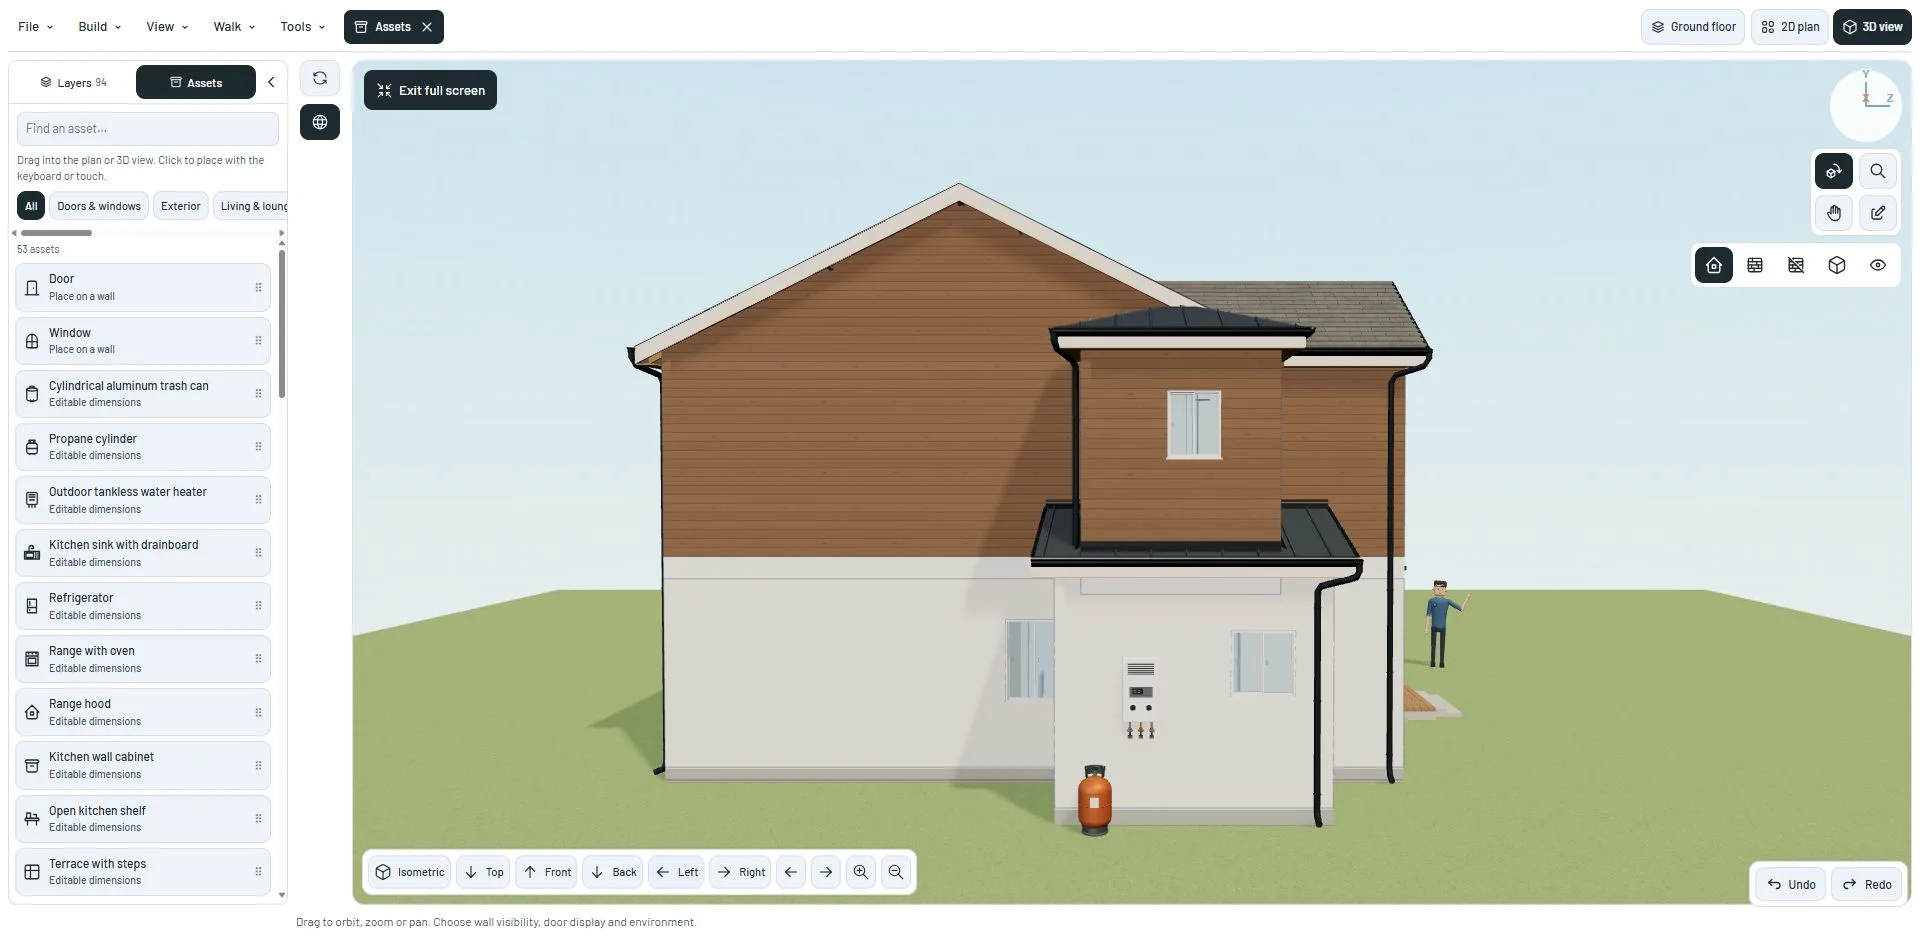
Side view of the Maqui house with one connected lower eave around the upper bathroom and a single outer gutter.View larger
The lower cover continues around the upper wall, with one gutter along its outside edge.Development screenshot ·
Read the update
v0.1.0-alpha.14Planner

Less rendering work, the same house detail

The planner shares repeated resources and batches compatible surfaces and furniture parts, keeping the house geometry and visual detail.

  • Keep the same polygons, finishes and shadows with fewer drawing calls.
  • Move, rotate or mirror indoor furniture without rebuilding the house.
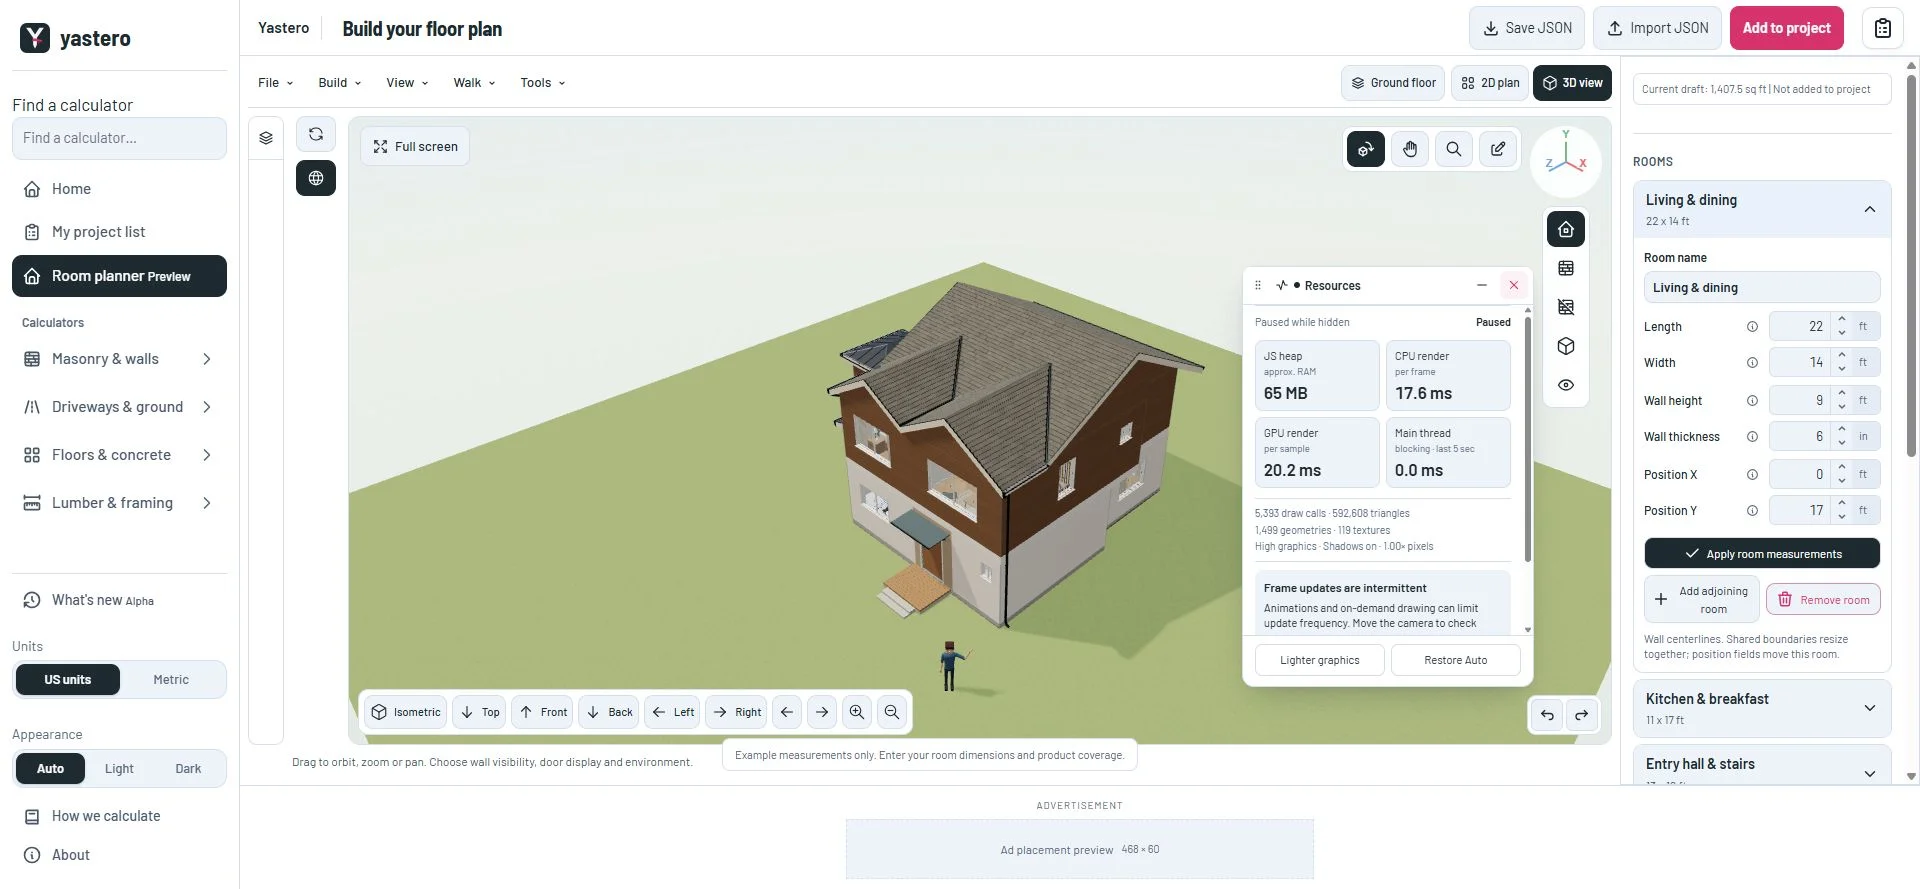
Yastero model house with the resource monitor showing scene rendering counts after optimization.View larger
The model retains its architectural detail while the resource monitor reports the work used to draw it.Development screenshot ·
Read the update
v0.1.0-alpha.13Planner

Softer floors make the plan easier to read

Floor finishes use quieter colors and finer texture contrast in the 2D plan, helping furniture, walls and door swings stand out.

  • Keep the parquet pattern without the strong brown background.
  • Read the layout more easily while keeping your chosen materials.
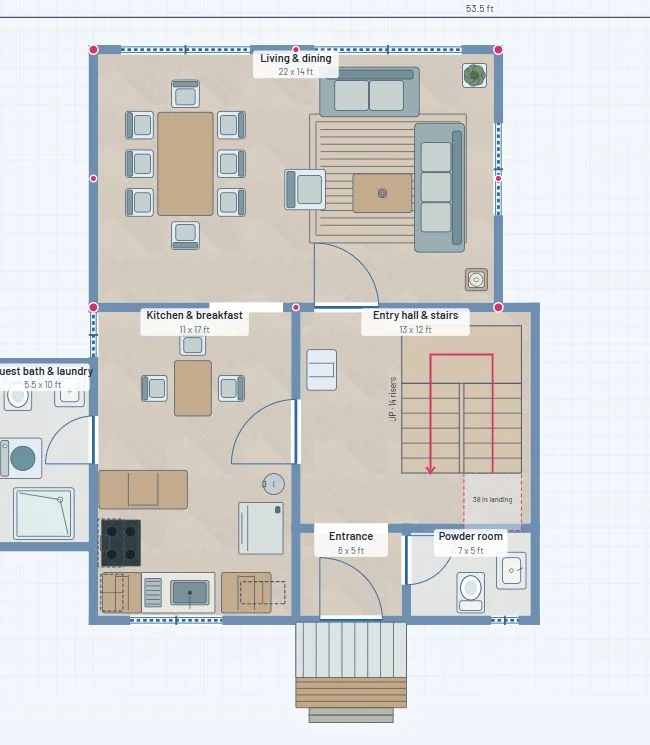
Maqui ground-floor plan with pale parquet behind clearly defined furniture, walls and door swings.View larger
Pale parquet keeps its herringbone direction while the room layout stays easy to read.Development screenshot ·
Read the update
v0.1.0-alpha.12Planner

A bathroom door that leaves the entrance clear

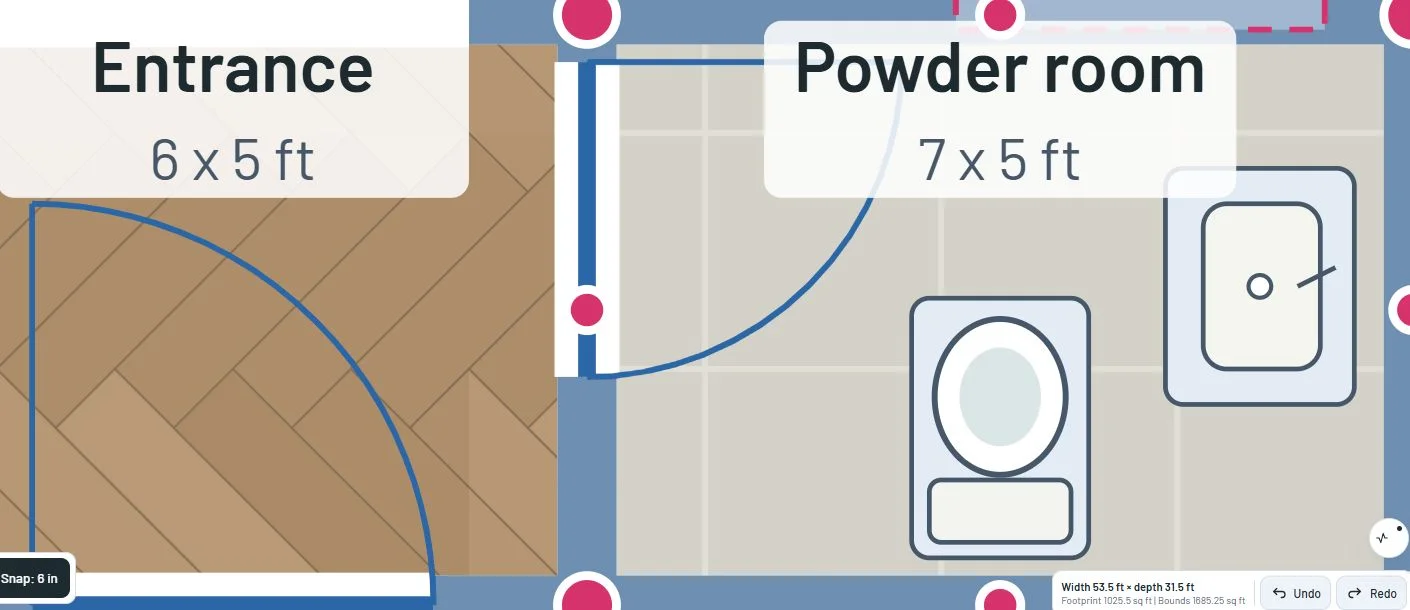
The Maqui powder-room door opens into the bathroom, with a practical door size and space kept clear around the toilet.

  • The bathroom and front-door swing paths stay separate.
  • Update an older demo bathroom without replacing the house you have edited.
Entrance and powder-room plan with the bathroom door opening inward and separate from the front-door swing.View larger
The bathroom door opens into its own room, leaving the entrance clear and the fixtures outside its swing.Development screenshot ·
Read the update
v0.1.0-alpha.11Website

More room to draw. A clearer record of what changes.

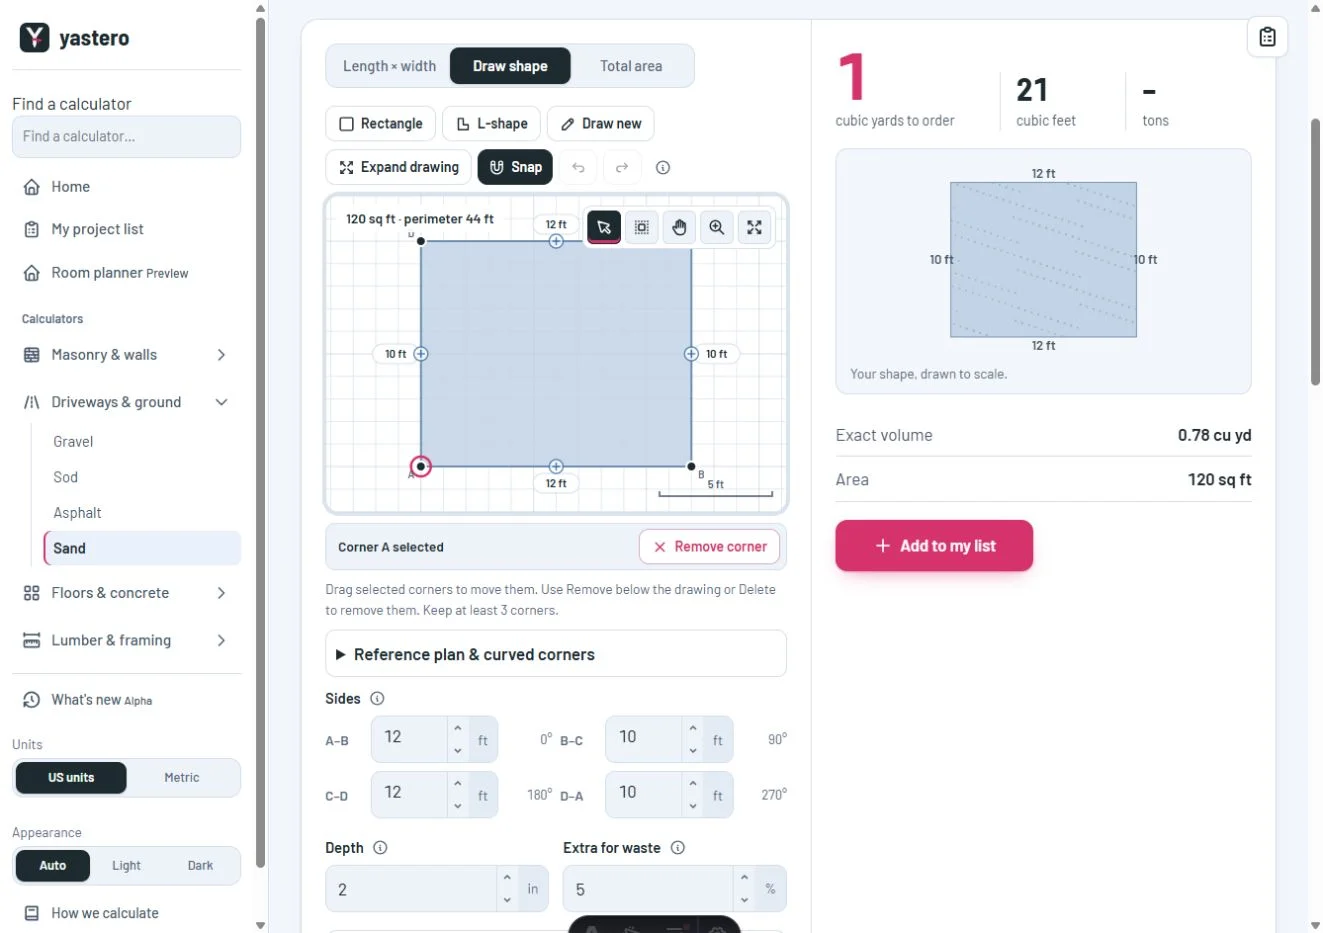
Corner controls stay out of your drawing, and Yastero now has an illustrated history you can browse.

  • Remove a selected corner from a separate bar below the canvas.
  • Browse screenshots and practical notes for each alpha milestone.
Sand calculator with Corner A selected and the Remove corner button below the drawing.View larger
The selected corner stays available for dragging. Removal has its own space below the canvas.Development screenshot ·
Read the update
v0.1.0-alpha.10Planner

Floors with depth, roofs with framing

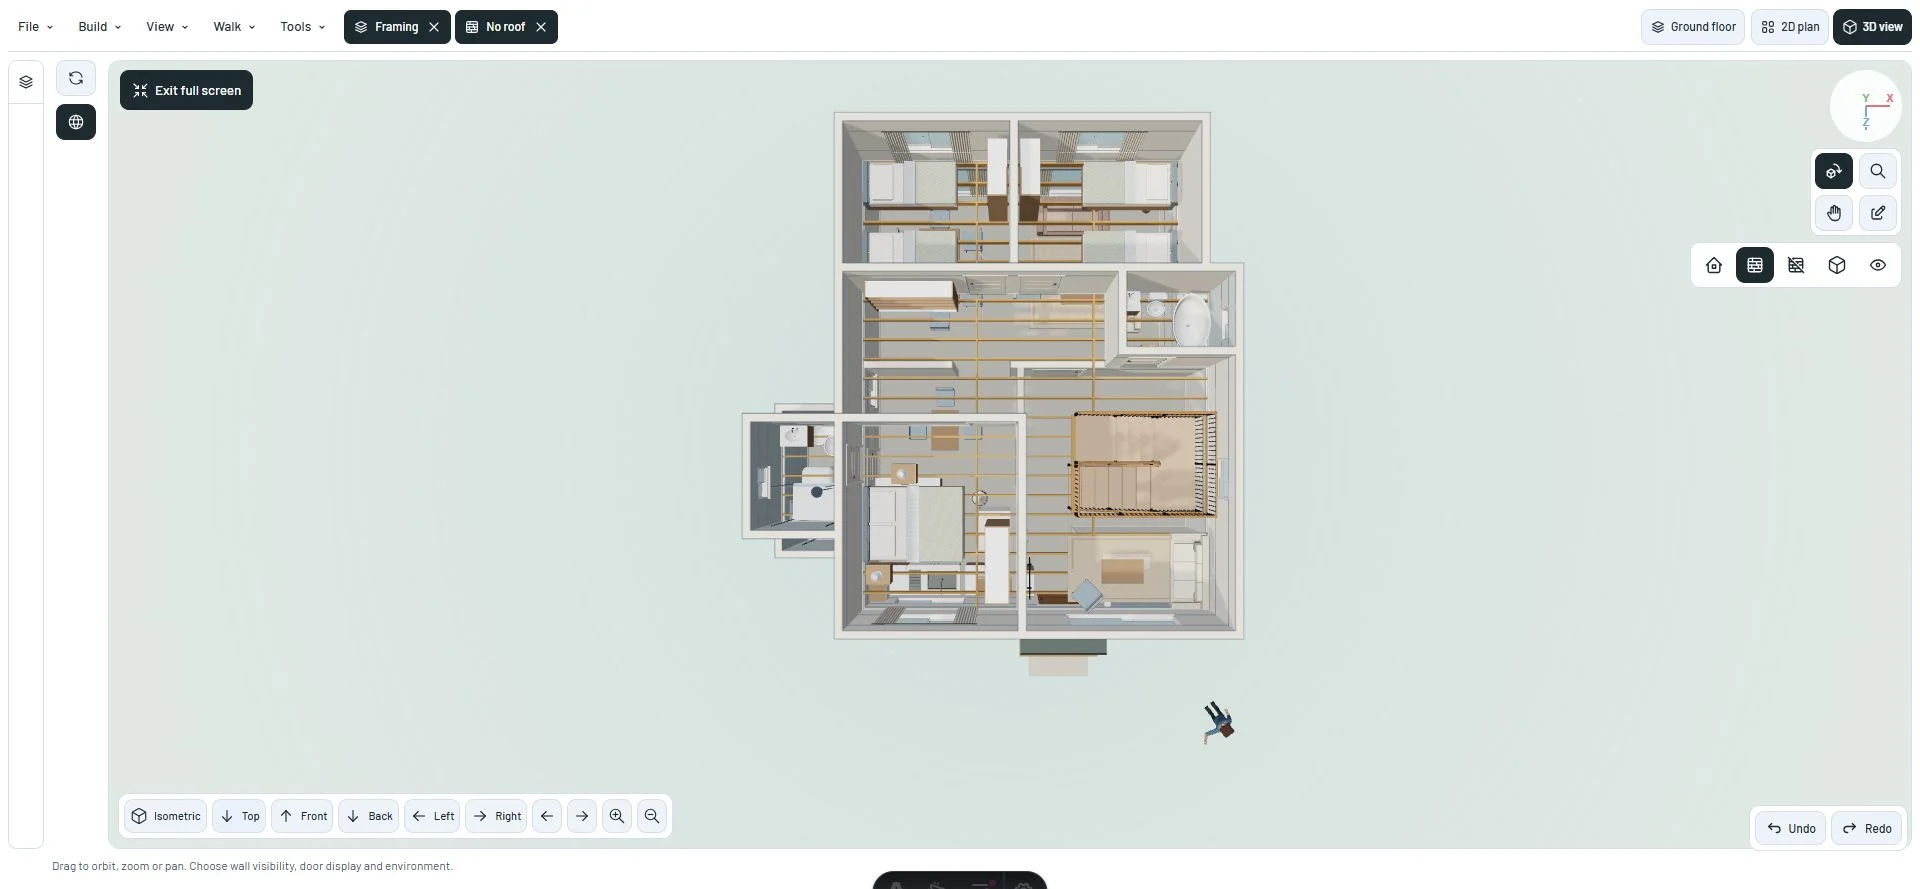
The house has layered floors, a solid slab and roof framing, with a loading screen that follows the editor as it starts.

  • Inspect floor joists, roof rafters and the layers beneath a finished surface.
  • Keep stair openings clear through the full floor thickness.
Upper floor in framing view with parallel joists and a clear stair opening.View larger
Show framing reveals the floor structure and the opening through it.Development screenshot ·
Read the update
v0.1.0-alpha.9Planner

Stairs with room to arrive and turn

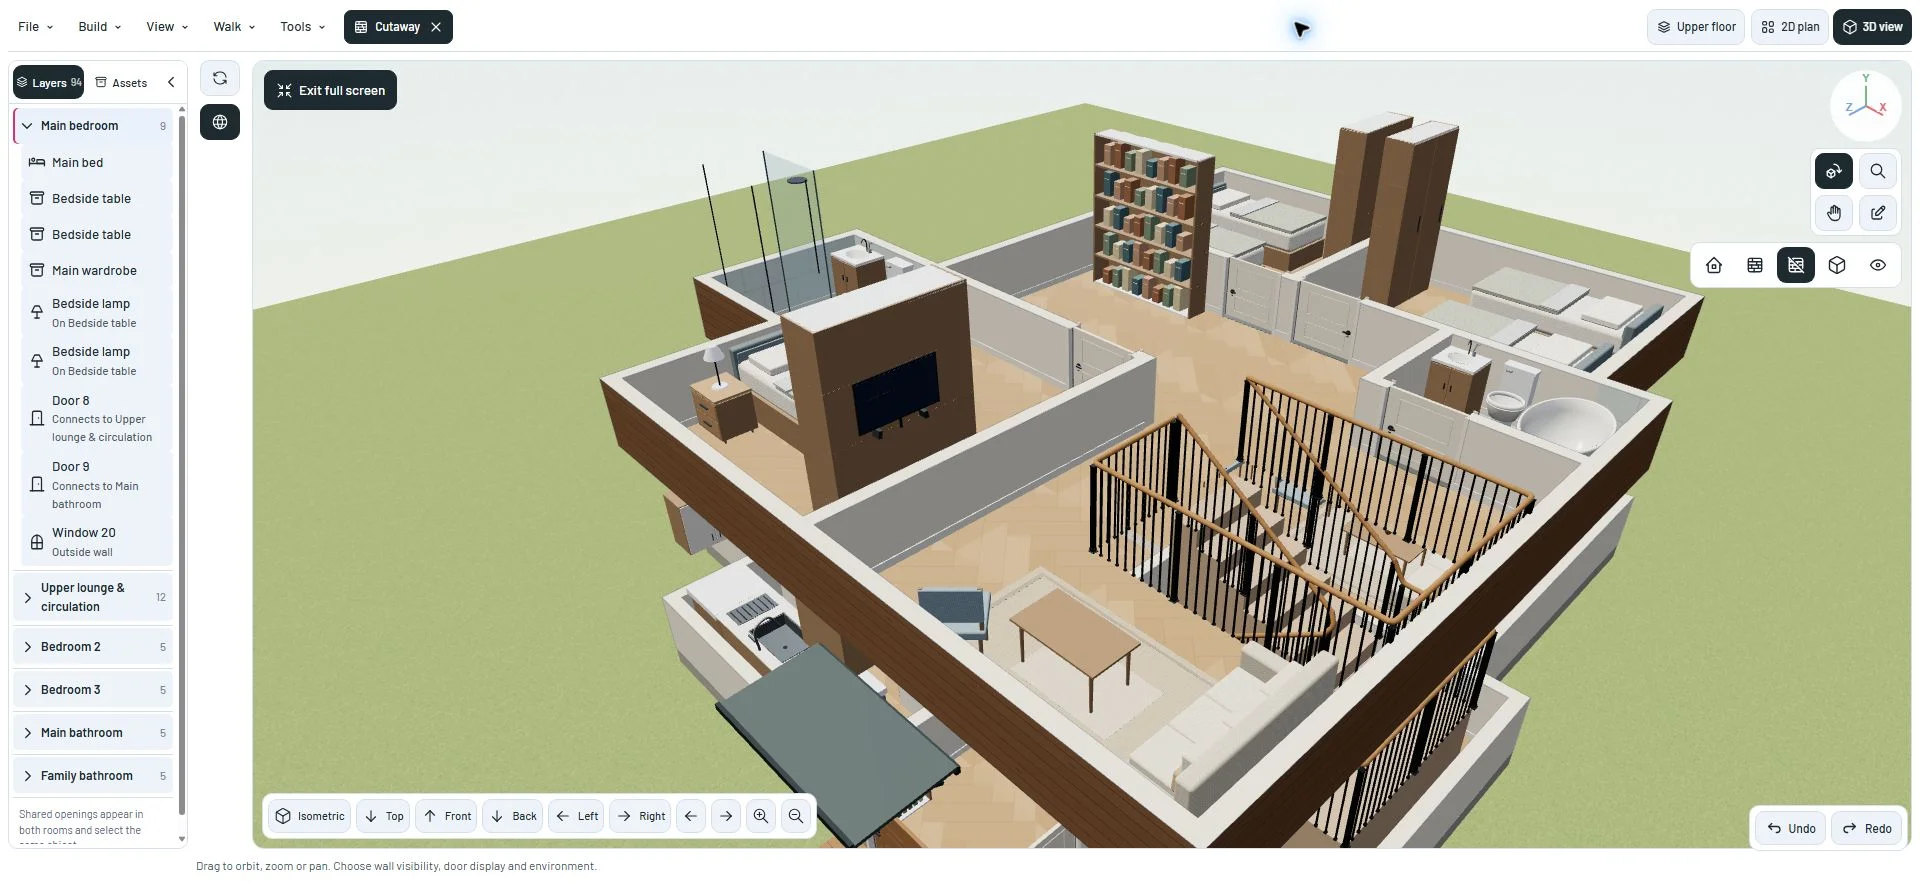
Reworked stairs and upper-floor circulation give the demo house a clearer route between levels, with a spiral alternative and more detailed railings.

  • Choose the return-stair demo or a separate spiral-stair layout.
  • Walk between floors with a continuous change in height.
Return stair with wood handrails, steel pickets and upper-floor circulation around the opening.View larger
The return-stair layout combines a clear arrival with detailed wood and steel railings.Development screenshot ·
Read the update
v0.1.0-alpha.8Planner

Tidier tool windows. A small view of performance.

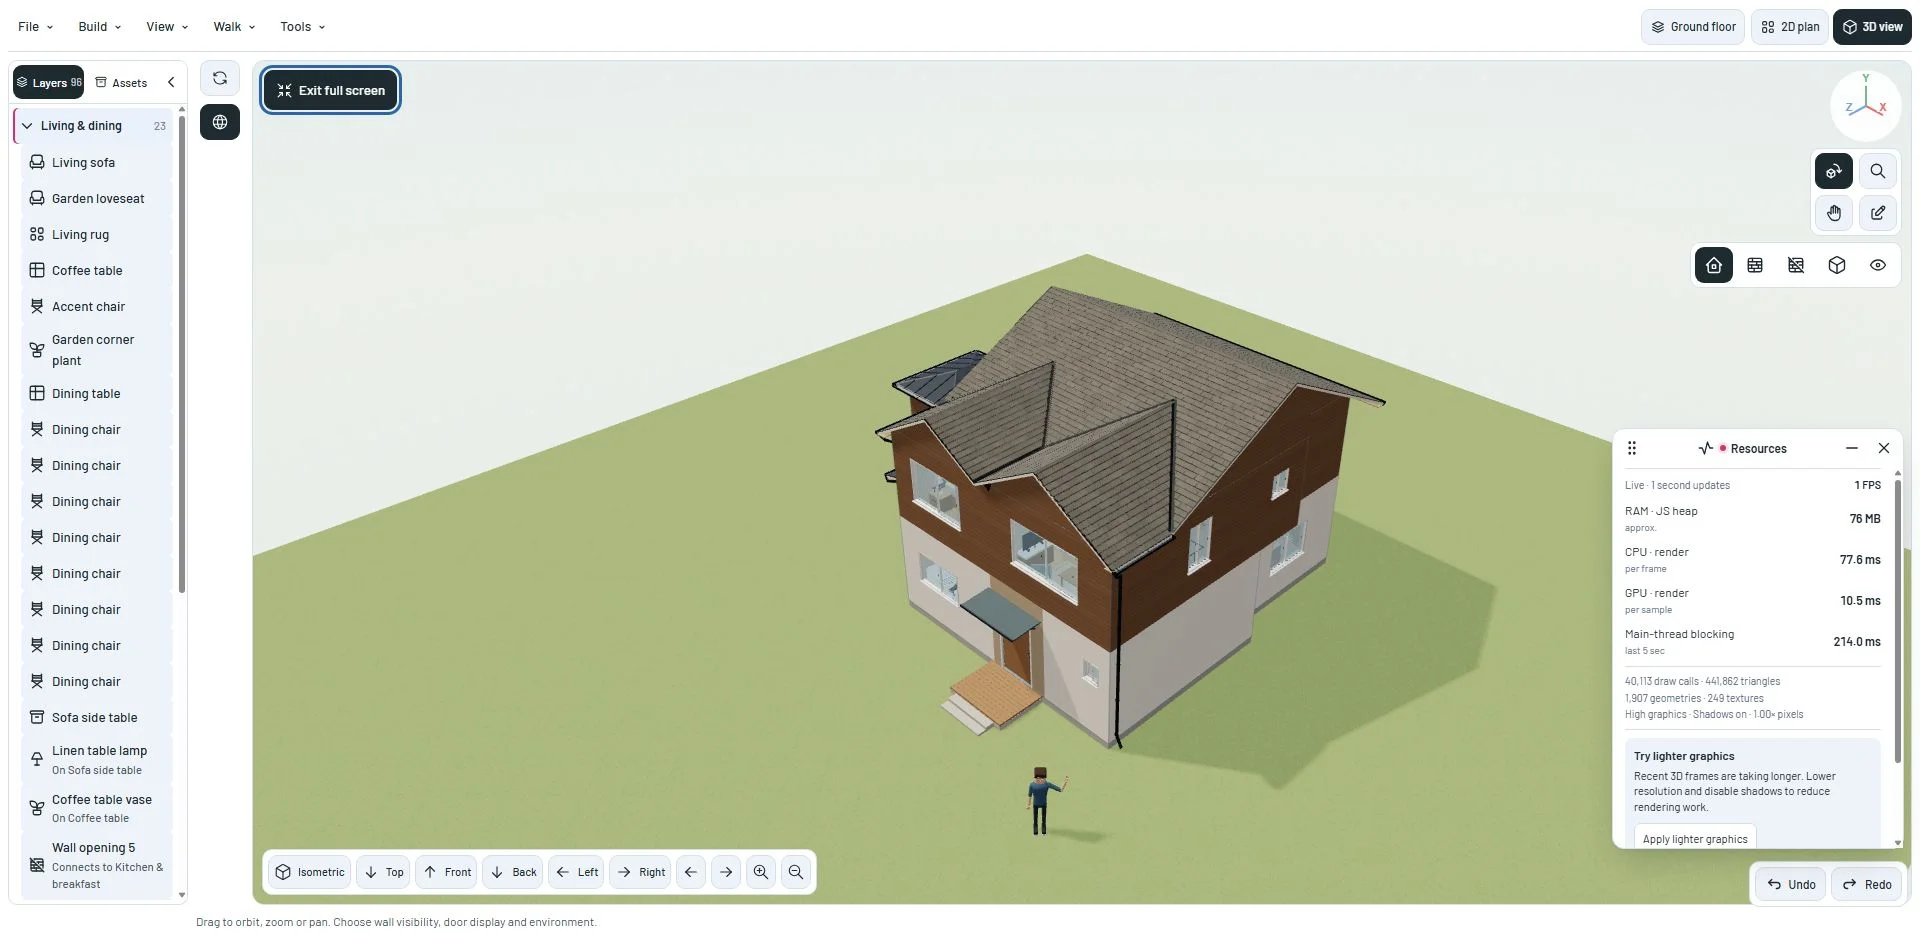
Floating tools share a compact title bar, and a resource monitor helps explain when a scene gets expensive to draw.

  • Drag, minimize, expand and close tools from a single title bar.
  • Keep performance information in a panel, a compact strip or a small bubble.
Floating resource monitor beside the house in the desktop planner.View larger
Rendering information stays close to the scene you are working on.Development screenshot ·
Read the update
v0.1.0-alpha.7Planner

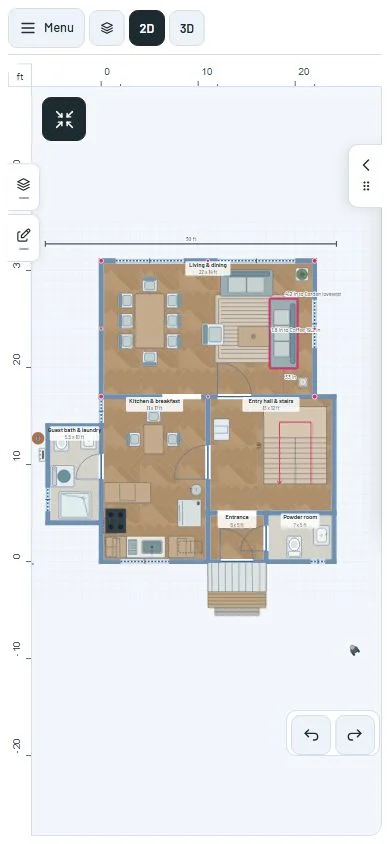
A workspace that fits your phone

Side tabs, a mobile menu and compact editing panels leave more of the house visible while you work.

  • Open layers and object controls from space-saving side tabs.
  • Switch between clearly labeled 2D and 3D views.
Mobile planner with compact side tabs beside the 2D house plan.View larger
The workspace keeps layers and editing tools behind compact side tabs.Development screenshot ·
Read the update
v0.1.0-alpha.6Planner

Furnish from the side panel

An Assets tab puts the catalog beside the plan, with better-proportioned furniture and more everyday household details.

  • Drag catalog items into the house from the side panel.
  • Reuse an edited window configuration instead of resizing every window by hand.
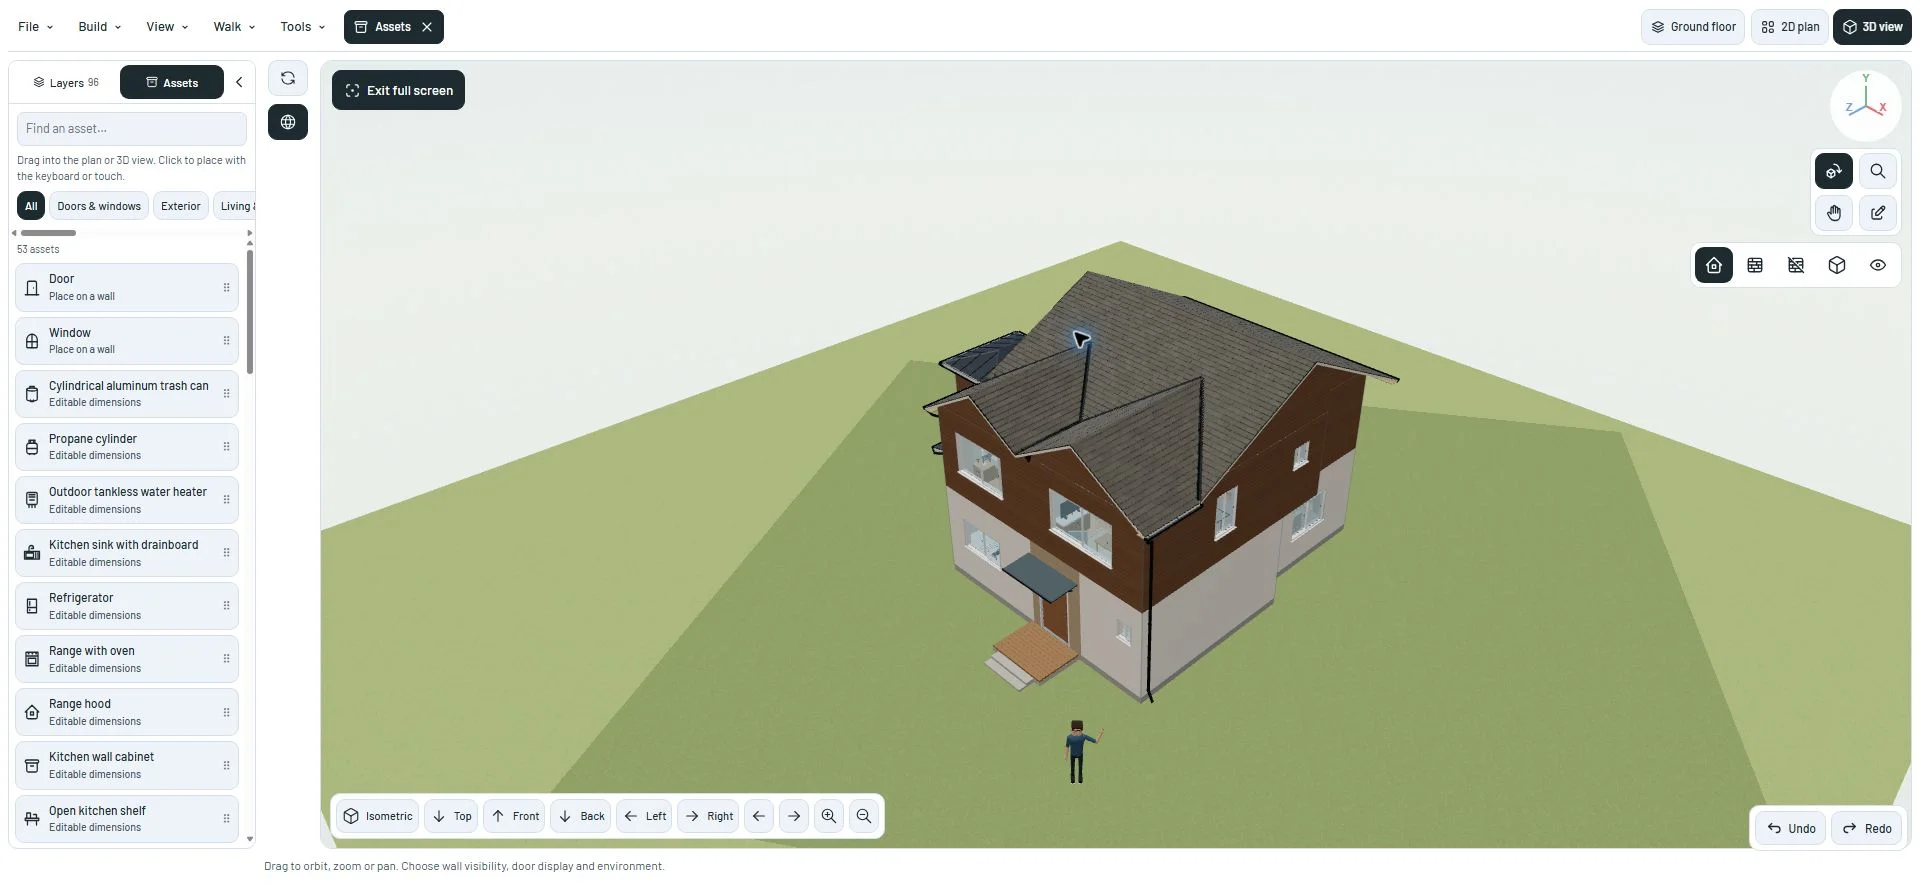
Planner Assets tab with a searchable catalog beside the house.View larger
Keep the catalog open beside the model while adding objects.Development screenshot ·
Read the update
v0.1.0-alpha.5Planner

Roofs with materials, edges and drainage

Roof sections have deliberate shapes and separate finishes, with visible covering details, gutters and downspouts.

  • Assign covering and trim materials to individual roof sections.
  • See seams, tiles, roof edges and drainage components in 3D.
Close view of roof covering with raised surface detail and defined edge trim.View larger
Covering and edge components have separate surfaces and visible detail.Development screenshot ·
Read the update
v0.1.0-alpha.4Planner

Start with a furnished house

The two-story Maqui demo joins the original single-story house, with furnished rooms and a guided introduction to the tools.

  • Choose a house preset rather than starting with an empty room.
  • Use a guided tour to discover the plan, materials and object catalog.
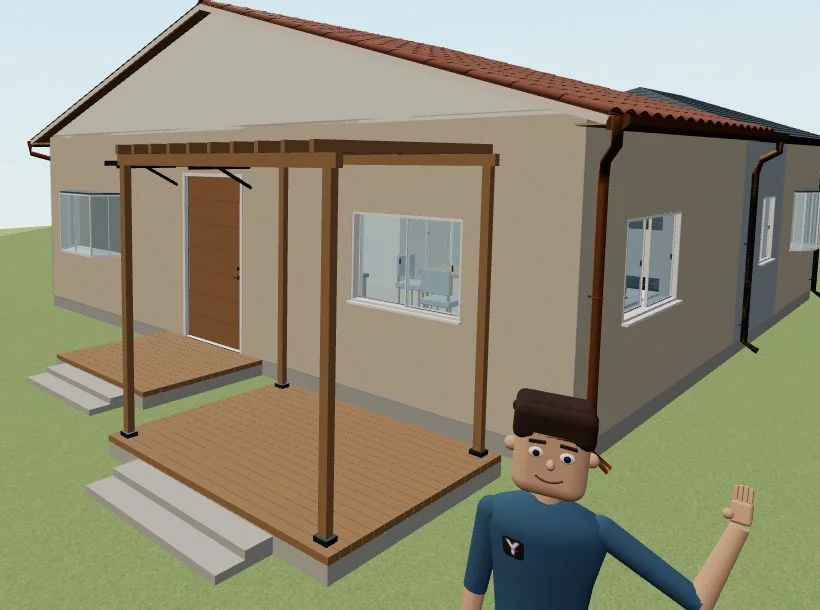
Exterior facade of the two-story Maqui demonstration house.View larger
An early view of the furnished two-story Maqui demo.Development screenshot ·
Read the update
v0.1.0-alpha.3Planner

Step inside the plan

The planner grows from a drawing into a house you can inspect, furnish and walk through.

  • Switch from a measured plan to a 3D house and a first-person view.
  • Explore surface finishes, exterior components and house levels.
Early 3D welcome house with roof and compact music player.View larger
The early house preview brought the model and floating tools together.Development screenshot ·
Read the update
v0.1.0-alpha.2Planner

A project you can come back to

Saved calculations can be reopened, and connected rooms bring walls, openings, furniture and quantities into one editable plan.

  • Reopen a saved calculation with its original inputs.
  • Draw connected rooms, edit openings and place furniture.
Early connected floor plan with room measurements, rulers and material controls.View larger
An archived development view of the connected plan and its measurements.Development screenshot ·
Read the update
v0.1.0-alpha.1Calculators

From a material calculation to a project list

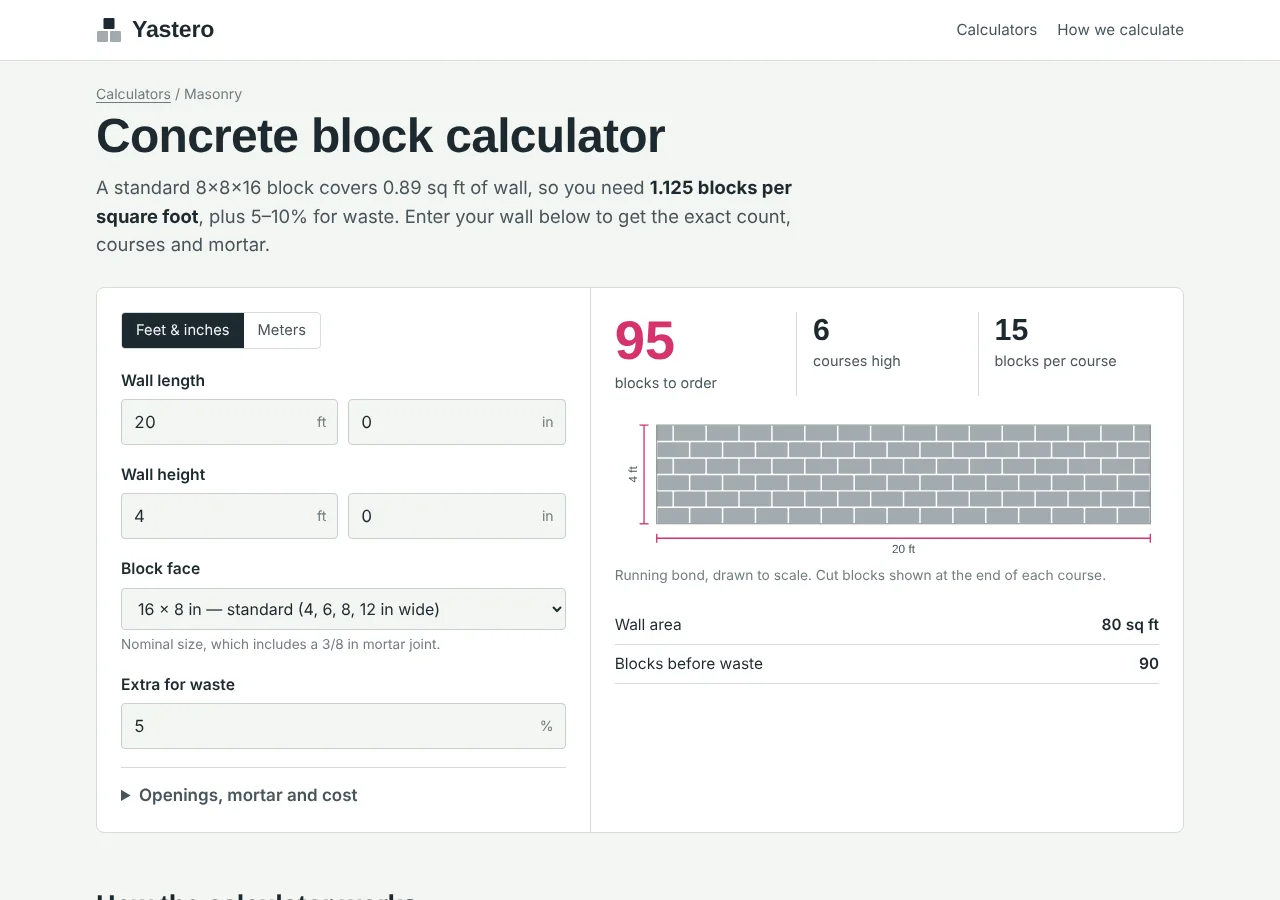
The first working site brings material calculators, scale drawings and a saved project list into one place.

  • Estimate home and yard materials in the units you buy.
  • Draw irregular areas, import supported DXF outlines and save results.
Original Yastero concrete block calculator prototype with inputs and a wall drawn to scale.View larger
Original prototype preserved in the project archive. Its appearance predates the current interface.Development screenshot ·
Read the update

How to read this history

The dates refer to documented development work. Version numbers were assigned when this history was assembled on October 22, 2026. Several milestones share a date. Screenshots preserve the interface at that point, so older images may differ from today's tools.

Why alpha? The core tools work, but building geometry, touch interactions and project workflows are still being refined. Beta will mean those core workflows have passed broader end-to-end review. We have not announced a beta date.

Planning a purchase? See how we calculate and check the assumptions for your own project.
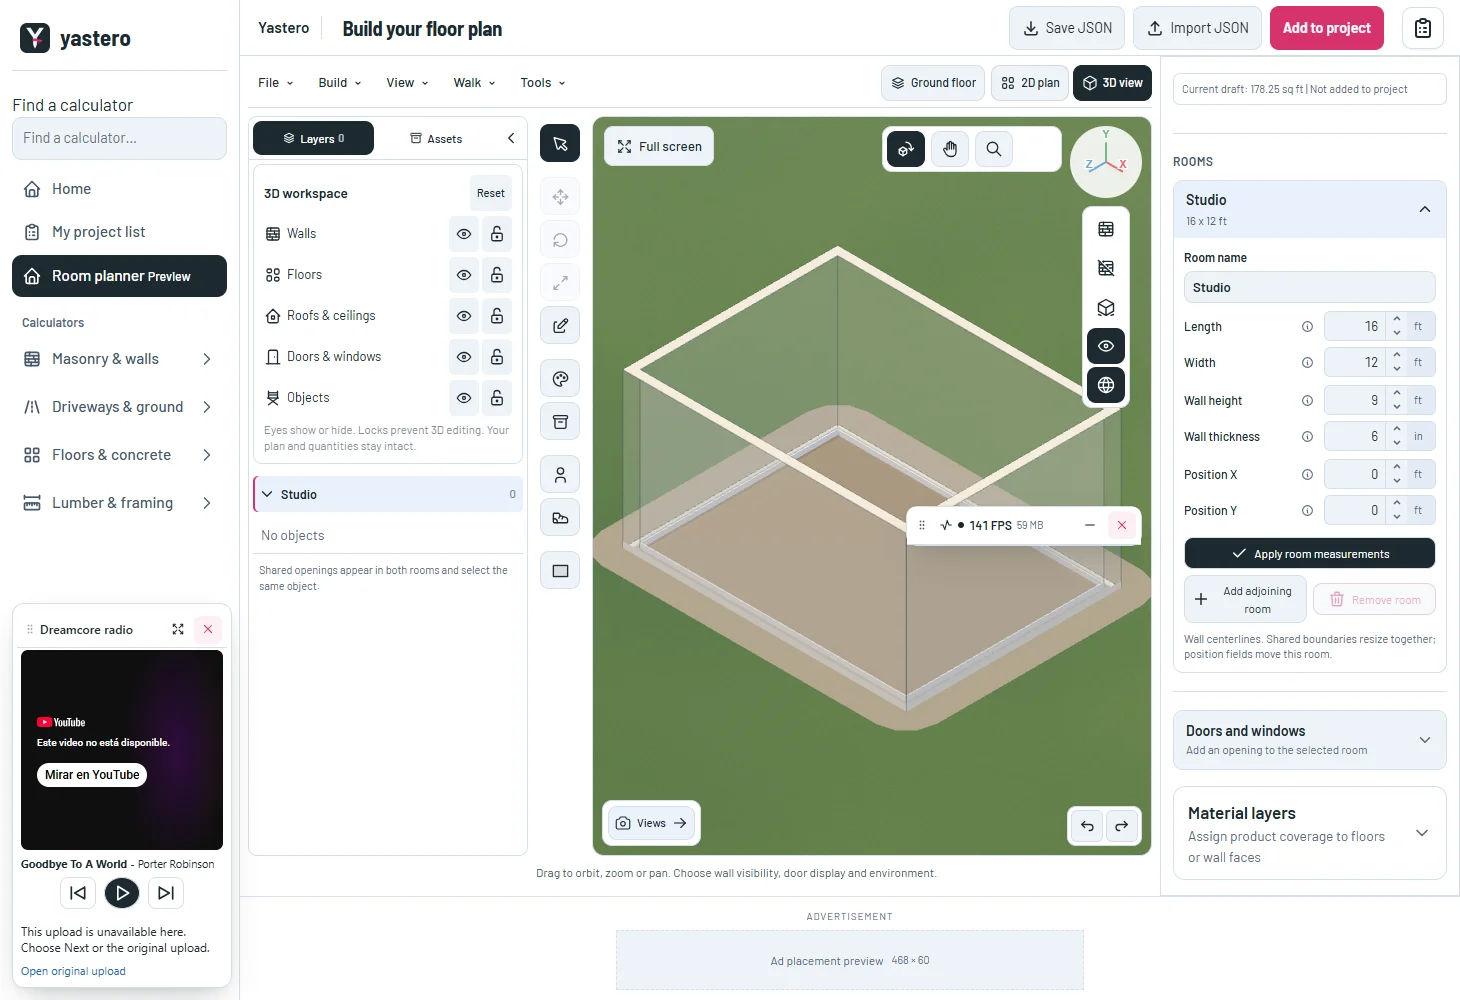
Development screenshot